LinkPoint360 is dedicated to enhancing its products with a constant eye to user experience and productivity. The Spring ’17 release is focused on creating dynamic inroads to CRM record creation and access directly within the email client.
Note that while the release documentation demonstrates the upgrades as they appear within Microsoft Outlook, the functionality of the available features remains the same for IBM Notes, with the exception of Action Labels or menu placement. The LinkPoint360 Knowledge Base will be updated with screen captures and descriptions specific to the IBM Notes integration at a later date.

The Spring ’17 release of LinkPoint Connect will be deployed in Q2/2017. Please watch this page for updates.
Spring ’17 Release Summary
Features
Smart Forms
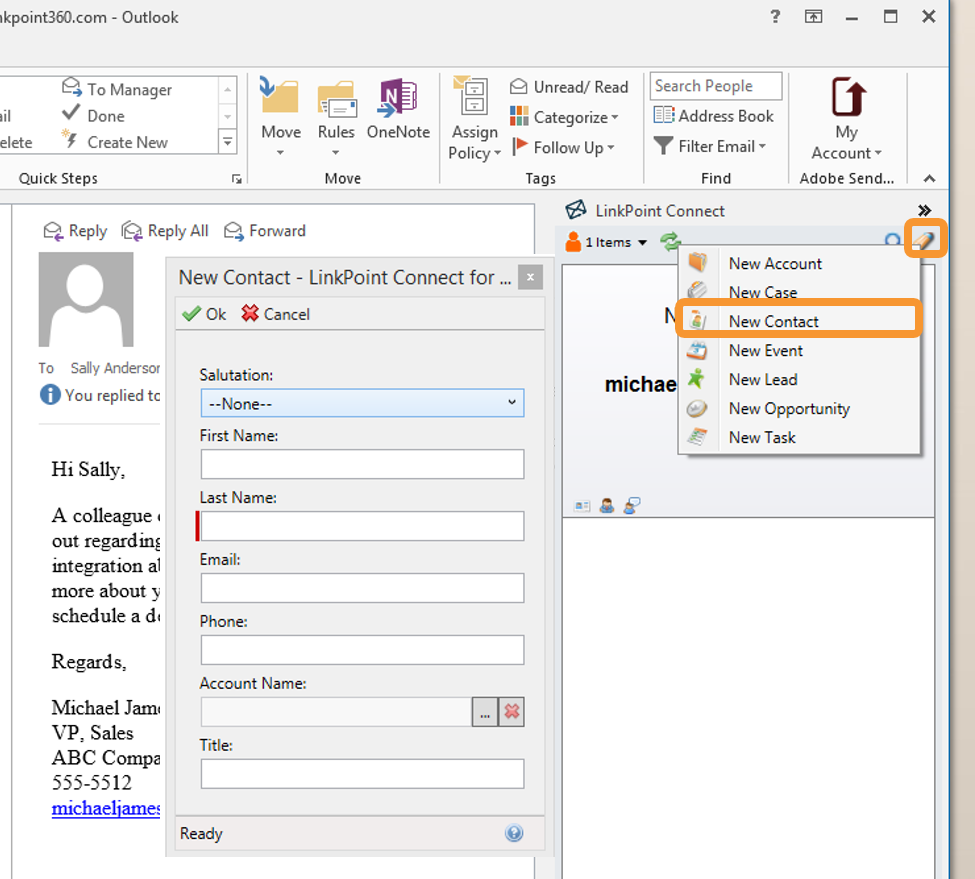
Smart Forms allow users to create and update Salesforce records with a customizable interface within their email application. The feature includes a set of starter forms that integrate with 8 standard Salesforce.
Users can click the Smart Forms icon within the Side Panel, Record Window or Regarding Window to create or edit Accounts, Contacts, Leads, Opportunities, Cases, Events, and Tasks by default. A Smart Form will display in a modal window for the user to review available fields, enter data directly into required fields, and click OK to write the data instantly to the Salesforce record. Users can also select the Smart Form icon to review existing data and make changes on the fly.
Smart Forms supports custom record types and fields with implementation support from the LinkPoint360 Professional Services Team. Users can enable or disable specific record types for Smart Forms from the LinkPoint Assist configuration window. Smart Forms is enabled by default with the Spring ’17 release.
Availability: This feature is available for LinkPoint Connect for Salesforce: Desktop Edition and Desktop Plus Edition integrations.

Email Recorded Indicator for Salesforce

The Email Recorded Indicator is a small icon added to the Subject Line of emails that are recorded to the Activity History section of an object in Salesforce. The indicator is designed to visually specify whether the email was an outbound email (one that an internal user sent out to a prospect or customer) or whether the email was an inbound email (one that the user received). The ⬇✉ icons indicate inbound emails. The ✉⬆ icons indicate outbound emails. These indicators are automatically applied as part of the recording process with LinkPoint Connect, regardless of whether the email was recorded via Send and Record, Smart Record, or Quick Record.
Availability: This feature is available for LinkPoint Connect for Salesforce: Desktop Edition and Desktop Plus Edition integrations.
Enhancements
Link to Salesforce
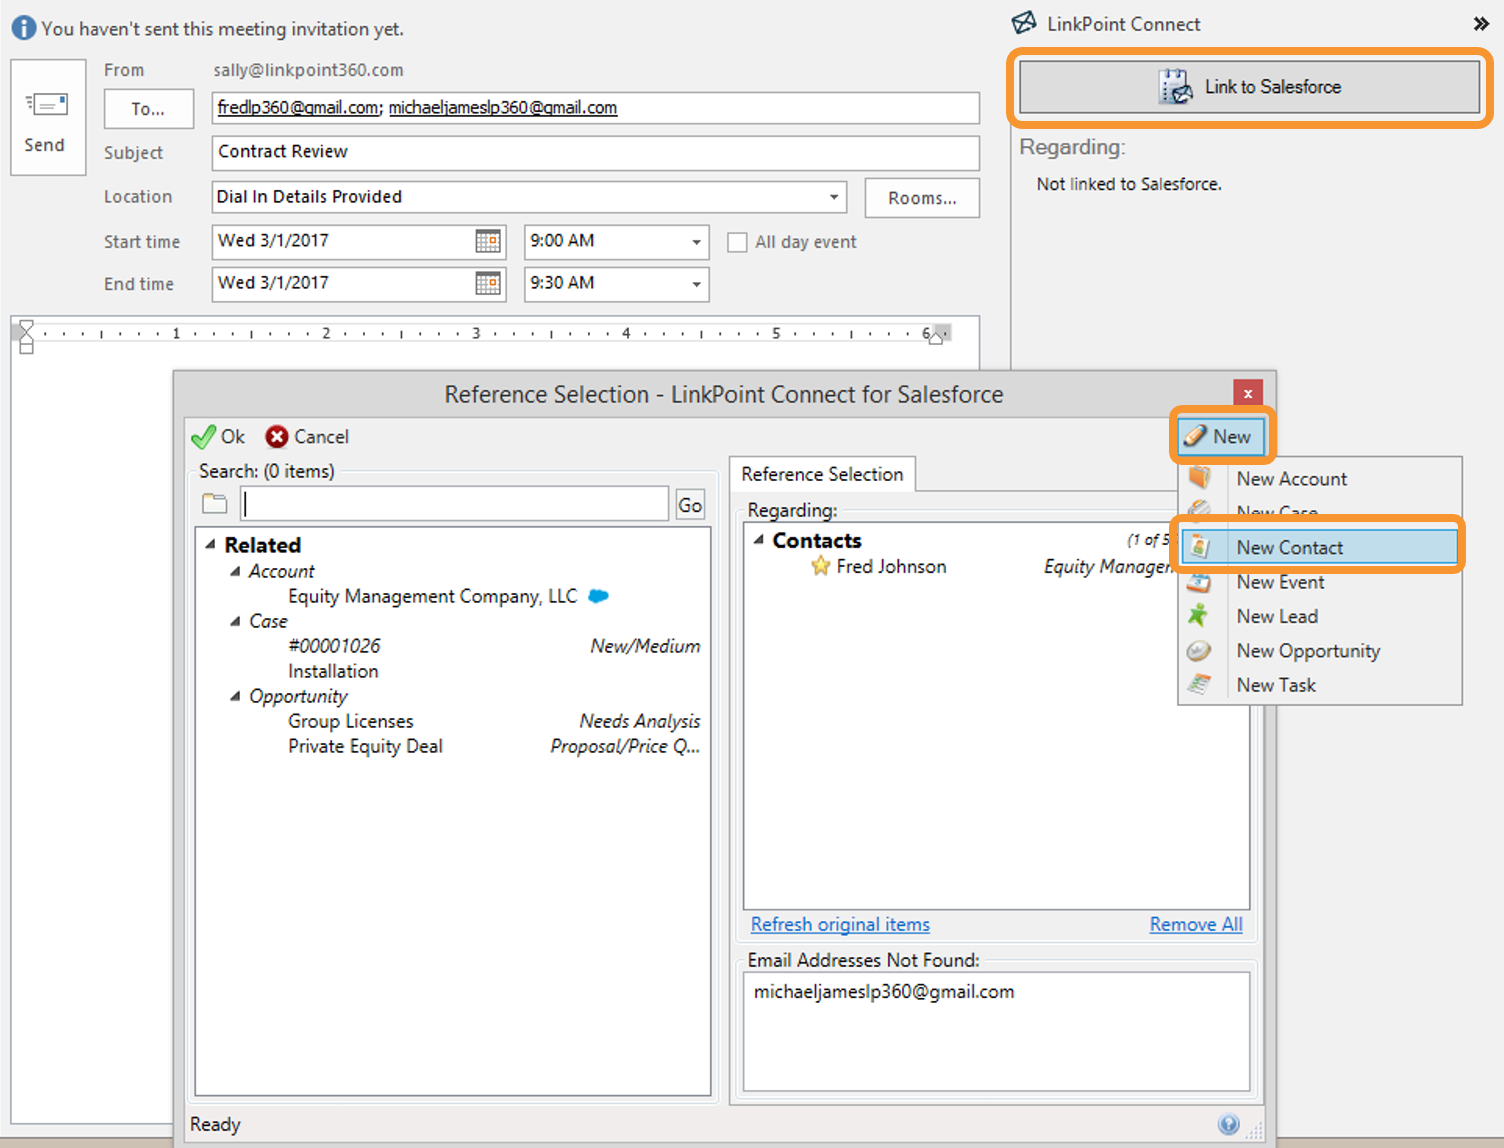
The Link to Salesforce feature gives users improved options for relating calendar and task items to Salesforce records. Users can create appointments, meetings, or tasks in their email application and then select Link to Salesforce to launch a Reference Selection window. Then, users can choose from suggested contacts or leads based on invitees (where relevant) or create records using the new Smart Forms feature. Customers that include custom objects or forms will see the information displayed in the Regarding section of the Side Panel after implementation support from the LinkPoint360 Professional Services Team.
Availability: This feature is available for LinkPoint Connect for Salesforce: Desktop Edition and Desktop Plus Edition integrations.
Follow Up Task Assignment
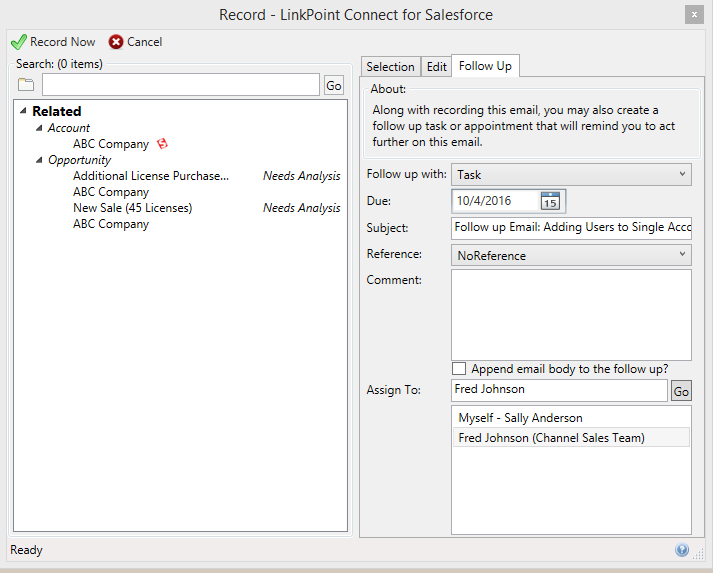
Users can now set a different Task owner when creating a Follow Up. This is especially useful for team members who delegate tasks or manage intake of communication in a company. Users can choose other members of their organization to assign a Follow Up Task via the Record Window. The task will be created in Salesforce and assigned to the selected user. The feature will default to the users own Salesforce profile. However, the user can search the Assign To field for any member of the team by entering their first or last name. This option is only available for Task creation (not Appointment creation).
Availability: This feature is available for LinkPoint Connect for Salesforce: Desktop Edition and Desktop Plus Edition integrations.
LinkPoint Tracker Updates
Users can now leverage LinkPoint Tracker with an updated user interface and additional tracking capabilities. Users can access the LinkPoint Tracker panel to view a history of all opens for outbound emails. Selecting a specific email will display details in the pane to the right. This includes the date and time the email was first read and most recently read. Users can also note the location of the recipient where the email was last read based on IP address and a total read count for how often the email has been opened. This feature is enabled by default with the Spring 17 release.
Availability: This feature is available for LinkPoint Connect for Salesforce: Desktop Edition and Desktop Plus Edition integrations.
Icon Size Controls
Users can now control the size of the icons that are displayed in the LinkPoint Connect Side Panel. The LinkPoint Assist configuration window includes a Side Panel component with Icon Size options for Small, Medium, or Large. The default setting is Small.
Quick View Side Panel
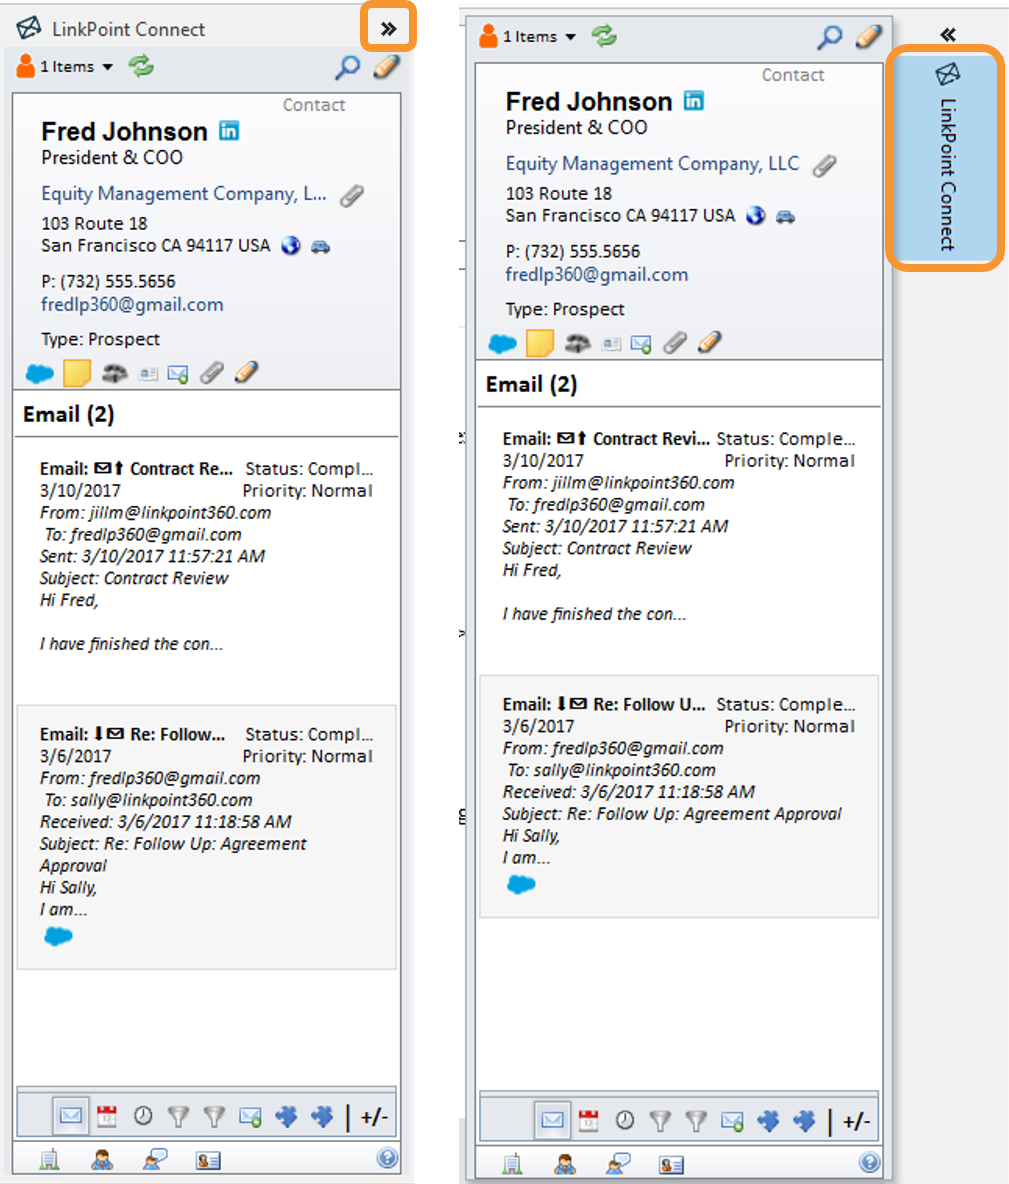
Users working on smaller screens can take advantage of the Side Panel’s new Quick View capability. Collapse the Side Panel using the >> button in the top right corner. To Quick View as needed, single click on the LinkPoint Connect text. The Side Panel will pop up and display the related information for the email you are currently viewing. Click off of the Side Panel for it to collapse again. This feature allows users with smaller screens to have the ability to access the Side Panel as needed while freeing up much needed room on their screen.
A Note about Software Upgrades
Products and services provided by LinkPoint360 are automatically updated by default. Individual users may, in most cases, change their update preferences within LinkPoint Assist. Some organizations may request that upgrades be disabled by default and then manually released at the discretion of internal IT teams. If you see new features or functionality listed within the release notes but do not see the new features in your instance of LinkPoint Connect, please contact your System Administrator.
![]() Download: Access the complete Spring ’17 Release Notes in .pdf format. Get the Release Notes
Download: Access the complete Spring ’17 Release Notes in .pdf format. Get the Release Notes
