
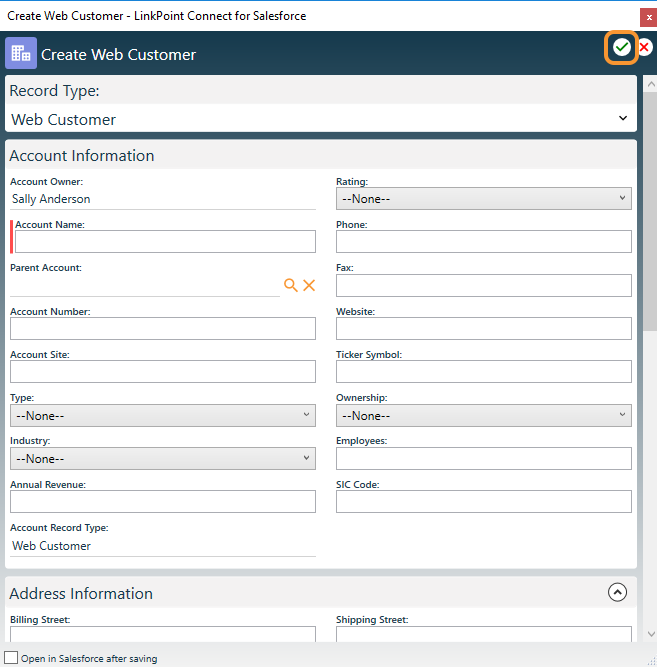
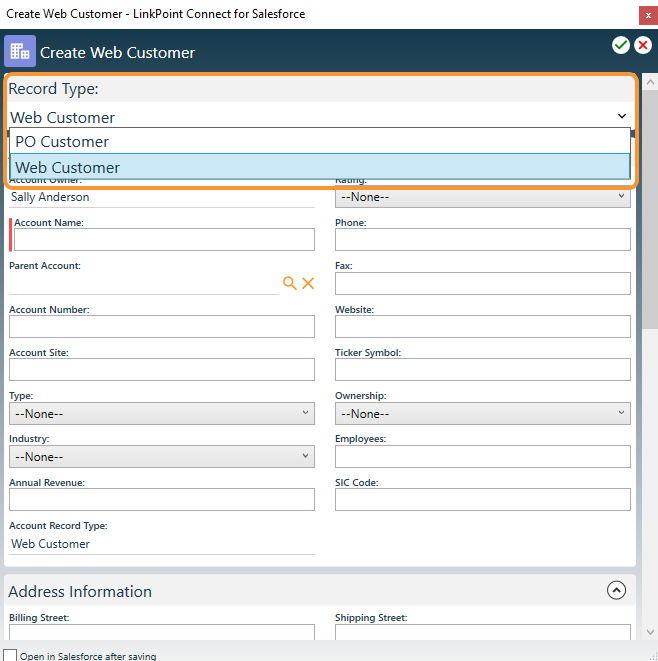
Create new records for standard and custom Salesforce objects from Outlook with SnapForms. LinkPoint Connect automatically detects the user’s Salesforce objects and provides access to SnapForms for those objects. SnapForms display the fields for the object as they appear in the user’s instance of Salesforce and support required and dependent fields. Where applicable, SnapForms present the record types available for an object in a drop-down list.

Click the images throughout the Knowledge Base to see full size versions of screen captures.
Create Salesforce Records with SnapForms

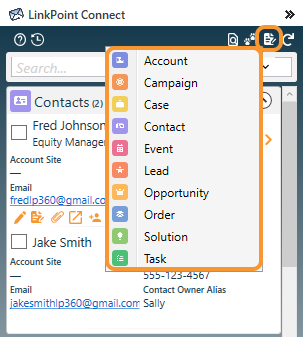
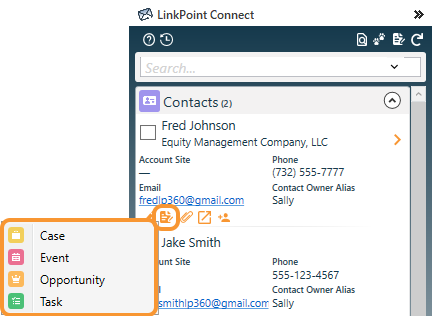
Click the Create New Records icon in the top-right corner of the Side Panel. This will present a list of available objects unique to each user’s permissions in Salesforce. Select an option from the list to launch the SnapForm.


Enter data in the available fields in the SnapForm. Complete all required fields, and click the green checkmark to create the item in Salesforce.
![]() Download: Access the complete LinkPoint Connect User Guide in .pdf format. Get the User Guide
Download: Access the complete LinkPoint Connect User Guide in .pdf format. Get the User Guide
