Enabling and Disabling LinkPoint Connect Side Panel Navigation Pane Items (Outlook + Salesforce)
LinkPoint Connect offers users the flexibility to choose the information that is displayed in the Side Panel. In this section, you will learn how to add, remove, and rearrange the content shown in the Side Panel.
Tip: The configuration options mentioned in this section are based on the standard out-of-the-box settings for LinkPoint Connect. If you do not have these settings available, it is possible that they have been disabled by your internal IT admin.
Click the images throughout the Knowledge Base to see full size versions of screen captures.
Enabling and Disabling LinkPoint Connect Side Panel Navigation Pane Items
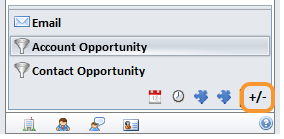
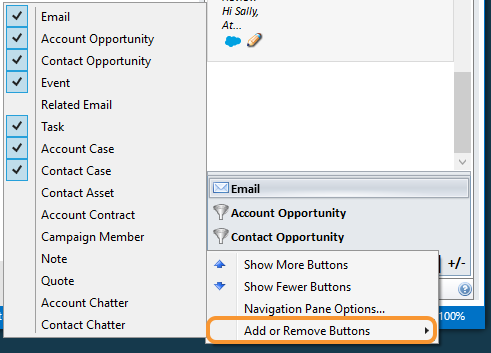
Navigate to the Side Panel, and click the +/- icon in the bottom right of the Navigation Pane.
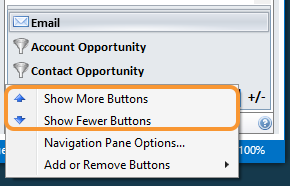
Select the option to Show More Buttons to add to the list of items available in the Navigation Pane. Select Show Fewer Buttons to reduce the number of items available.
Tip: You can also click and drag the top of the Navigation Pane up or down to increase or decrease the size of the pane. This will automatically show or hide buttons.
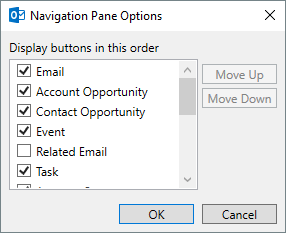
Select Navigation Pane Options…
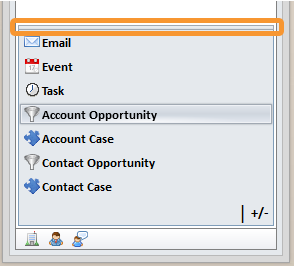
Choose the items to display in the Navigation Pane by selecting or deselecting the checkboxes in the Display buttons in this order list. Select an item and click the Move Up and Move Down buttons to change the order that the items appear in the Navigation Pane. Click OK to save changes or Cancel to discard them.
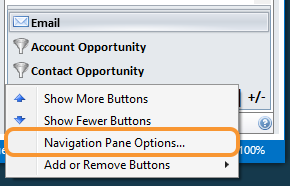
Select Add or Remove Buttons to see a quick view of available options for the Navigation Pane. Click items with a checkmark to deselect them and remove them from the Navigation Pane. Click items without checkmarks to add them to the Navigation Pane.
Download: Access the complete LinkPoint Connect: Outlook + Salesforce User Guide in .pdf format. Get the User Guide