
Smart Address offers users the ability to tag emails and calendar items and associate them with Salesforce “What” records as part of the sync process. To do this, Smart Address Sync creates a separate Contact folder within Exchange and generates a unique email address for each object record that is enabled. As users send emails or create meetings, they can add Smart Addresses from their Address Book or Contacts folder wherever they have access to their Exchange account (desktop, web mail, mobile device, etc.). Cloud Edition detects Smart Addresses and uses them to relate the emails and calendar items to additional Salesforce records. In this section, you will learn how to map Salesforce objects for use as Smart Addresses.

Click the images throughout the Knowledge Base to see full size versions of screen captures.

Warning: Smart Address functionality is only available when working with Email and Calendar Sync. Smart Addresses cannot be appended to Task or Contact records from Exchange to create associations in Salesforce.
Warning: Cloud Edition Admins have the ability to set default sync settings and/or lock down these settings to prevent end user override. Your instance of Cloud Edition may not allow you to change any/all of the settings described in this section, depending on how your Admin has configured your access. Settings that are preset and locked by an Admin are visible to end users but are grayed out and cannot be edited.

Example: In this example, we will demonstrate how to map new objects for use with Smart Addresses using sample data. Your Salesforce objects will vary based on how your instance of Salesforce is configured.
Mapping Salesforce Objects from Smart Address

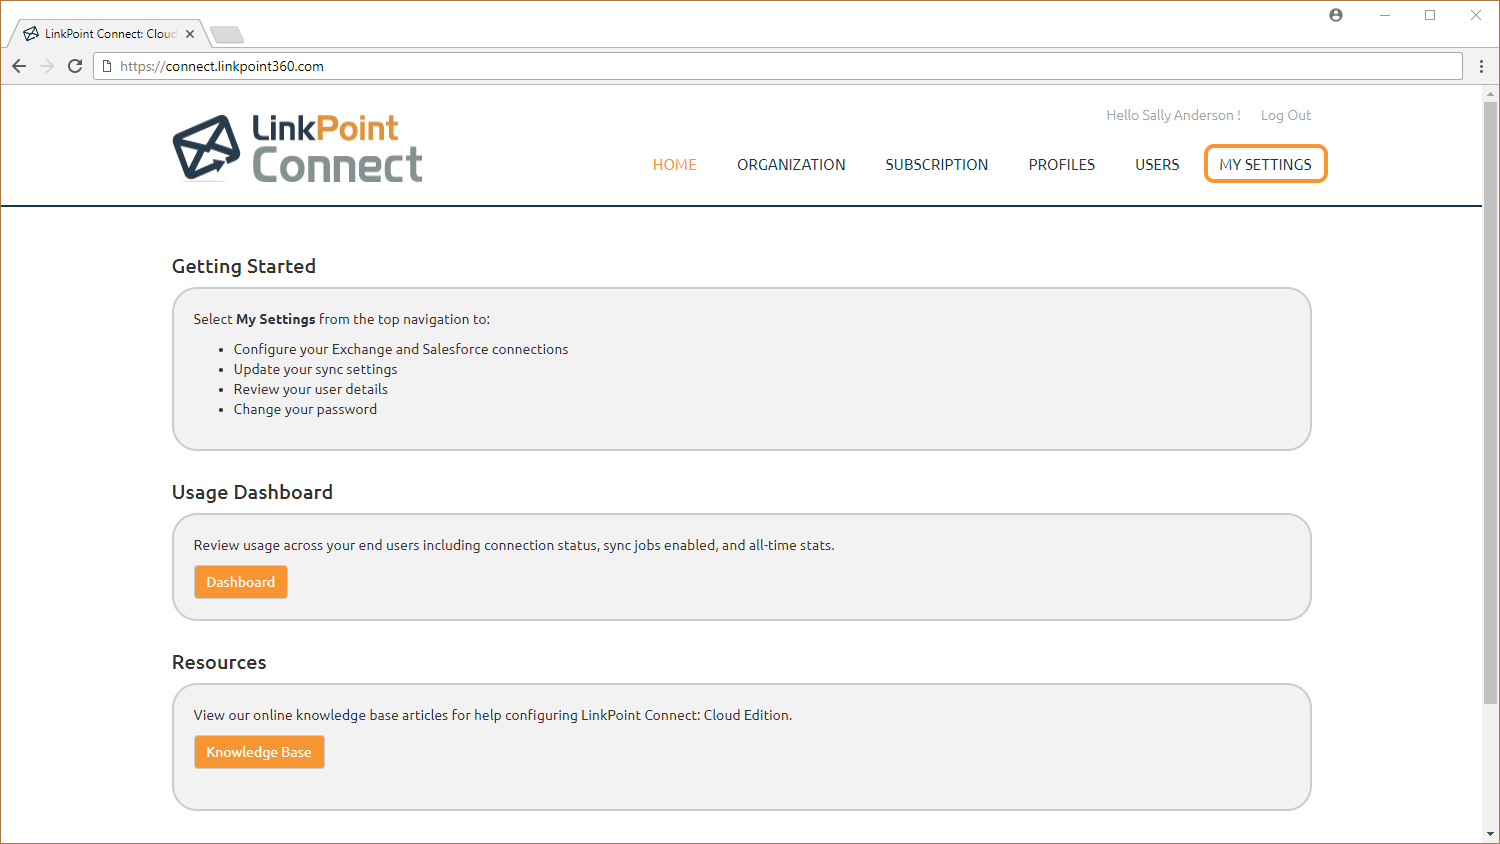
Log in to Cloud Edition, and select My Settings in the top right corner of the screen.

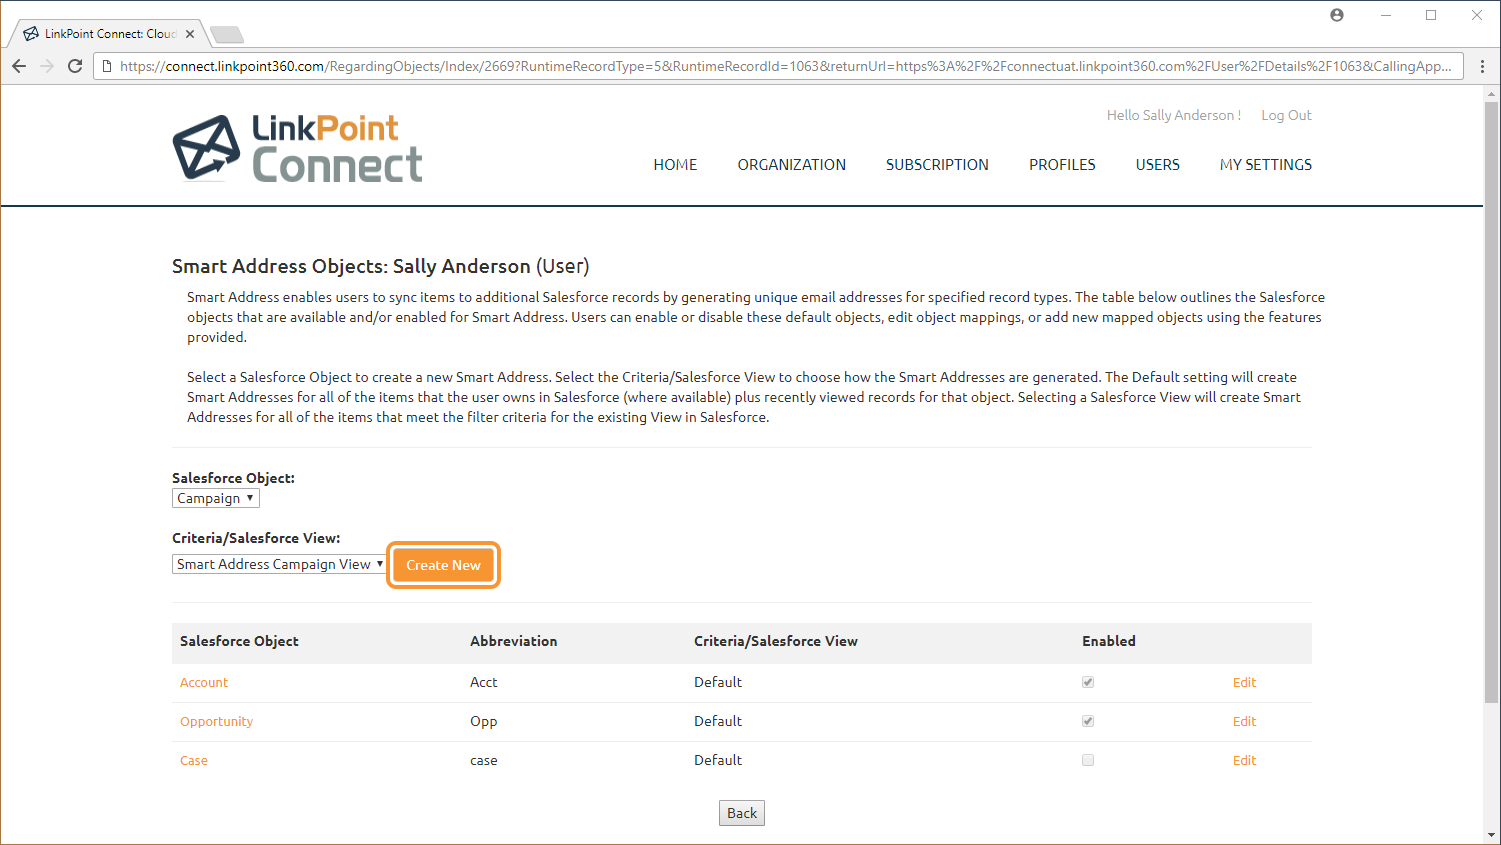
Locate the Sync Jobs section and the Smart Address Sync Object. Then, select the Map Objects link.


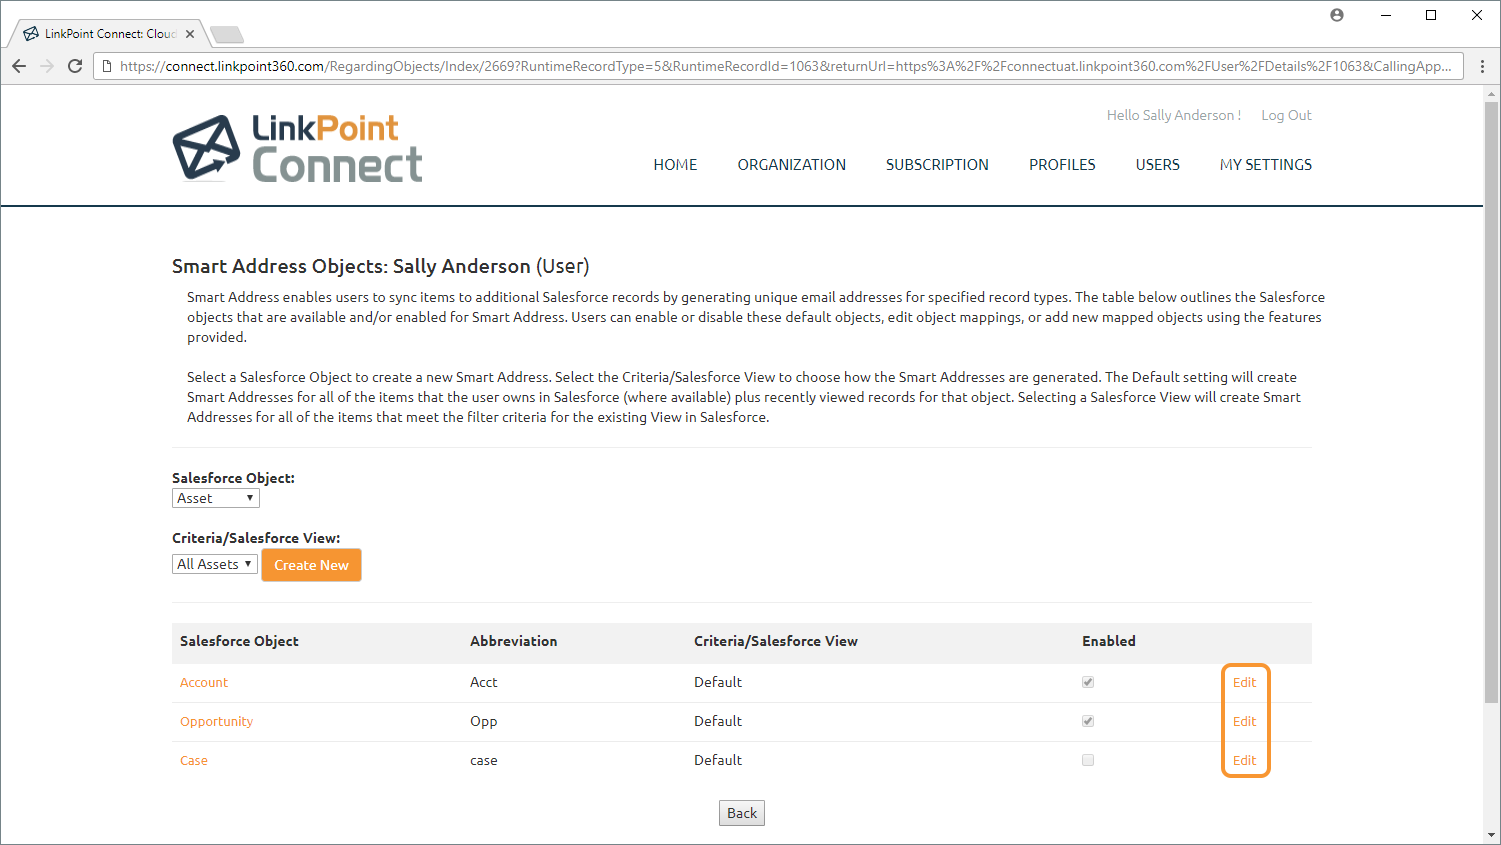
Review the list of existing mapped objects. The table outlines the Salesforce objects that are available and/or enabled for Smart Address use along with the abbreviation that will appear at the beginning of the Smart Address name in the Exchange contact list and the Criteria or Salesforce View being used to populate the Smart Addresses.
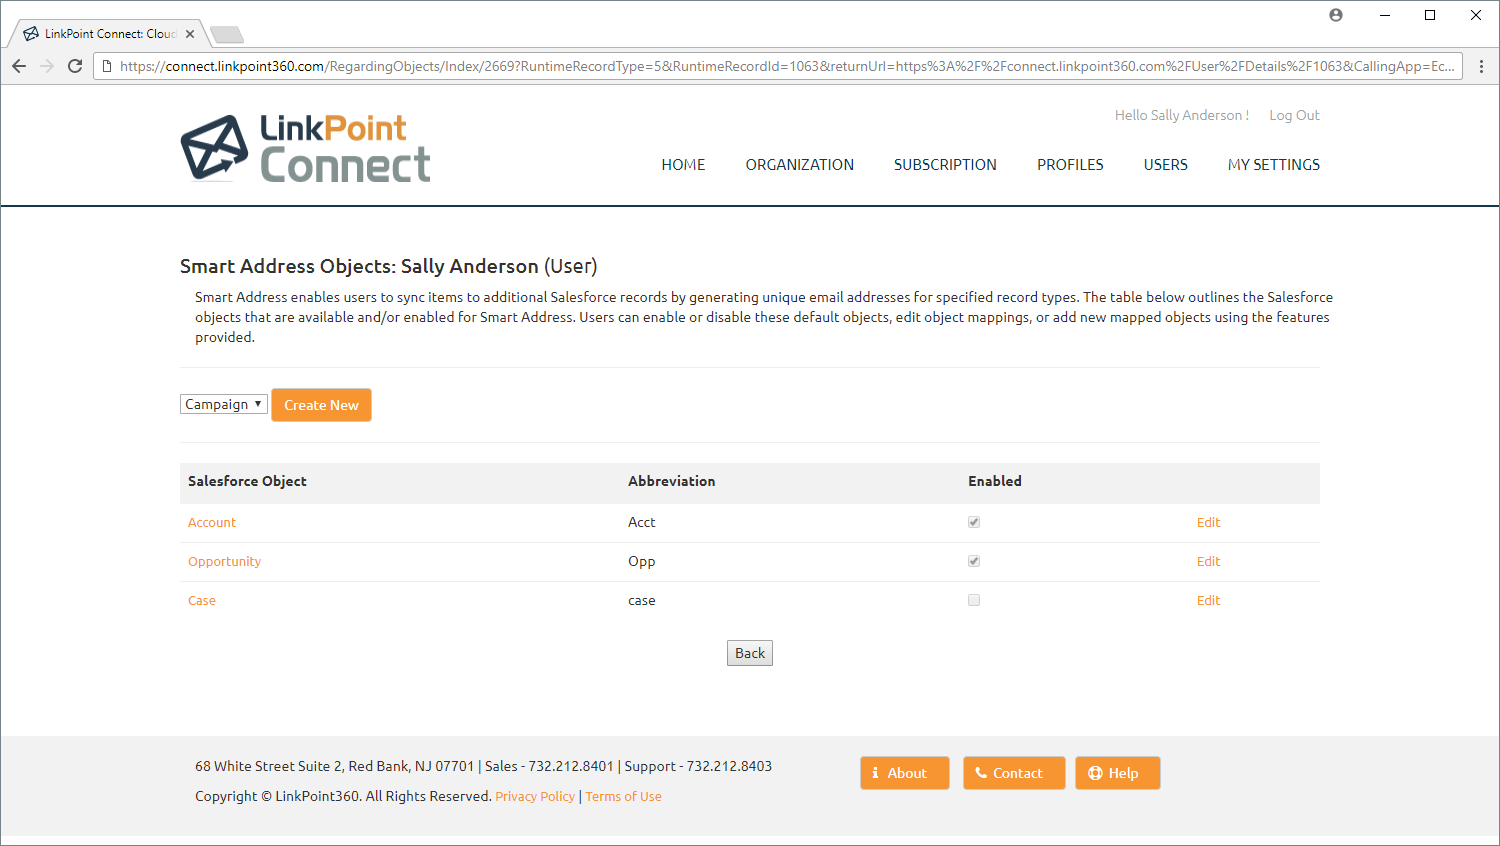

- Accounts: Smart Address will create a unique email address for every Account the user owns and every Account on the user’s Most Recently Viewed list in Salesforce. This mapping is enabled by default.
- Opportunities: Smart Address will create a unique email address for every Opportunity that the user owns and every Opportunity on the user’s Most Recently Viewed list in Salesforce. This mapping is enabled by default.
- Cases: Smart Address is designed to detect the Salesforce Case object but is disabled by default. When enabled, Smart Address will create a unique email address for every Case the user owns and every Case on the user’s Most Recently Viewed list in Salesforce.
Warning: Smart Address mapping is presented on the Objects page as Enabled, but Smart Addresses will not be available for use within Exchange unless you have enabled the Smart Address Sync Job.
A

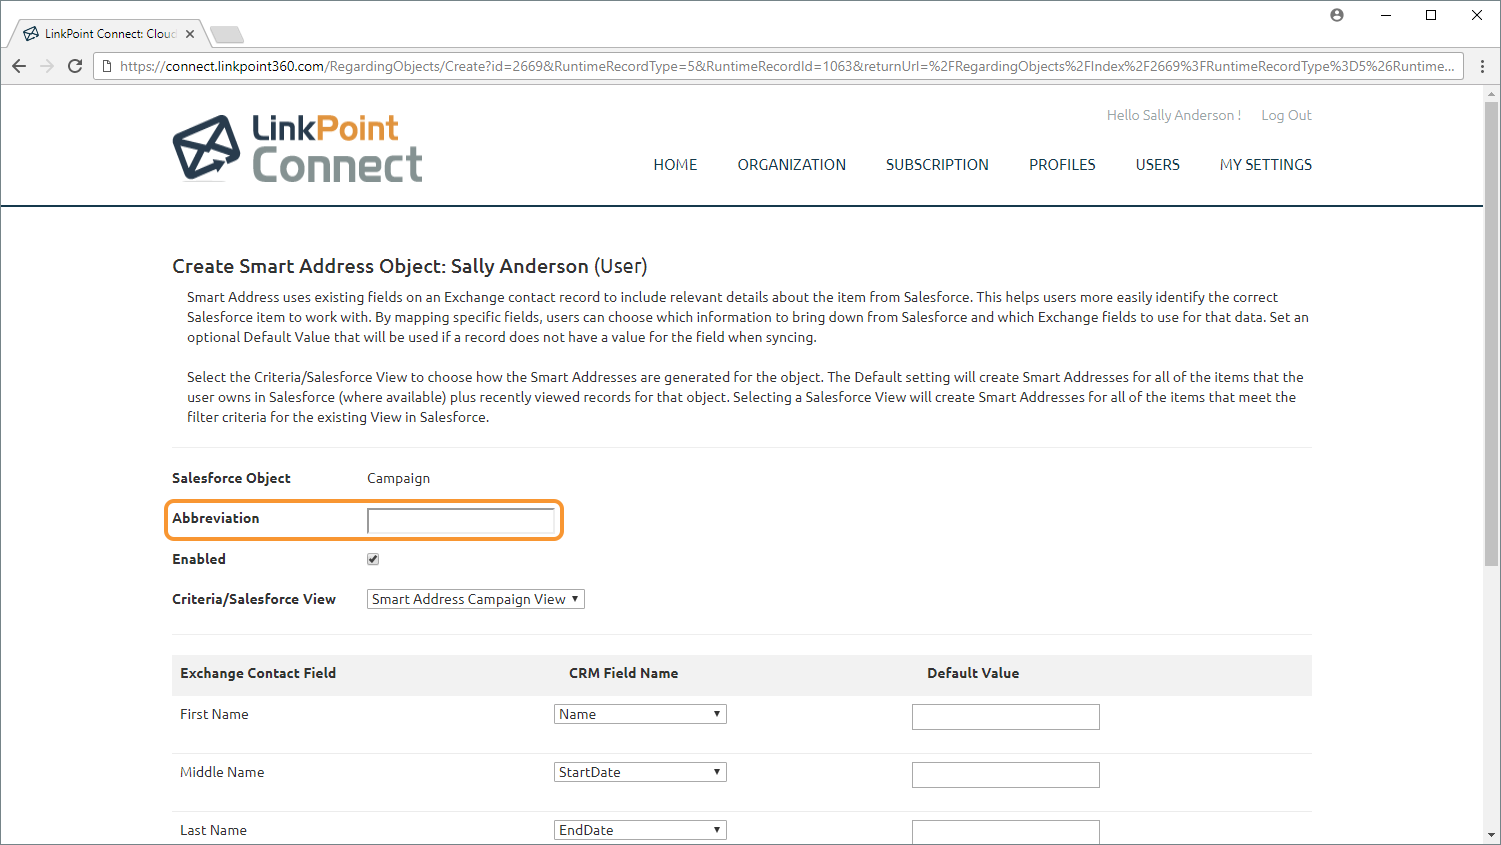
Select a new Salesforce Object from the drop-down list. The available Objects will vary by user and will only be presented as an option if the user has permission to view the Object in Salesforce.
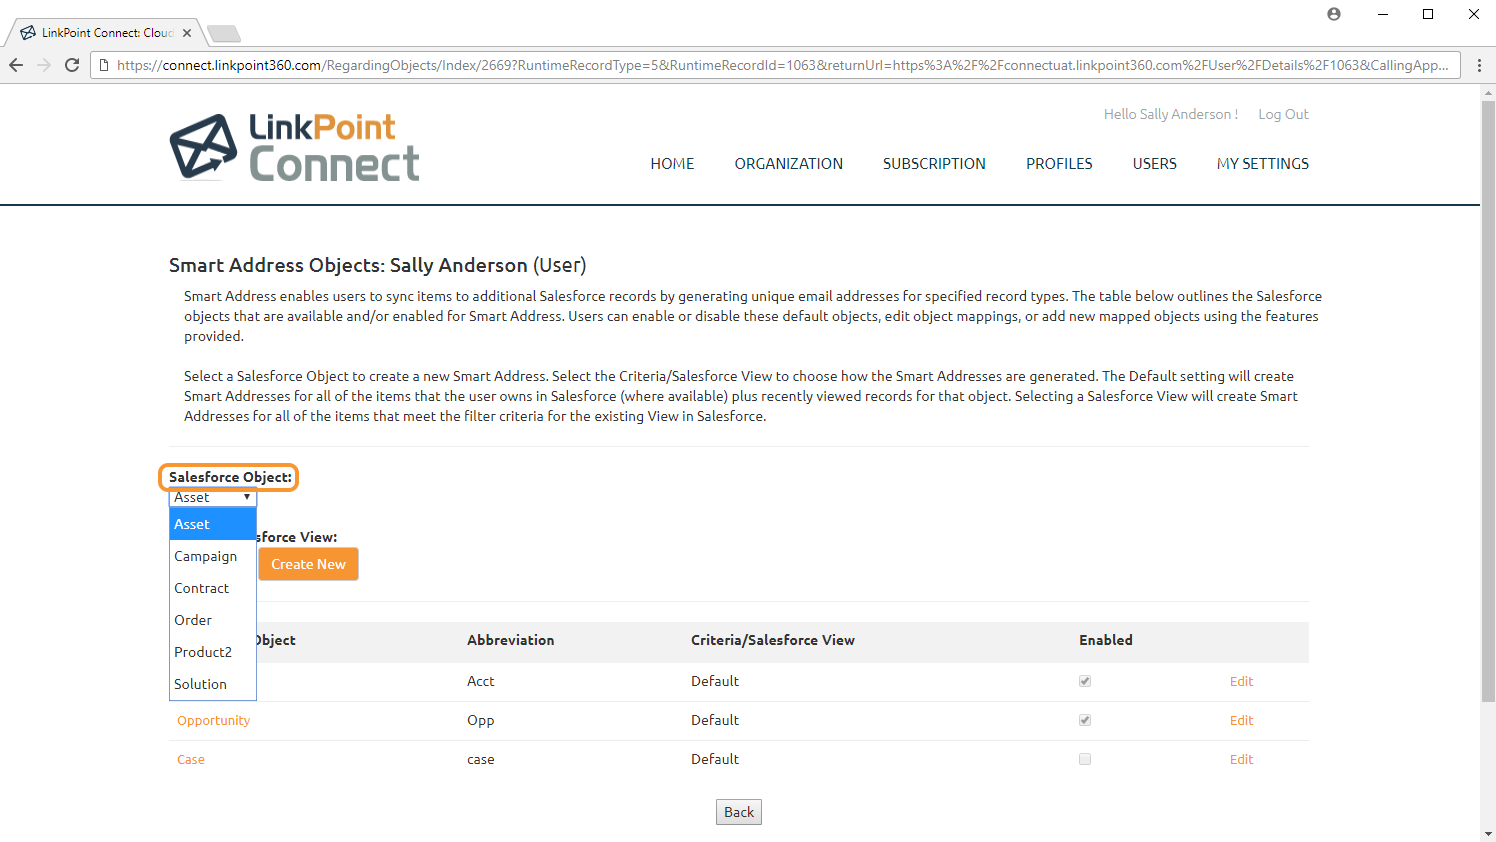

Select the Criteria/Salesforce View to use when generating the Smart Addresses for the selected Salesforce Object. Choose Default to work with default Smart Address criteria. Choose a Salesforce View from the list to create Smart Addresses based on the View’s criteria.
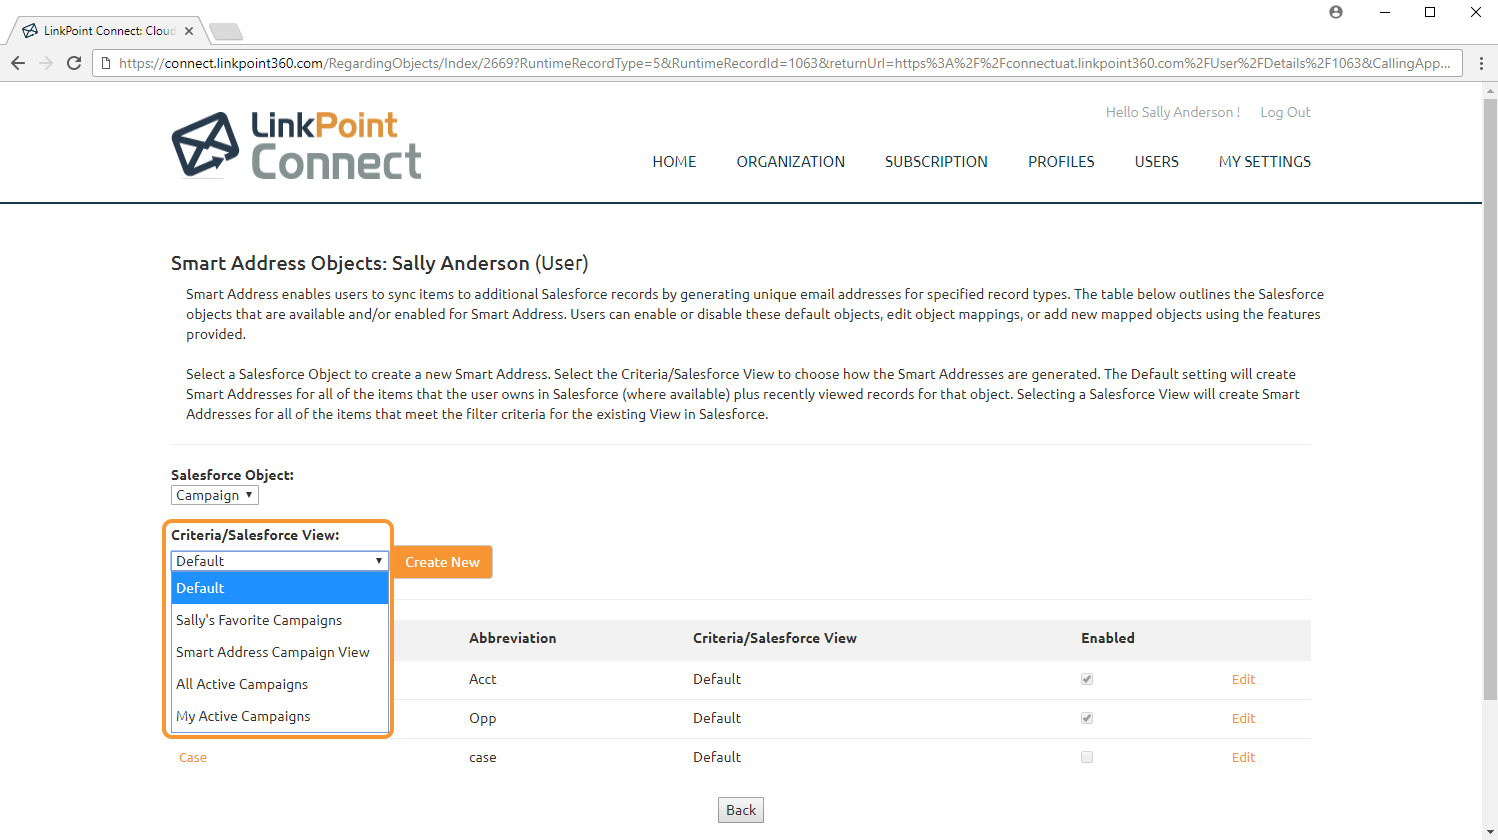
- Default Criteria: Created on a per object basis for all records a user owns in Salesforce. (i.e. a user will have a Smart Address for every Account they own) and for all records that appear on the user’s Most Recently Viewed list in Salesforce for the object, regardless of whether they own the account (i.e. a user viewed a colleague’s Opportunity but does not own it).
- Salesforce View: Created based on the filters used to populate the View in Salesforce. End Users can select from Public Views as well as any view, including Private Views, they have access to in Salesforce. Any record included in the View can be a Smart Address, regardless of ownership or recently viewed status.
- Additional Filters: LinkPoint360 Professional Services can add filtering to exclude Smart Addresses based on certain criteria, such as excluding items that have a Status of Closed. Contact your Account Executive with any questions regarding Cloud Edition customization.

Click Create New to continue.

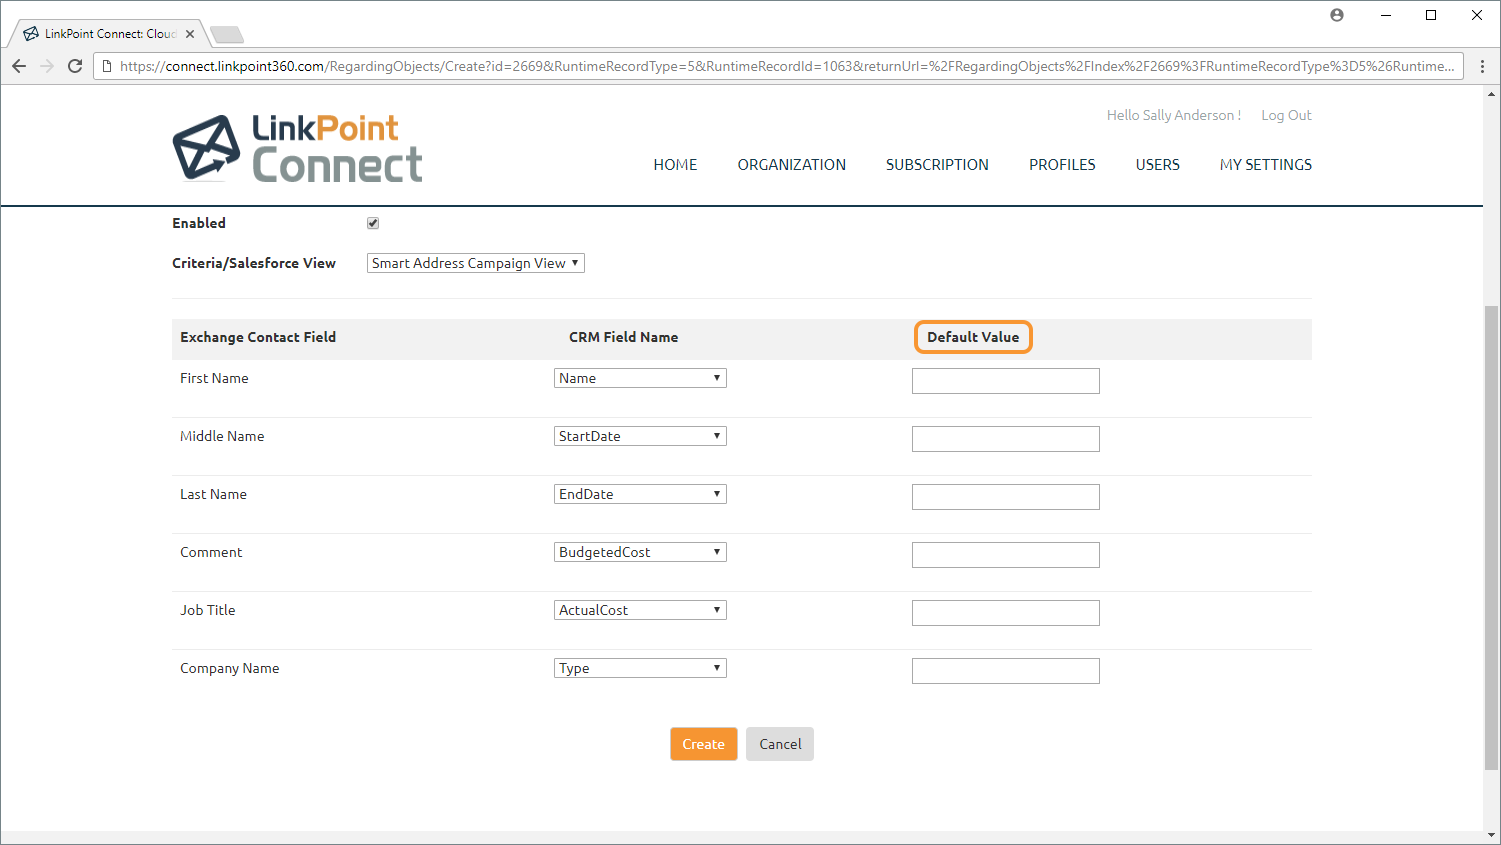
Enter an Abbreviation to be used when creating and labeling the Smart Address in Exchange.

Select the Enabled checkbox to activate the new object and include it with the next Smart Address sync.
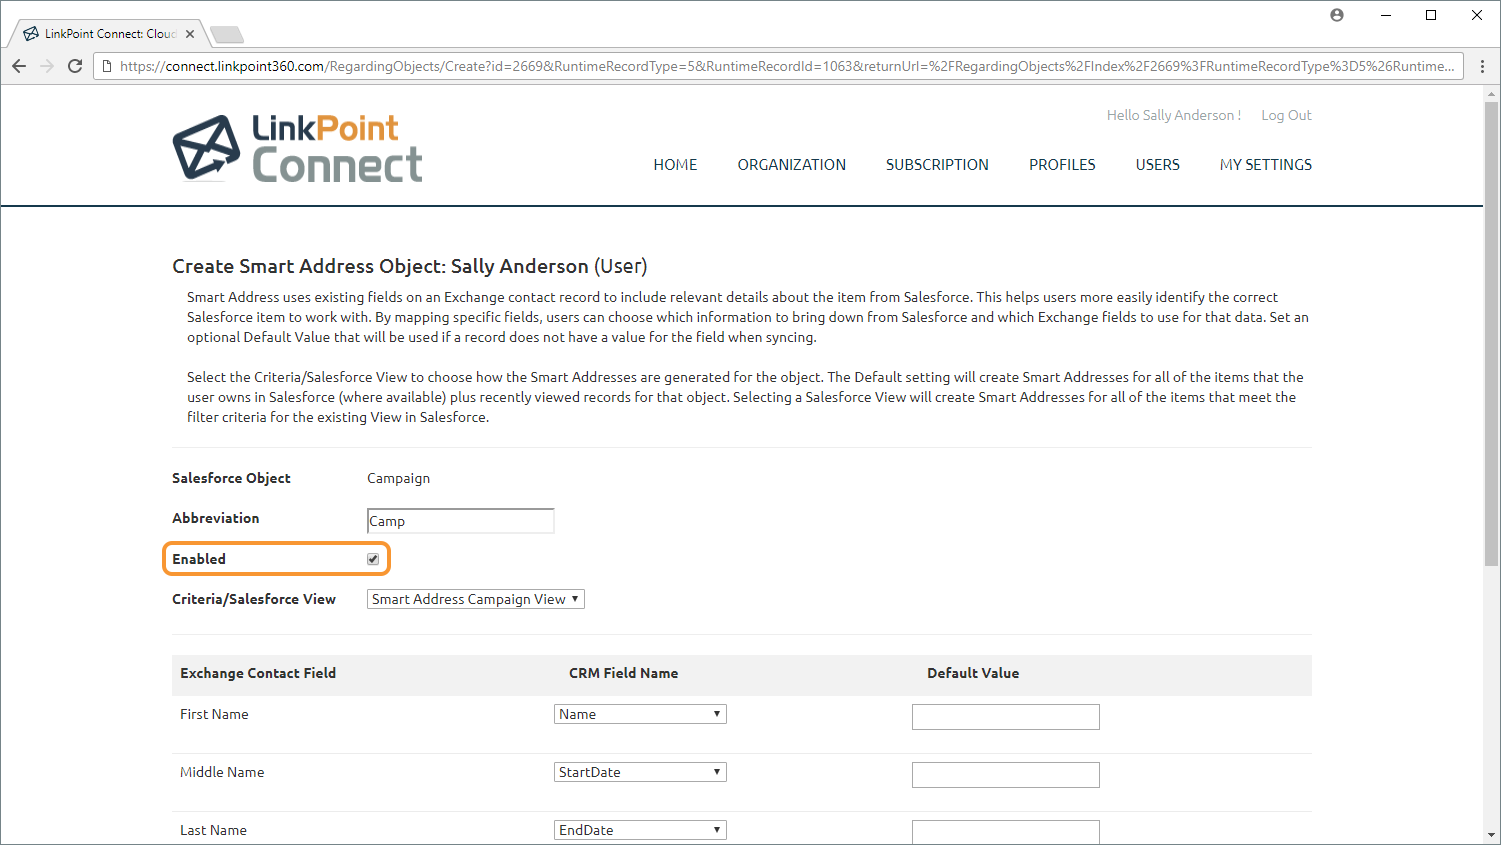

Select the Criteria/Salesforce View to use to generate the Smart Addresses for the selected Object.


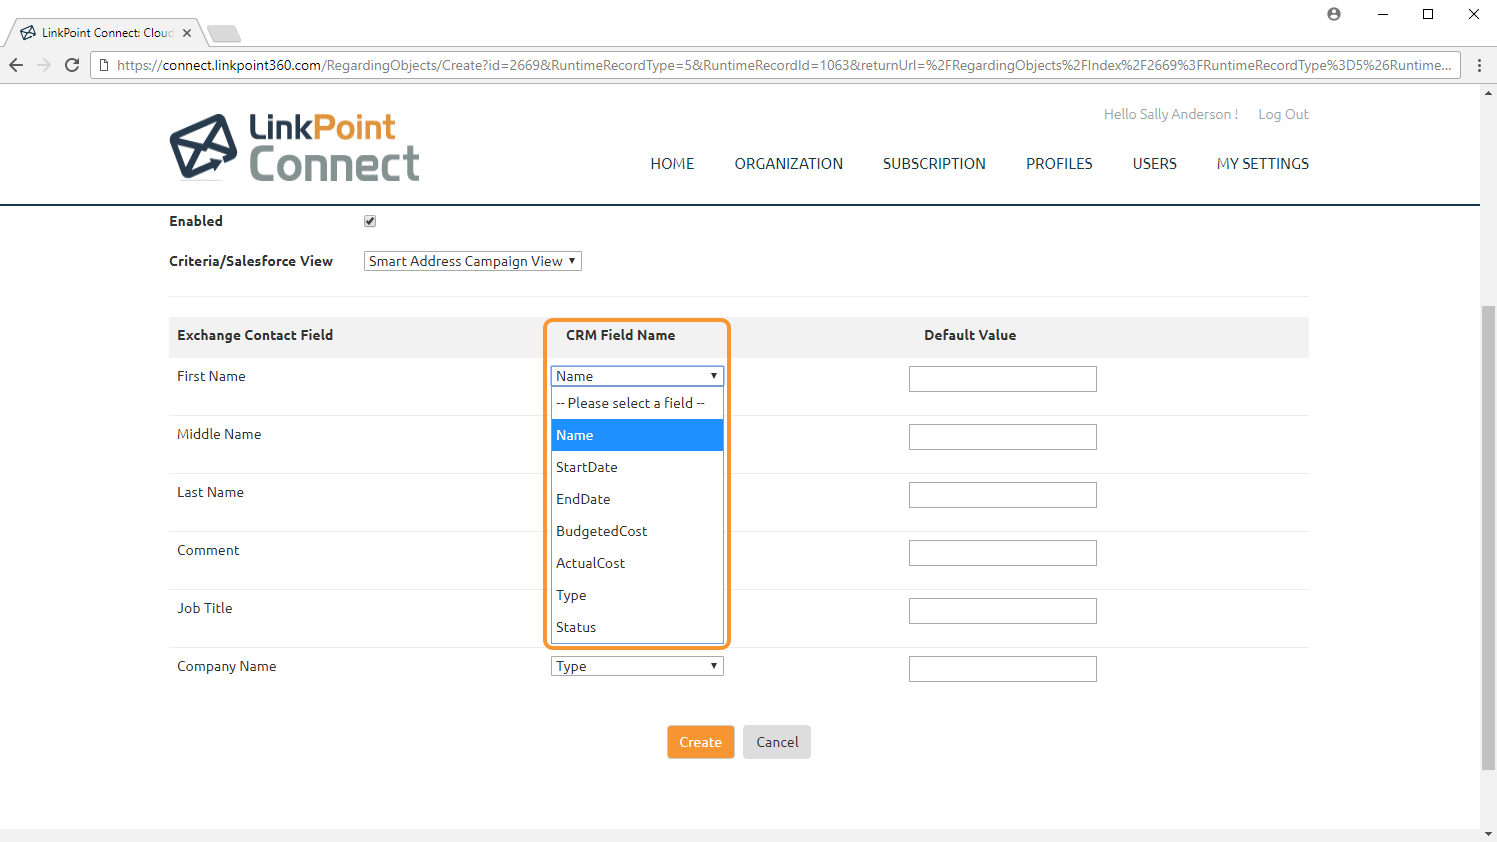

Set an optional Default Value that will be used if the Salesforce record does not have a value for the field when syncing.

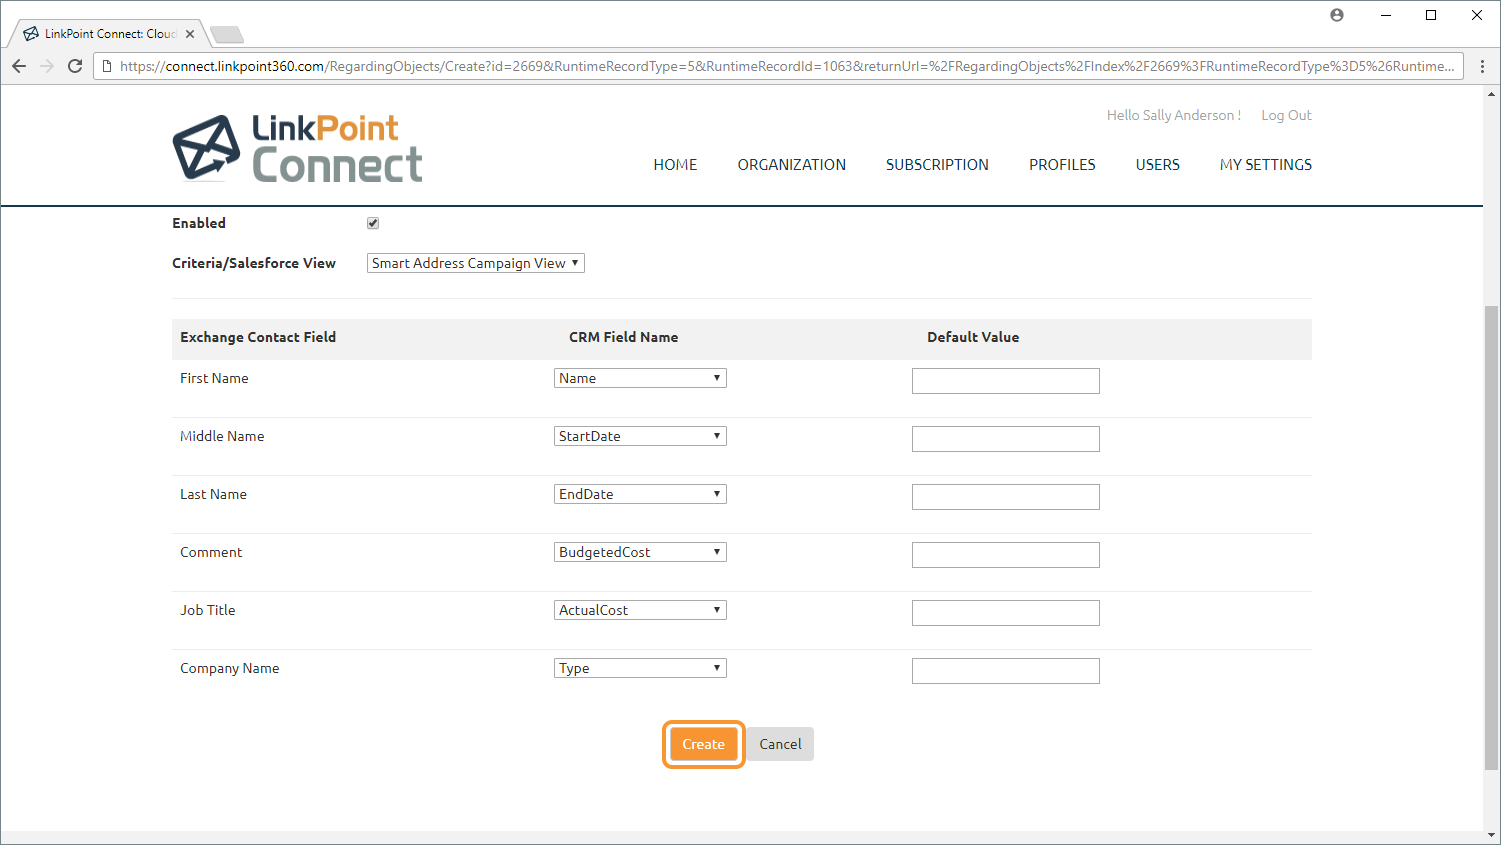
Click the Create button when finished to generate the Smart Address object. The new Smart Addresses will be included in the Smart Address Exchange folder and will be available on your mobile device (wherever your Exchange account is connected) during the next scheduled Smart Address Sync Job.
Tip: You can edit any existing Smart Address object mapping by returning to the Smart Address Objects page and selecting the Edit link for a specific Salesforce Object.
![]() Download: Access the complete LinkPoint Connect: Cloud Edition (Exchange + Salesforce) User Guide in .pdf format. Get the User Guide
Download: Access the complete LinkPoint Connect: Cloud Edition (Exchange + Salesforce) User Guide in .pdf format. Get the User Guide
