Relating an Outlook Calendar Item to a Salesforce Record
LinkPoint Connect enables users to associate existing Outlook Meetings and Appointments with Salesforce Accounts, allowing items to be created once and then sync as needed between systems. In this section, you will learn how to relate calendar items in Outlook to existing Salesforce records.
Click the images throughout the Knowledge Base to see full size versions of screen captures.
Relating an Outlook Calendar Item to a Salesforce Record
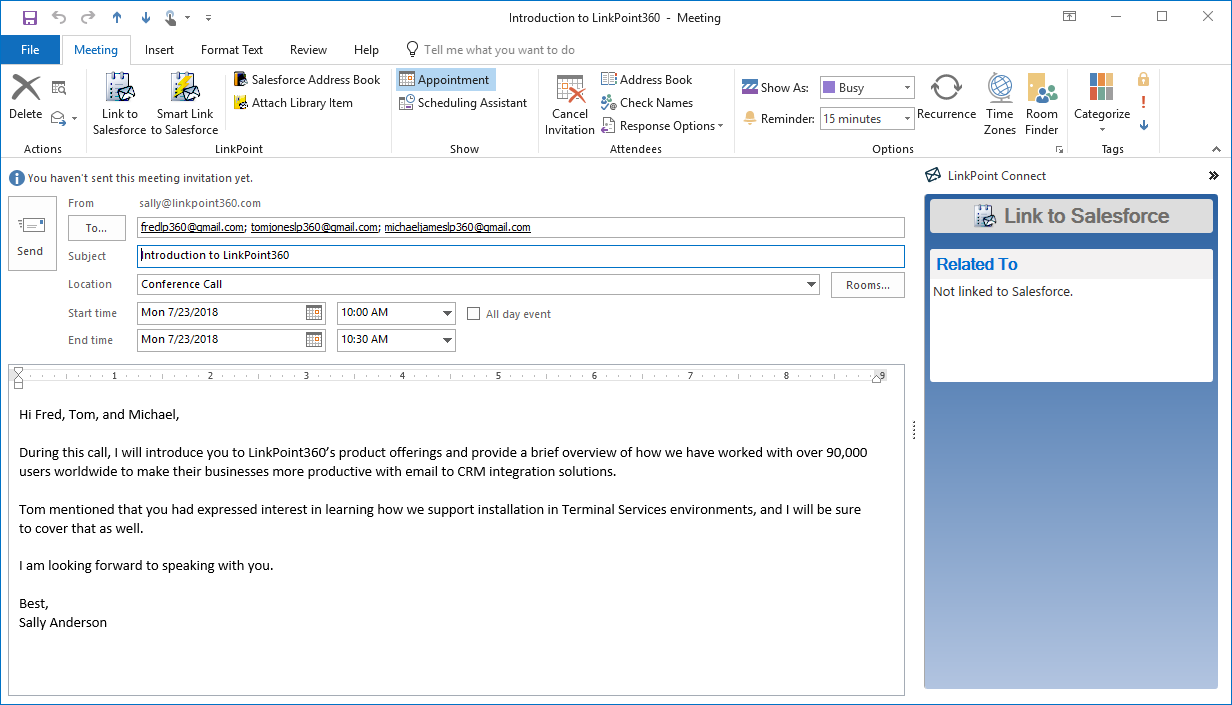
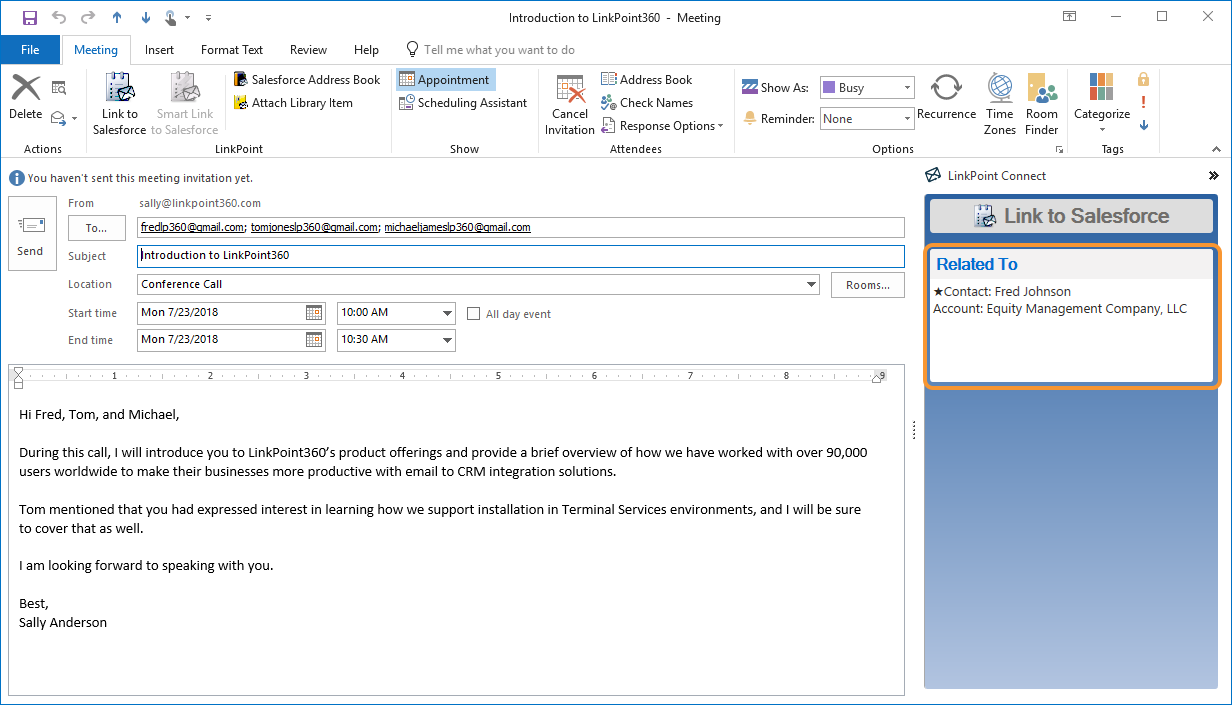
Open a Meeting or Appointment in Outlook and enter information for the item including the invitees, subject, location, date, time, and content.
Click the Link to Salesforce button in the Side Panel.
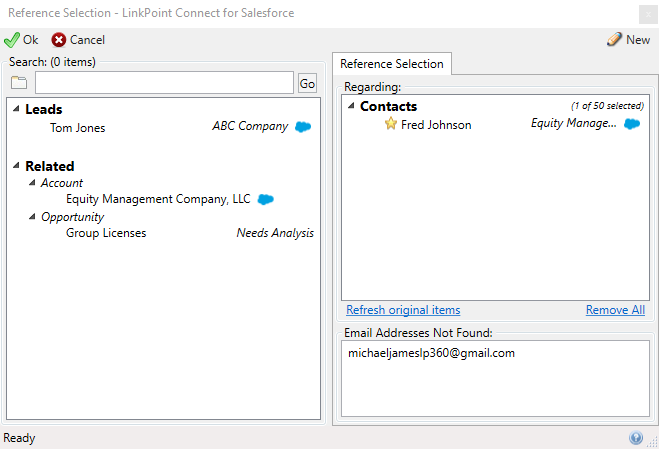
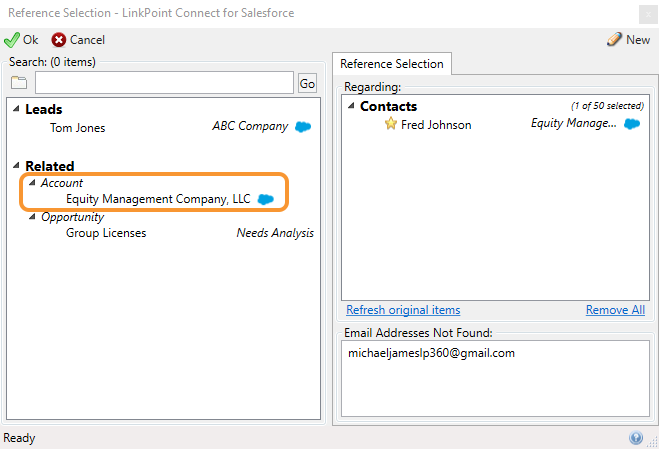
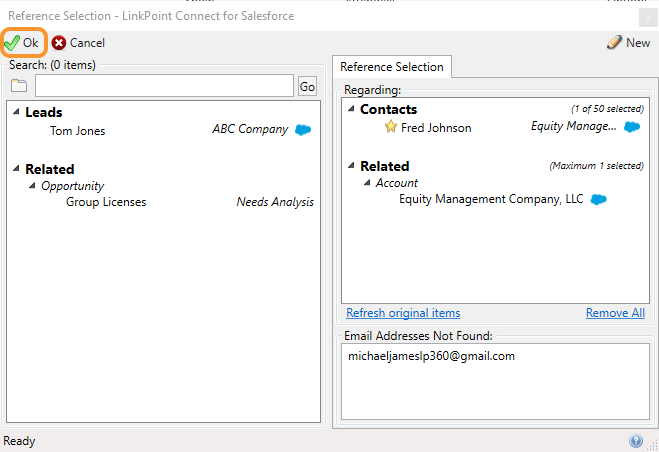
Review the recommended records in the Reference Selection window. This information is based on existing related Salesforce records that match the email addresses included on the meeting. If you are working with an Appointment, the results will be blank, but you can use the Search field to find the required records.
Select any additional Contacts or records to relate to the calendar item. Double click items on the left pane or click the green arrow to add them to the Regarding pane. Double click items on the Regarding pane or click the red x to remove them.
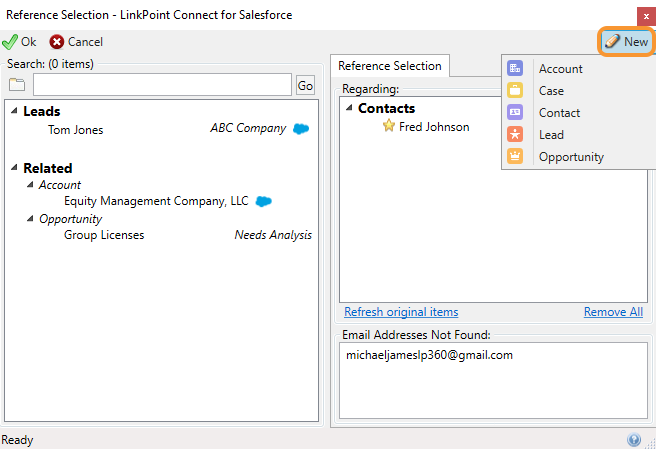
Tip: Select the Smart Forms icon and then select the record type to create new records in Salesforce. This is useful for creating records that may be related to the meeting invite you are sending.
Click the Ok button in the Reference Selection window to continue.
Tip: Some organizations configure their instance of Salesforce to limit association of records to one “who” (such as a Contact) and one “what” (such as a Case or Opportunity). In this instance, you will only be able to assign or relate the item to one Contact and one additional record in Salesforce. If your organization enables recording to multiple Contacts and/or multiple record types, you will be able to select these items in the Reference Selection window. Speak with your internal Salesforce admin to learn more about how your organization uses this Salesforce feature. Contact LinkPoint360 Support for assistance with enabling LinkPoint Connect to mirror your Salesforce processes.
Note that there are now records listed in the Related To section of the new Meeting within the Side Panel.
Tip: Customers that use custom objects or forms will see the information displayed in the Related To section of the Side Panel.
Click the Send button to create the Meeting and send it to the listed recipients.
Tip: LinkPoint Connect will sync the Meeting to your calendar in Salesforce during the next scheduled or manual sync depending on your settings. The Meeting will also be related to the selected Salesforce records.
Download: Access the complete LinkPoint Connect: Outlook + Salesforce User Guide in .pdf format. Get the User Guide