
Users can update their TimeScout account settings to adjust their availability or change how their contact information is displayed to external users on the booking screens.

Click the images throughout the Knowledge Base to see full size versions of screen captures.

Click the TimeScout icon in the top left section of the Side Panel, and click the Open TimeScout Website menu option. This will launch your default web browser.


Select Account from the top navigation, and select Account Settings.


Select Organizer Details from the Account Settings menu. Update or add the information in the available fields as needed. Click Save to confirm the changes.


Tip: Some content will be populated from the account set up process and details included in your Office 365 account. Remember that the information you provide here will be presented on all of the booking screens.

Select Organizer Calendar from the Account Settings menu.


Choose the Office 365 Calendar for TimeScout to manage, and click Save.

Tip: The Organizer Calendar option will not appear if you only have one calendar in your Office 365 account.

Select Availability Setup from the Account Settings menu.


Click a Day, Start Time, or End Time to edit the available time slots.
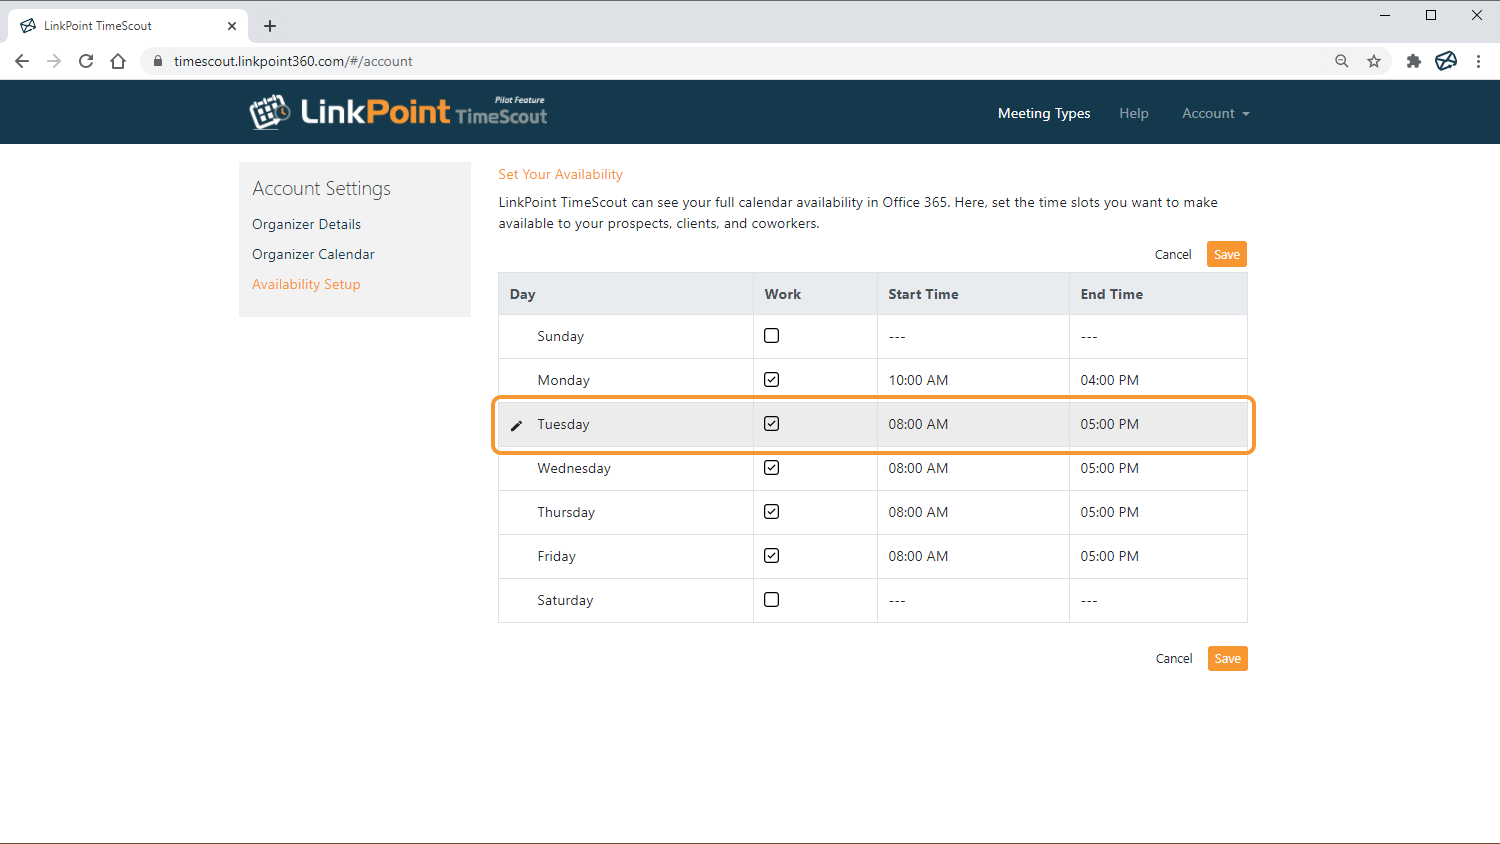
Tip: TimeScout will present the Work Hours and Work Week as they are set in the selected Office 365 Calendar. You can change them in TimeScout to refine the availability you present to prospects and clients.

Adjust the availability for a specific Day. Each Day can be set as or excluded from available options and can be configured with a different Start Time and End Time. Click Save to keep the changes.


Click Save on the Availability Setup page to confirm the changes.


Select Account from the top navigation, and select Log Out to end the browser session.


Download: Access the complete LinkPoint Connect User Guide in .pdf format. Get the User Guide

Still need help? Contact our Support Team