Using Active Update to Update Contacts in Salesforce with IBM Notes

LinkPoint Connect users can now update existing contacts in Salesforce directly from IBM Notes. Contact information for prospects and clients can change often, with new job titles as part of a promotion or even new phone numbers and email addresses as part of mergers and acquisitions. As users receive communication from contacts, they can easily identify any new information and choose the contact details to update or keep.

Active Update is an enhancement to LinkPoint Connect’s contact creation tools featuring easy drag and drop functionality. In this section, you will learn how to update Salesforce contacts using Active Update.

cursor-48

Click the images throughout the Knowledge Base to see full size versions of screen captures.


Using Active Update to Update Contacts in Salesforce

Step_1

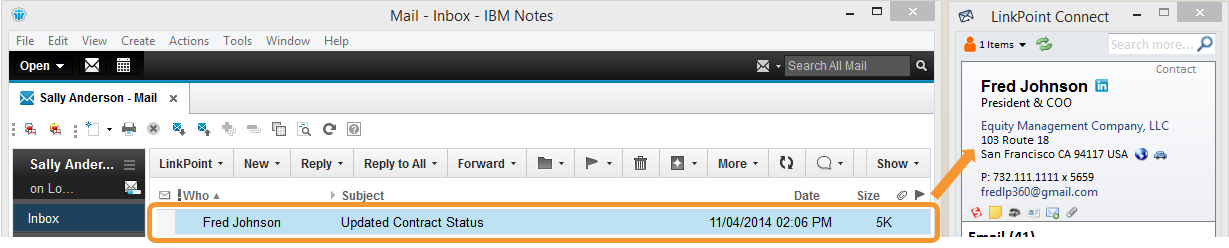
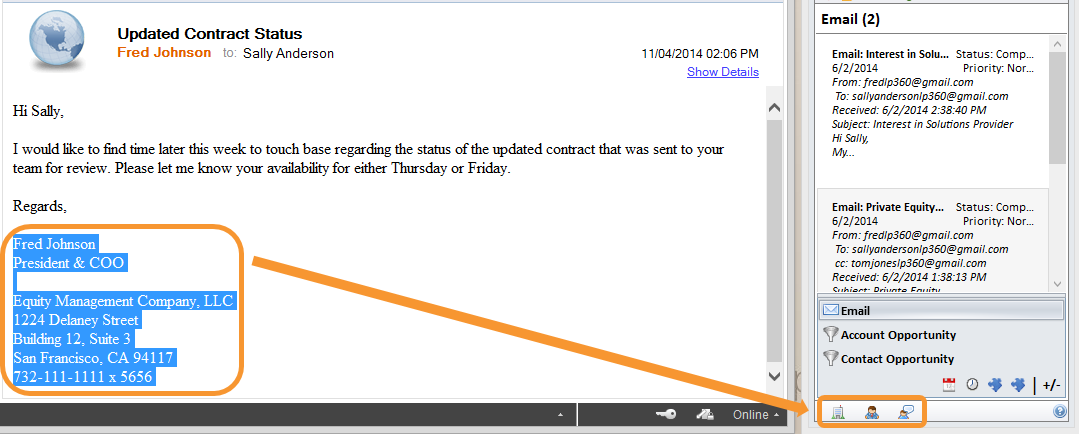
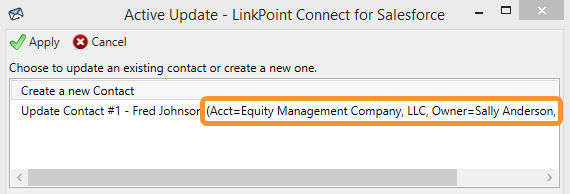
Select an email from an existing contact. Note that the LinkPoint Connect Side Panel searched Salesforce for the contact and found a matching record based on the sender’s email address.


Step_2 Highlight the signature within the email. Drag and drop the highlighted signature to the Drop Zone at the bottom of the LinkPoint Connect Side Panel. Release the selection over the contact type you want to update.

Active_Update_lnsf_2


Tip_Web Tip: Users can update Accounts, Contacts, or Leads by releasing the email signature over the corresponding icon in the Drop Zone.

Active_Update_lnsf_Tip2


Step_3 Review the contact information in the Active Update window. LinkPoint Connect will search Salesforce and identify any matching records and list them in the top portion of the window.

Active_Update_olsf_3


Tip_Web Tip: You can review some record details, such as the Account and Owner, in the information next to the contact to be sure you are working with the right record before making any changes.

Active_Update_olsf_Tip3


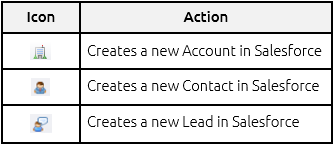
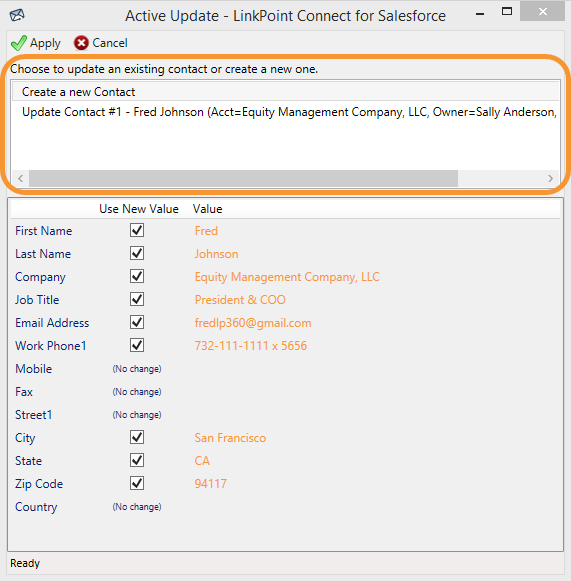
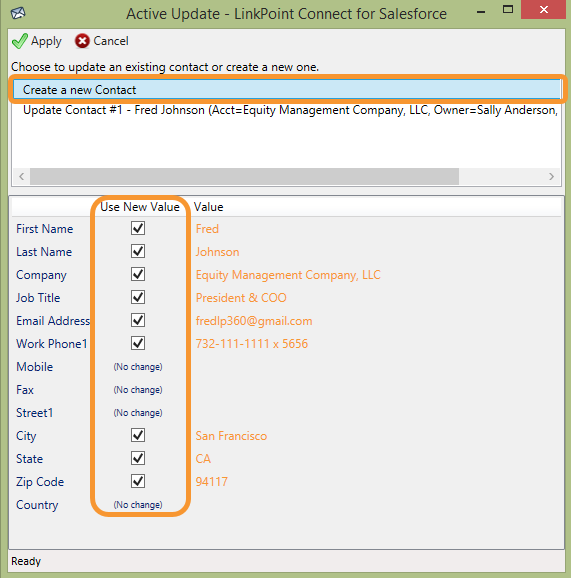
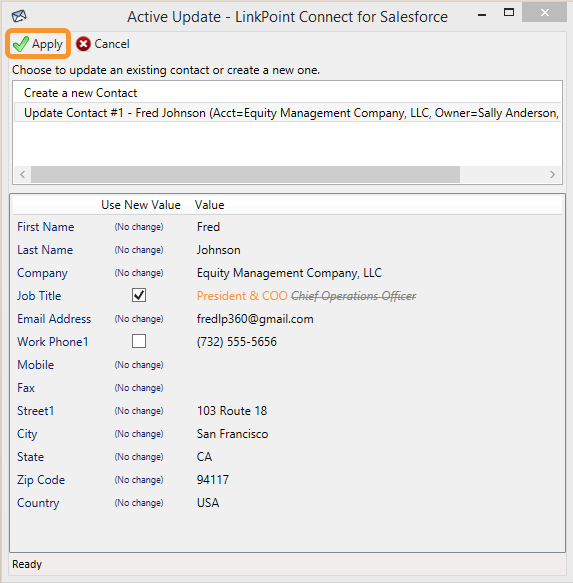
Select Create a new Contact to create a new Salesforce record. Confirm the information to include in the new Contact record by selecting or deselecting the checkboxes for each information field.

Active_Update_olsf_4a


Step_4b Select a Contact to update from the list. Select a checkbox for a field to overwrite the existing Salesforce record with the new information for that field. Deselect a checkbox to keep the existing value in Salesforce.

Active_Update_olsf_4b


Tip_Web Tip: Active Update will display the Contact record fields on the left and the existing field values as they appear currently in Salesforce on the right. The middle column shows you whether or not the information from the email signature is new. If the information for a field has not changed, it will display (No change). If the details in the email signature are different than the information in Salesforce, the existing Salesforce data will appear in grey, italics, and strikethrough. The new value will be displayed in orange. If you deselect the checkbox, the original data from Salesforce will be displayed.


Example_Web Example: In this example, we have identified an existing Salesforce record that requires an update. Only two fields are different between the record for Fred Johnson in Salesforce and the new email signature for Fred Johnson.

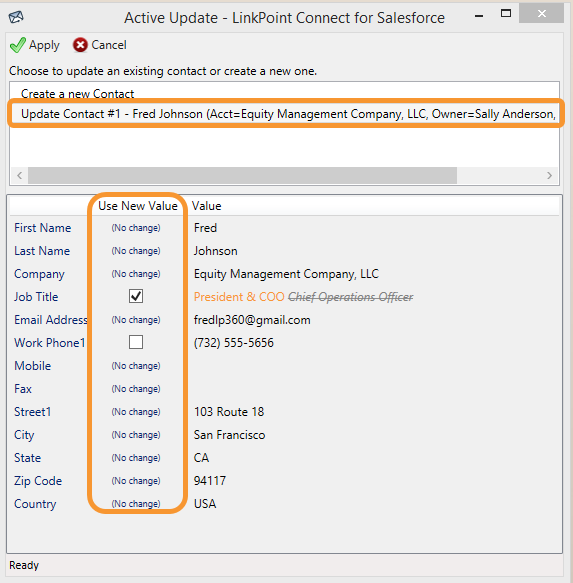
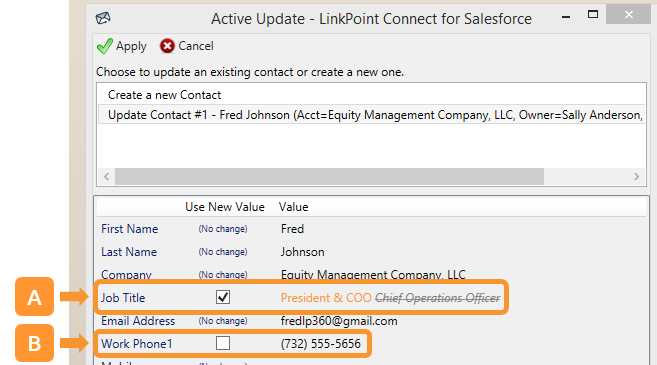
A. For Job Title, we have selected the checkbox to Use New Value. We know that Fred Johnson has a new title and want to use the new information. The old information appears crossed out, so we know what will be replaced.

B. For Work Phone 1, we have deselected the checkbox to Use New Value. While Fred listed a new phone number in his email signature, we know that the number we already have on his Salesforce record is the best number to reach him with. The old information appears with no changes and will not be overwritten after we apply the updates.

Active_Update_olsf_4b_Example


Step_5

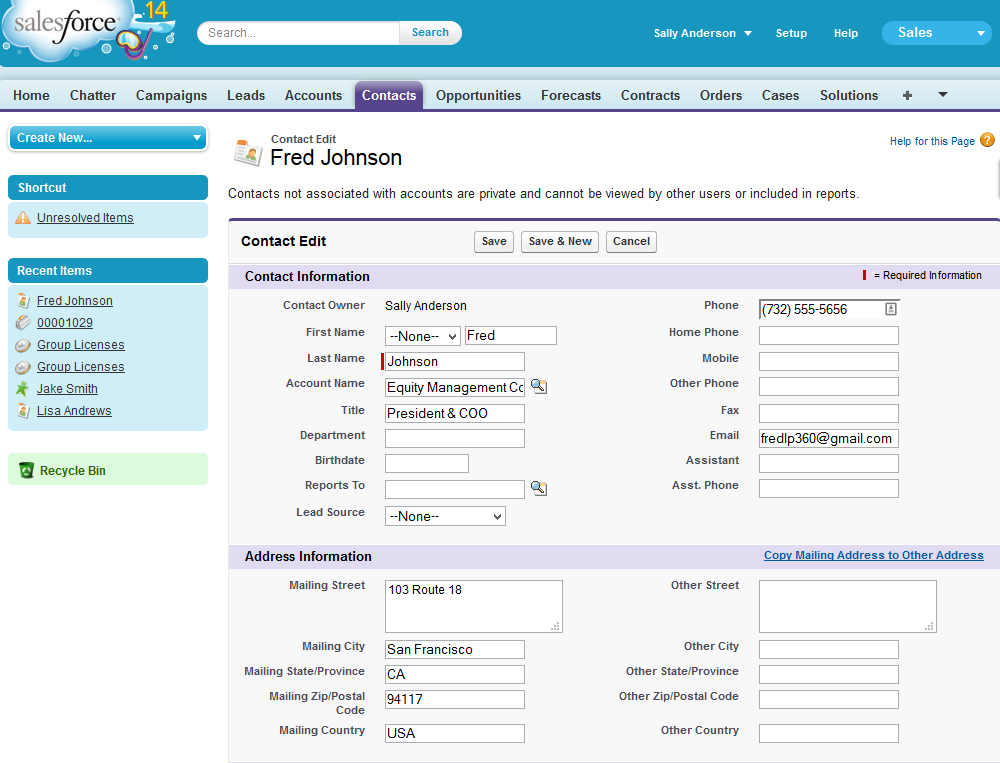
Click Apply to finalize the selection. This will launch Salesforce in the Internet browser.

Active_Update_olsf_5


Review the contact information within Salesforce and save the changes.

Active_Update_olsf_6


Step_7 Return to IBM Notes and select the email from the contact. Note that the LinkPoint Connect Side Panel now displays the updated contact information from Salesforce.

Active_Update_lnsf_7


Download_WebDownload: Access the complete LinkPoint Connect: IBM Notes + Salesforce User Guide in .pdf format. Get the User Guide


Support_Web Still need help? Contact our Support Team.