
Create accounts, contacts, and leads in Salesforce with minimal manual data entry. With email signatures and SnapForms, Salesforce records can be created with just a few clicks from Outlook. Drag and drop functionality works the same for all available record types. Users will have access to create new records based on Salesforce permissions.

Click the images throughout the Knowledge Base to see full size versions of screen captures.
Drag and Drop to Create Salesforce Records

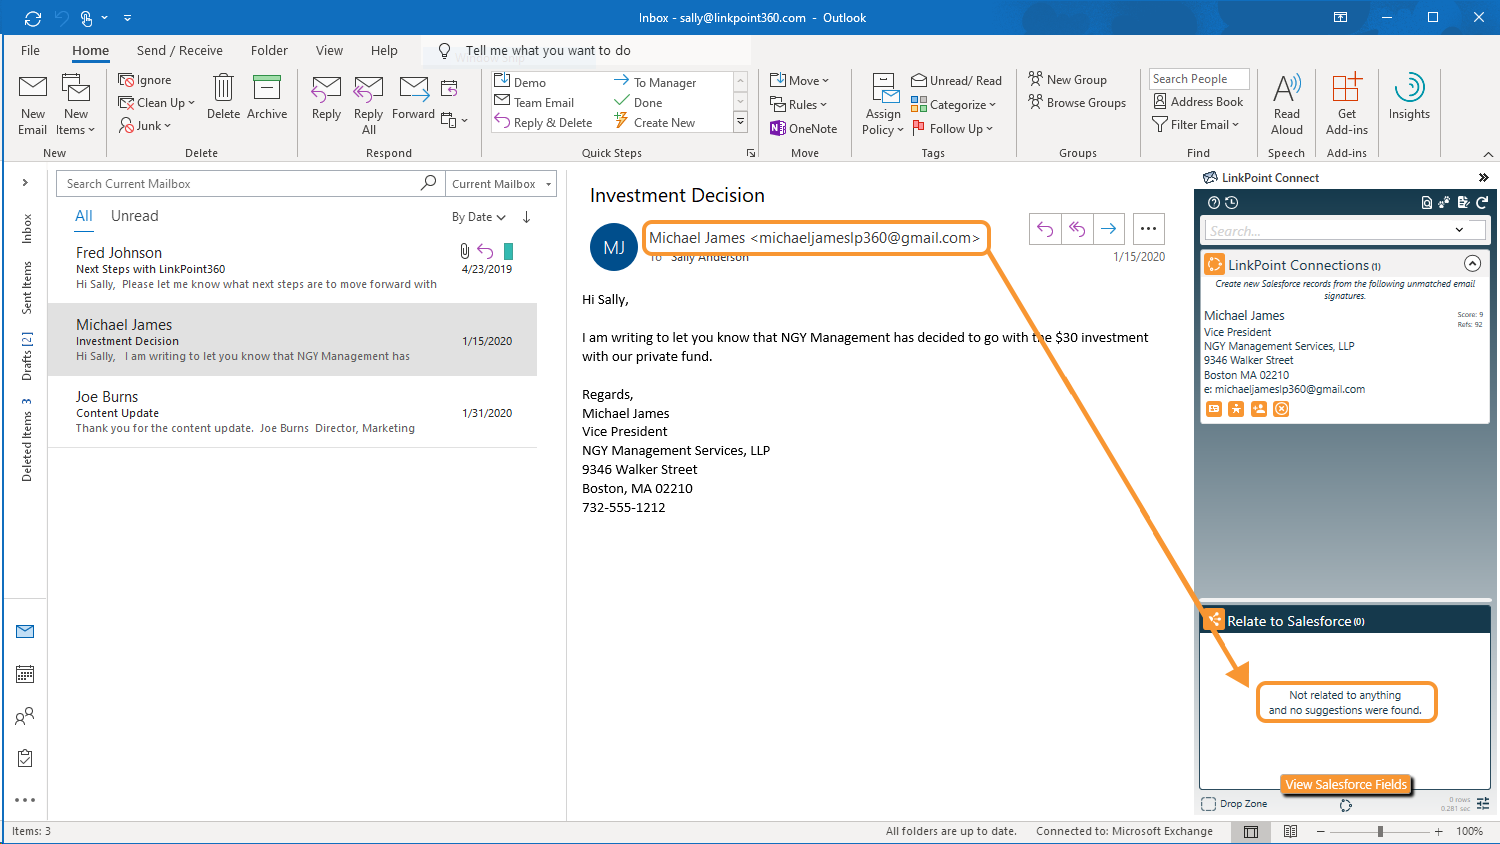
Select an email from a new email address. Note that the Side Panel searched Salesforce and did not find a record matching the email address.

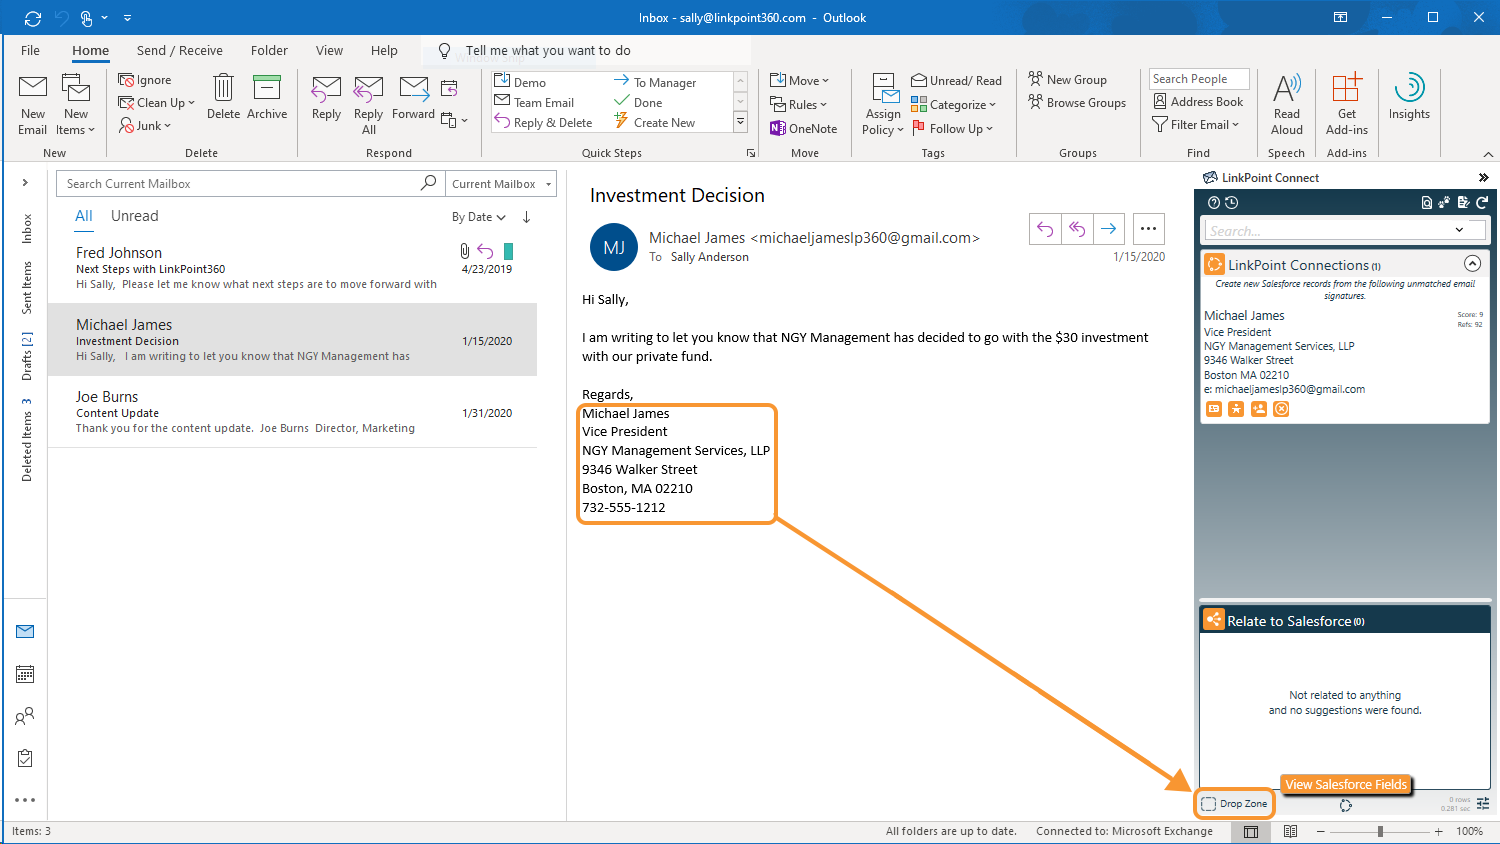
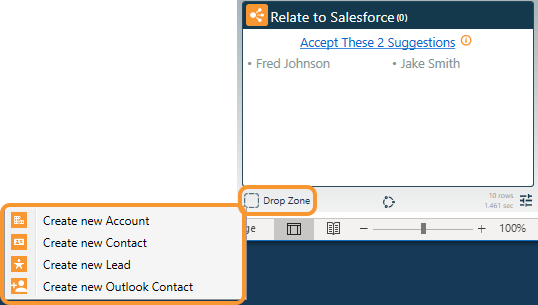
Highlight the signature in the email. Drag the highlighted signature to the Drop Zone at the bottom of the Side Panel and release the selection over the icon.


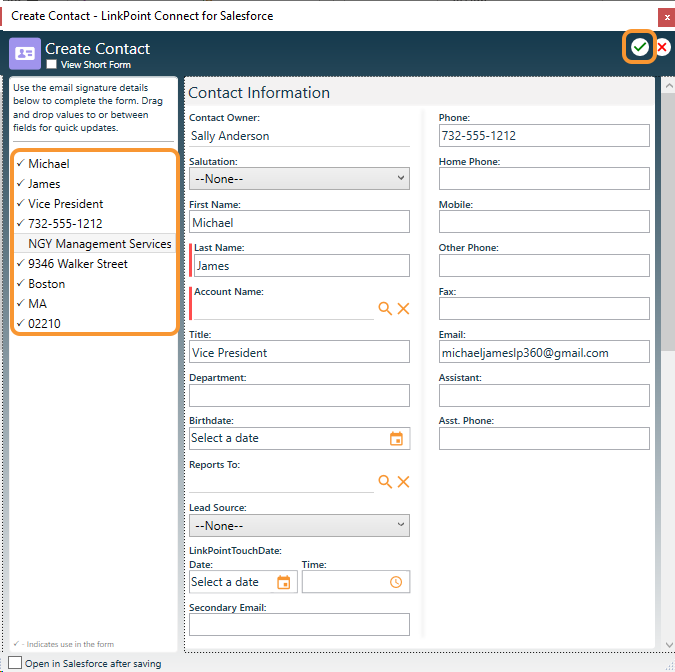
Enter any required or additional information in the SnapForm. Note that some fields are prepopulated based on the email signature. You can drag and drop values between fields on the form and from the Email Signature Field list on the left side of the form to make changes. Click the green checkmark to create the record in Salesforce.

![]() Download: Access the complete LinkPoint Connect User Guide in .pdf format. Get the User Guide
Download: Access the complete LinkPoint Connect User Guide in .pdf format. Get the User Guide
