
Update existing accounts, contacts, and leads in Salesforce with minimal manual data entry. Users can identify field-level data differences and make updates using email signatures with Active Update for SnapForms. Changes are saved to Salesforce but made from Outlook. Active Update also works as a duplicate checker, identifying matching records and prompting users to either create a new record or update an existing record. Active Update functionality works the same for all available record types.

Click the images throughout the Knowledge Base to see full size versions of screen captures.
Drag and Drop to Update Salesforce Records

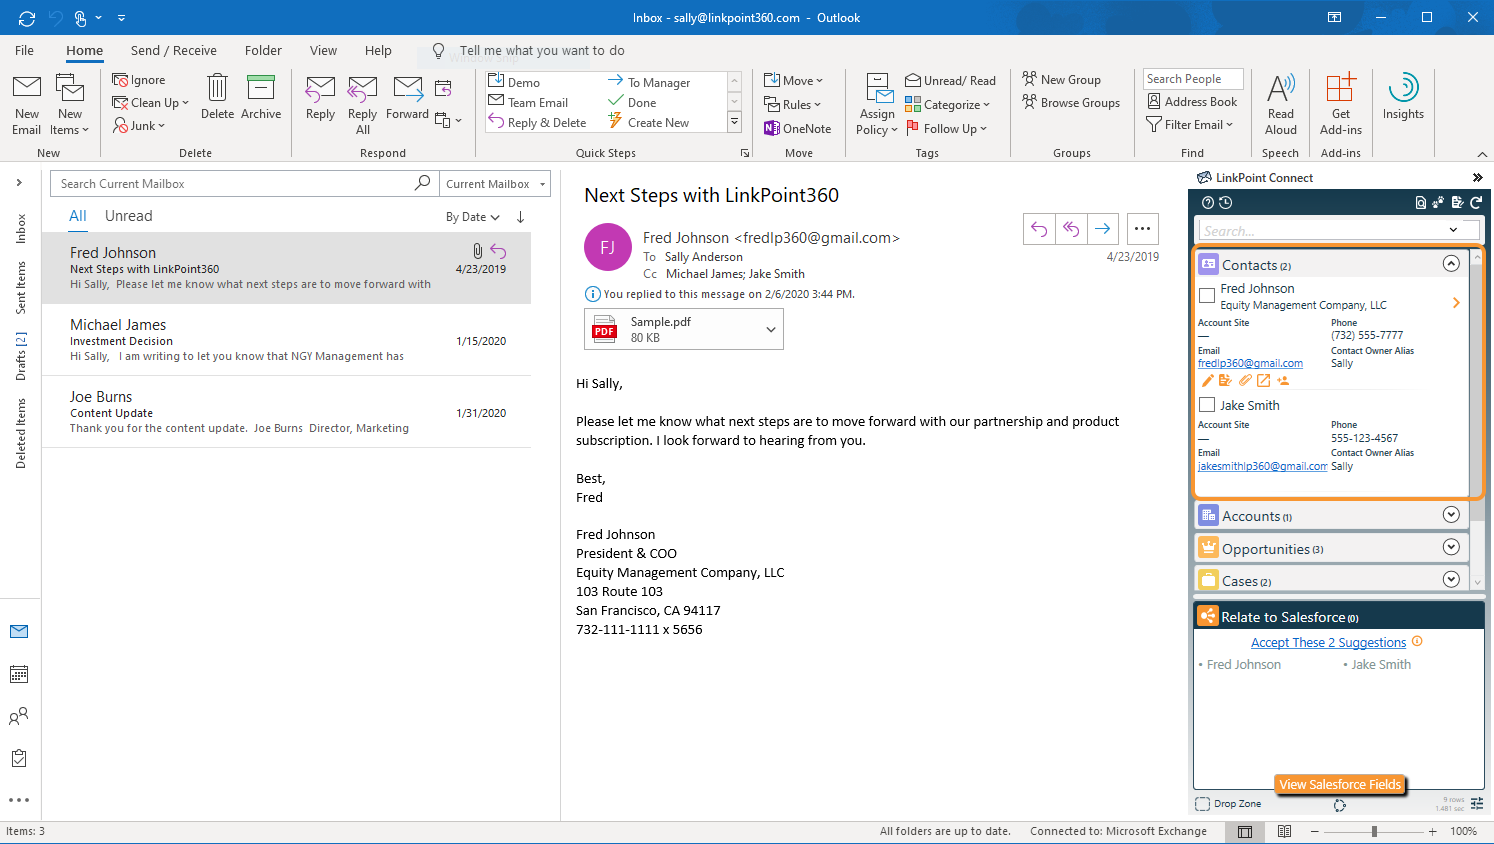
Select an email from an existing contact or lead. Note that the Side Panel returns Search Results based on the sender and/or recipient email addresses and the related Salesforce records.

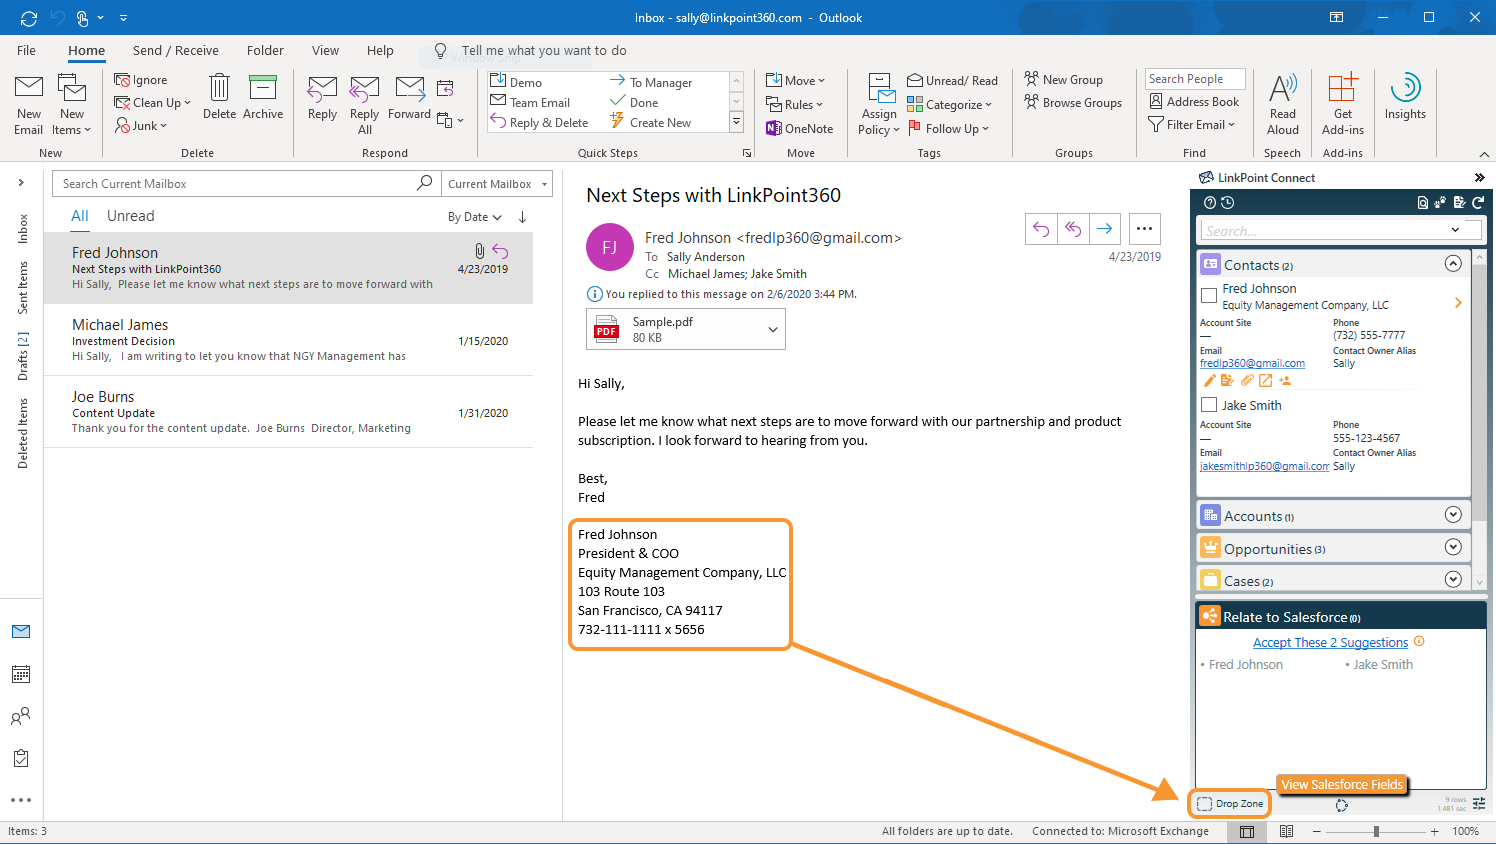
Highlight the signature in the email. Drag the highlighted signature to the Drop Zone at the bottom of the Side Panel and release the selection over the icon.

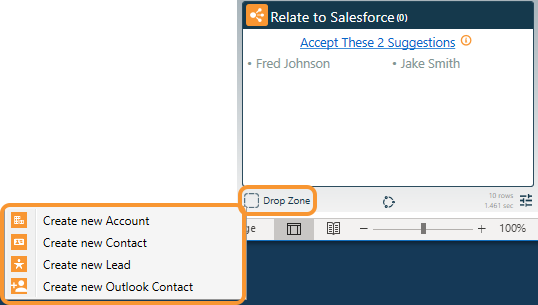
Select the record to update from the available list.

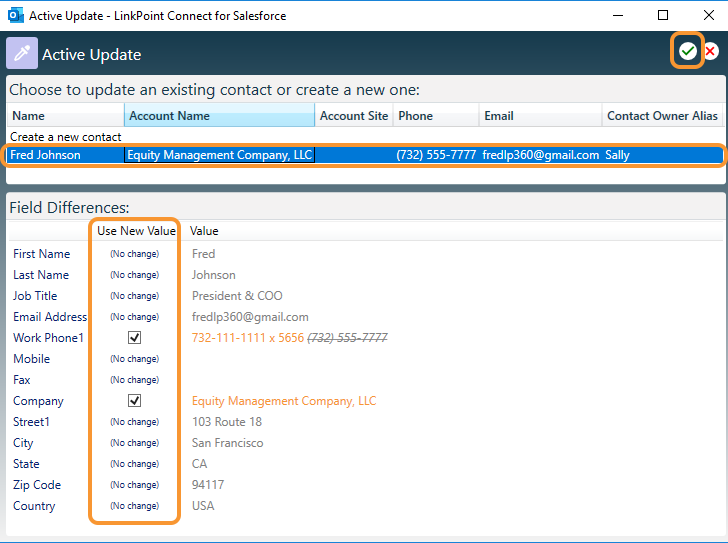
Review the information in the Active Update window. LinkPoint Connect will search Salesforce, identify matching records, and list the records in the top portion of the window. Users can review limited details to identify the correct existing record before making any changes.
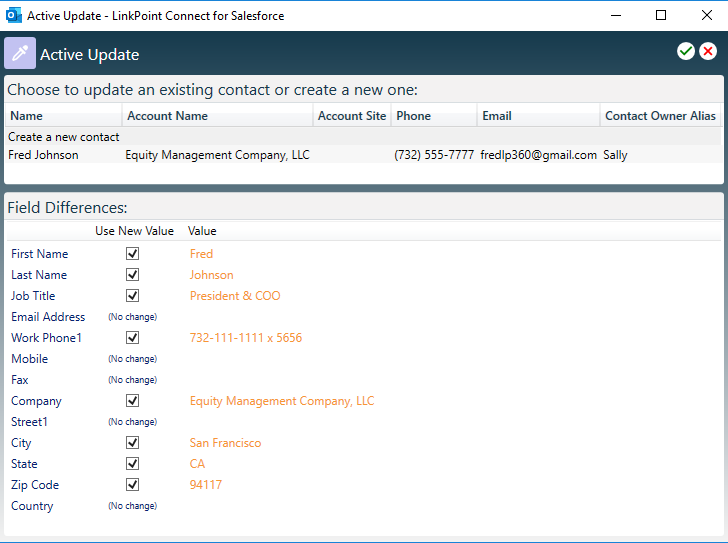


Select a Contact to update from the list. Select a checkbox for a field to overwrite the existing Salesforce record with the new information for that field. Deselect a checkbox to keep the existing value in Salesforce. Click the green checkmark to proceed.

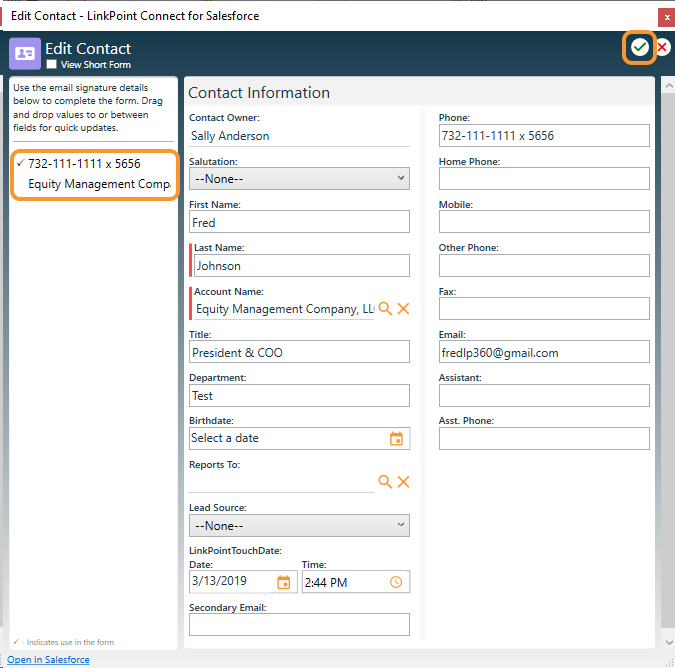
Enter any required information in the SnapForm. Note that fields have been updated based on the selections in the Active Update window. You can drag and drop values between fields on the form and from the Email Signature Field list on the left side of the form to make changes. Click the green checkmark to update the record in Salesforce.
![]() Download: Access the complete LinkPoint Connect User Guide in .pdf format. Get the User Guide
Download: Access the complete LinkPoint Connect User Guide in .pdf format. Get the User Guide
