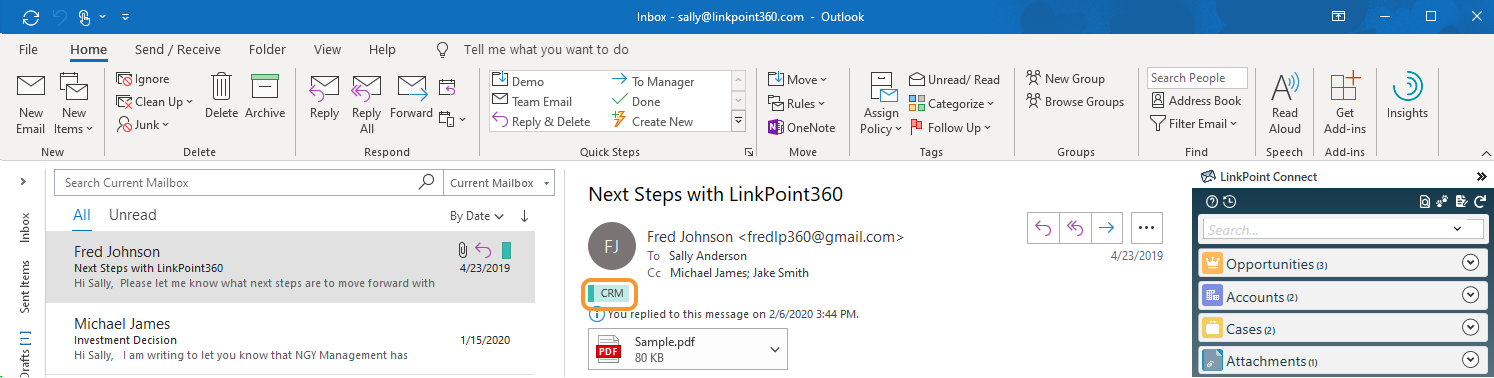
Record emails to Salesforce directly from the Side Panel in Outlook. The process is the same for inbound and outbound emails.
Additional Resources: Users can adjust the display and search settings in the Side Panel. Refer to the Edit Preferences section of this User Guide for more information.
Warning: Large emails with more than 32,000 characters in the body will record to Salesforce. However, the additional text will not be recorded because Salesforce limits the “Comments” field for tasks to 32,000 characters.
Tip: Organizations with the Salesforce Enhanced Email Object can record emails to this object rather than as completed Tasks in the record Activity History. This feature is off by default and can be enabled on request by LinkPoint360 Professional Services.
Click the images throughout the Knowledge Base to see full size versions of screen captures.
Record an Email to Salesforce
Select or compose an email. Note that the Side Panel returns Search Results based on the sender and/or recipient email address(es) and the related Salesforce records.
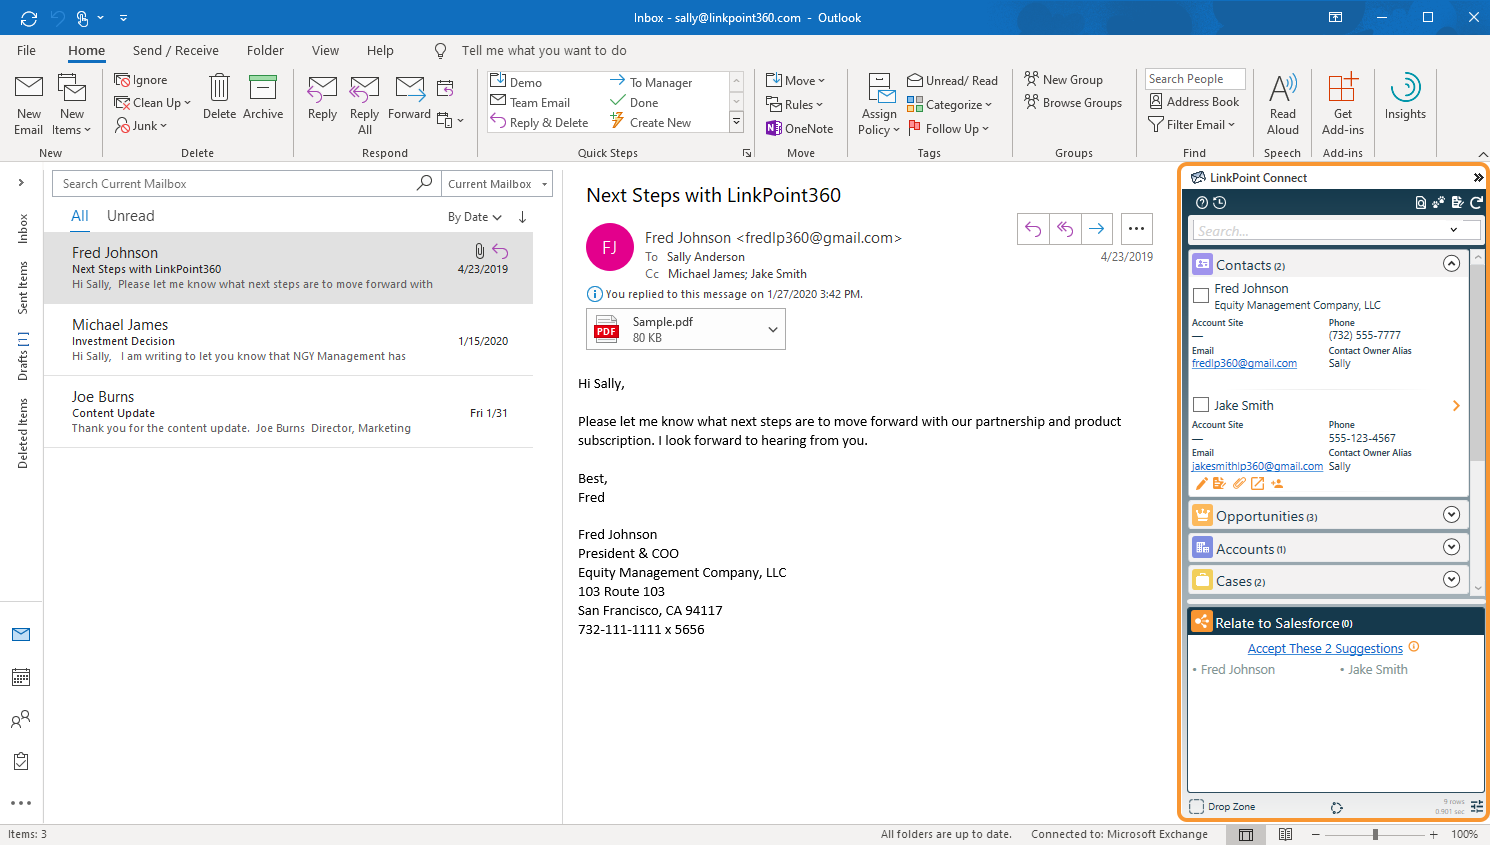
Select the option to Accept This/These Suggestions in the Relate to Salesforce section to record the email to all of the listed suggested records.
Tip: LinkPoint Connect automatically suggests contacts and/or leads in Salesforce if they are included in the To, From, Cc, or Bcc fields of the email. If there are no matching contacts or leads in Salesforce, the Relate to Salesforce section will not display any suggestions.
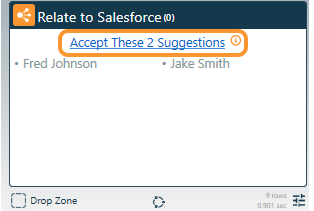
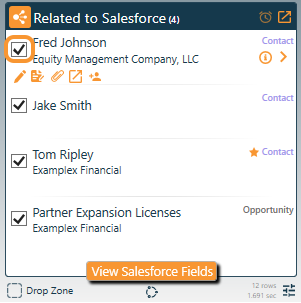
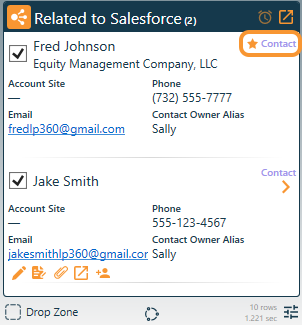
Select the Relate to Salesforce checkbox next to records in the Search Results to record the email to the selected record.
Warning: Salesforce does not allow users to take action on Contacts and Leads at the same time. Try selecting only Contacts or only Leads and record the email.
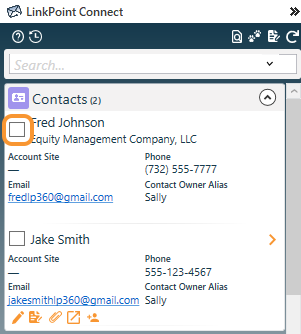
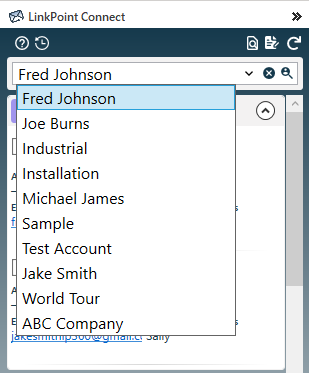
Enter text in the Search field, and press Enter or click the Search icon to search for additional records.
Tip: The Side Panel Search Bar will retain the last 10 terms entered for faster search access. Users can click the v icon in the Search Bar to select a previous search term. On most versions of Outlook, users can also call up the search history list by clicking within the Search Bar and then using the ctrl and down arrow keys on the keyboard simultaneously.
Deselect the Relate to Salesforce checkbox to disassociate the email from a selected record. Unchecking all of the selections will remove the email from Salesforce.
Tip: An Outlook Category of CRM will be assigned automatically to the email after it has been recorded to Salesforce, providing a visual indicator of recorded emails in Outlook.
Tip: Some SnapShots in the Side Panel may not include a checkbox to relate the item to a Salesforce record. The option to Relate to Salesforce only appears when working with a supported Outlook item (i.e. email, calendar event, or task). The checkbox will not appear if the record does not include Activity History in Salesforce.
Additional Resources: SnapShots provide an overview of Salesforce records in the Side Panel. Refer to the View Salesforce Data in Outlook section of this User Guide for more information.
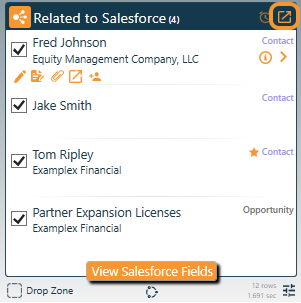
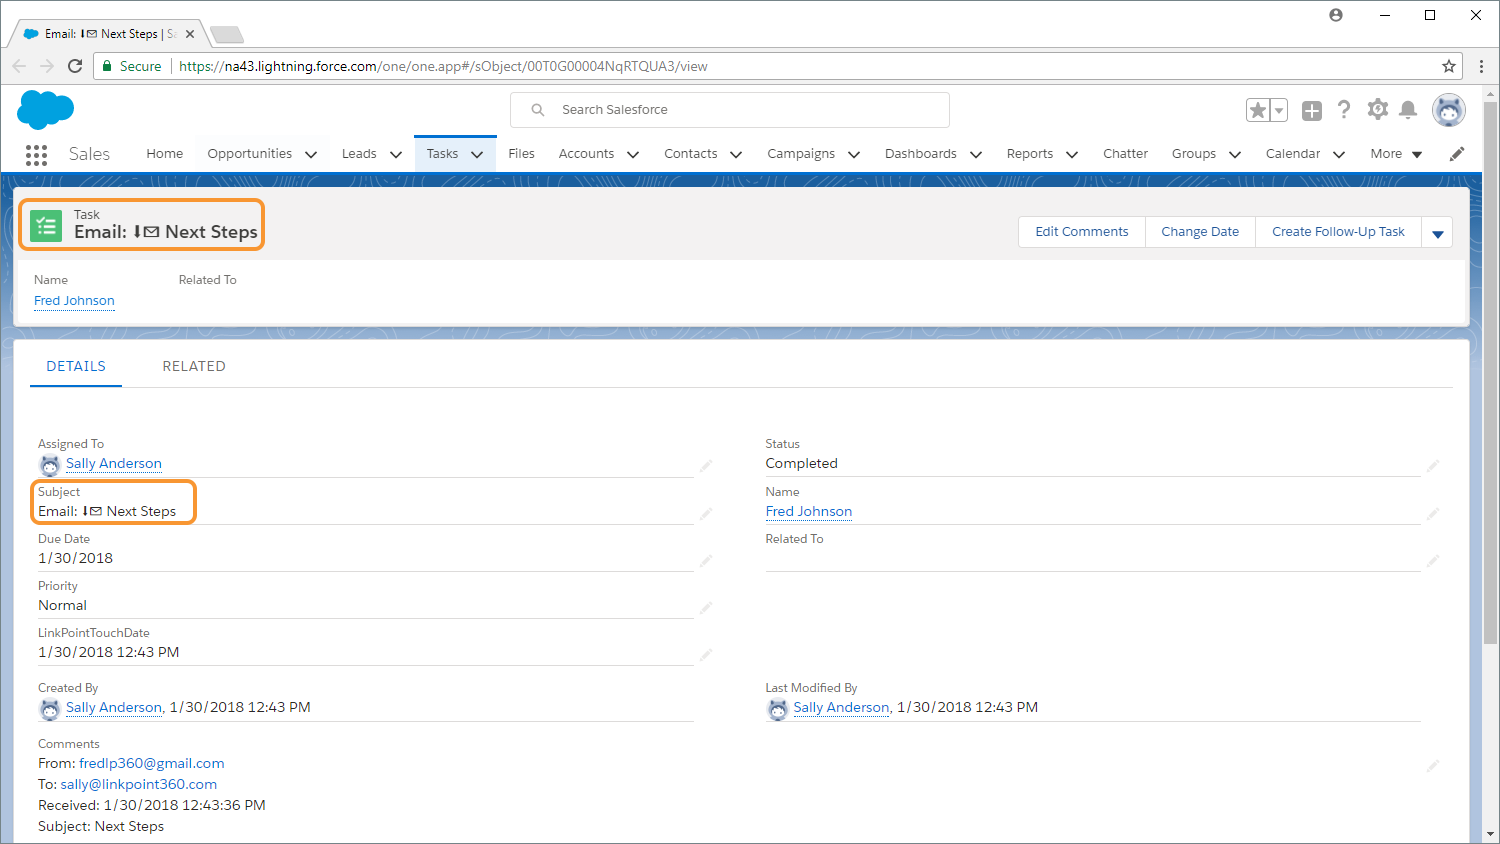
Tip: To view the recorded email, click the Open Record icon in the Related to Salesforce header. This will open the email as a completed task in Salesforce in a web browser.
Tip: Recorded emails will include an indicator icon in the Subject Line in the Activity History in Salesforce. The ⬇✉ (inbound) and ✉⬆ (outbound) indicators are automatically applied as part of the recording process and show whether an item was sent or received.
Change the Primary Contact for the recorded email if selecting multiple Contact records in the Side Panel. Note that the first Contact selected is automatically designated as the Primary Contact and is indicated with a solid orange star icon. Click the outline star for another selected Contacts in the Related to Salesforce list to change the Primary Contact.
Tip: Primary Contact selection is only supported for Salesforce orgs where the option to “Allow Users to Relate Multiple Contacts to Tasks and Events” is enabled. Primary Contact designation allows users to choose the best Contact to align a recorded item with in Salesforce when the item is related to multiple records. This enhances reporting metrics and ensures that data is allocated with accuracy for orgs with the “relate multiple contacts” setting enabled. Follow up Tasks and Events created from recorded emails automatically associate to the selected Primary Contact.
Send the email to record it to the selected Salesforce records. Inbound emails will be recorded in real time when Relate to Salesforce selections are made.
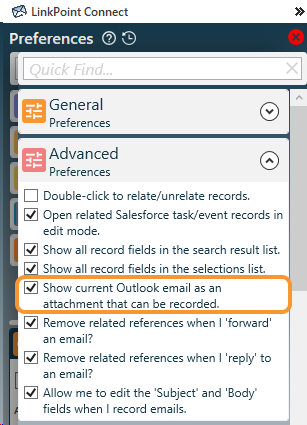
Tip: Users can record emails as attachments in Salesforce, rather than as completed Tasks in the record Activity History. This option is disabled by default.
Users can enable the option to “Show the current Outlook email as an attachment that can be recorded” within the Advanced Preferences section of the Preferences Pane. Users can select the email within the Attachment section of the Side Panel to record it as an Attachment to the selected records in the Related to Salesforce list. Note that if the HTML and Plain Text versions of the email exceed the size limits in place within Salesforce, LinkPoint Connect will record the email as truncated Plain Text only. If only the HTML version exceeds the size limit in Salesforce, the message content will be recorded as Plain Text only.
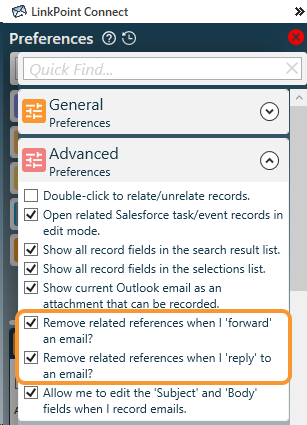
Tip: Users can configure settings within the Advanced Preferences section of the Preferences Pane to force outbound emails to inherit the related to selections of previously recorded inbound emails. Separate settings are available for forwarded emails and for replies. The settings are labeled as “Remove related references when I ‘forward’ an email?” and “Remove related references when I ‘reply’ to an email?”. These options are enabled by default. Users can change the inherited related to selections prior to sending and recording the email to Salesforce.
Download: Access the complete LinkPoint Connect User Guide in .pdf format. Get the User Guide