The LinkPoint Connect Side Panel enables users to view Salesforce data within Microsoft Outlook. In this section, you will learn about the different information that is accessible within the Side Panel and how to interact with the data.
Click the images throughout the Knowledge Base to see full size versions of screen captures.
Viewing Salesforce Data in Microsoft Outlook
Open Microsoft Outlook. The LinkPoint Connect Side Panel will automatically display by default. Click on an email, and the Side Panel will populate with data related to the selected email if the email address exists within Salesforce for a Contact or Lead.
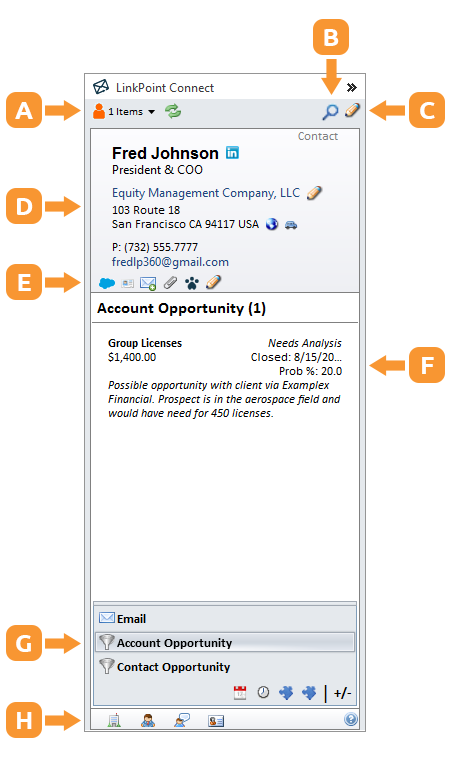
Explore the sections of the LinkPoint Connect Side Panel.
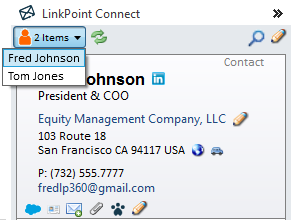
Contact List: All Contacts included in the To, From, Cc, and Bcc fields for the selected email are listed. Select one from the list to view the Salesforce information for that record within the Side Panel.
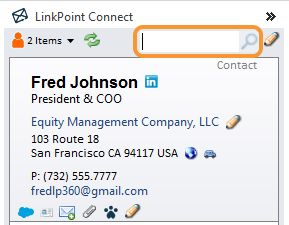
Search: Click the Search icon, type the name of any Salesforce Contact, and press Enter to view the Salesforce information for that record within the Side Panel.
Tip: If you are looking for a Salesforce Contact but cannot remember the name, try searching for the Account or Opportunity. The Side Panel will return all of the matching Contacts from the search results under the Contact List.
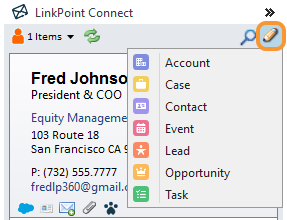
Smart Forms: Create a new Salesforce record from within Outlook. Choose the record you want to create and then complete the form provided.
Additional Resources: Refer to the Creating and Updating Salesforce Records with Smart Forms section of this User Guide for more information.
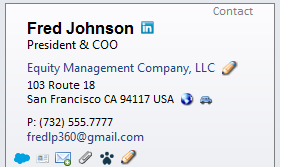
Business Card: View basic information related to the Contact such as Name, Job Title, Company, Phone Number, and Email Address.
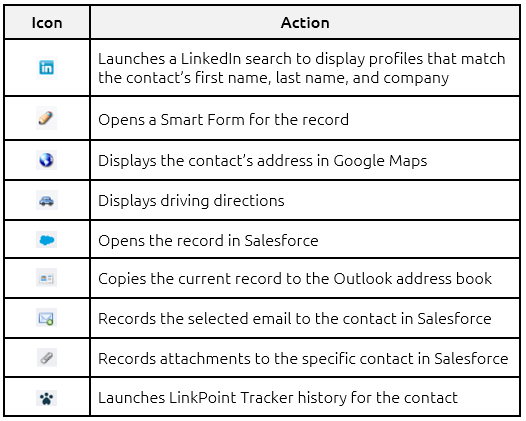
Shortcut Icons: Choose how to act on the data presented in the Side Panel using shortcut icons.
Tip: You can drag and drop attachments from your email or anywhere on your desktop and release the file on the Attachments icon to record the attachment. If you release the attachment over the Attachments icon on the Business Card, the attachment will be recorded to the Contact or Lead record. If you release the attachment over the Attachments icon on an Opportunity or Case record, the attachment will be recorded to the corresponding record in Salesforce.
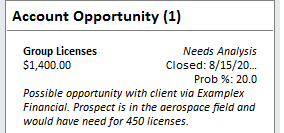
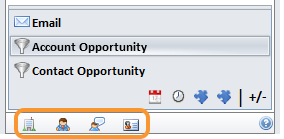
Related Information: Review data from Salesforce that relates to the selected Lead or Contact. View emails, Accounts, Opportunities, Cases, and custom objects by selecting items in the Navigation Pane.
Navigation Pane: Select the Related Information to display for a specific Lead or Contact.
Drop Zone: Create new Accounts, Contacts, or Leads by highlighting an email signature, clicking the selection, and then dragging and dropping the content on one of the icons in the Drop Zone.
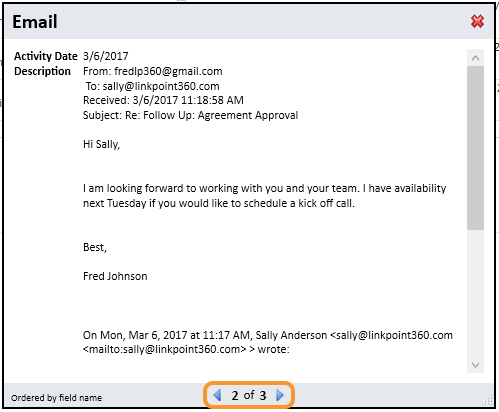
Double click on items listed within the Related Information section of the Side Panel to preview the Salesforce content within Outlook. Click the arrows to move between Salesforce items
Download: Access the complete LinkPoint Connect: Outlook + Salesforce User Guide in .pdf format. Get the User Guide