
Configure the Side Panel to display information relevant to user workflow. The Side Panel presents related records based on sender and/or recipient email addresses. Users can create or edit data, record emails, view record details, and take additional action on Salesforce records from the Side Panel. Data is presented for SnapShots, Search Results, and SnapForms based on a number of default settings. In some cases, display and search options can be modified by users or Salesforce admins.
Additional Resources: Users can further refine the Salesforce objects and fields included throughout the Side Panel in the Preferences Pane. Refer to the Edit Preferences section of this User Guide for more information.

Click the images throughout the Knowledge Base to see full size versions of screen captures.
Configure Display and Search Settings
Object Arrangement
Objects can be arranged in the Side Panel to reflect a user’s preferred order. Click and hold down any object group. Drag and drop the object group to the desired position in the Side Panel. Note that object groups appear relative to the displayed Search Results. Subsequent Search Results presenting a different combination of objects may or may not continue to reflect the placement changes.

Example: A user reviews Search Results containing Cases, Contacts, and Opportunities. The user moves Opportunities to the top of the list. In a later search, Accounts are included and appear at the top of the Side Panel. The user would need to move Opportunities above Accounts to adjust the placement based on the current Search Results.
Click the Expand icon to view all SnapShots for an object in the Search Results. Click the Collapse icon to minimize the results for the object.
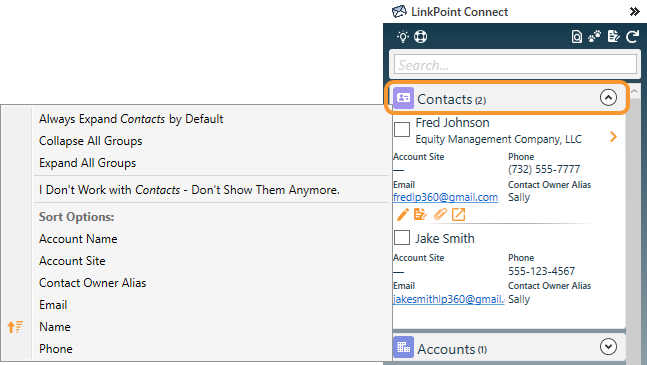
Right click any object group in the Search Results to choose from a menu of display options. These options allow users to set new default behavior for viewing records including Search Results sort order.
Search Results
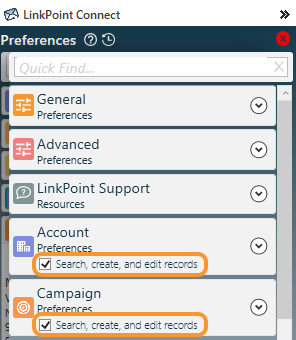
Side Panel search functionality includes robust record lookup based on object and record names as well as field-level data in Salesforce. Objects are displayed in the Search Results as an option to record emails to if they include the Activity History related list in Salesforce. Objects that do not include Activity History may still be visible in the Record Details pane to show relevant related list data. Users can exclude or include Salesforce objects in the Search Results. Click the Preferences icon in the Side Panel and locate an object in the list. Enable or disable the checkbox to Search, create, and edit records as needed.
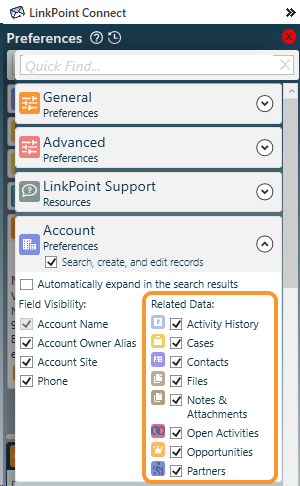
When viewing Record Details, all related lists for the record are displayed in the Side Panel. Users can exclude or include these related lists in the Record Details Search Results. Click the Preferences icon in the Side Panel and locate an object in the list. Click the Expand icon. Enable or disable the related list(s) using the Related Data checkbox(es).
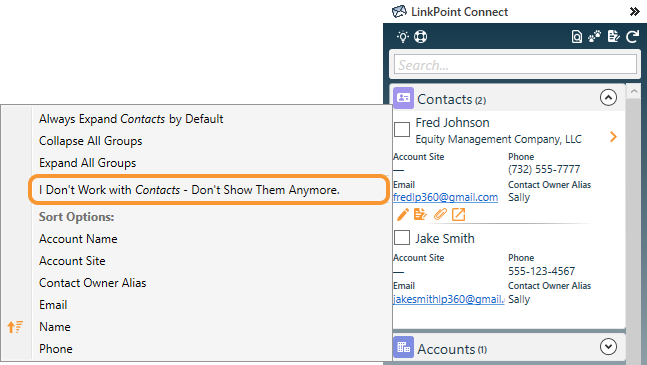
Users can completely exclude an object from all Search Results including the Record Details pane. Right click the object name in the Search Results. Select the option to I Don’t Work with [Object Name] – Don’t Show Them Anymore.
SnapShots
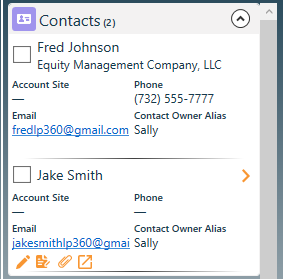
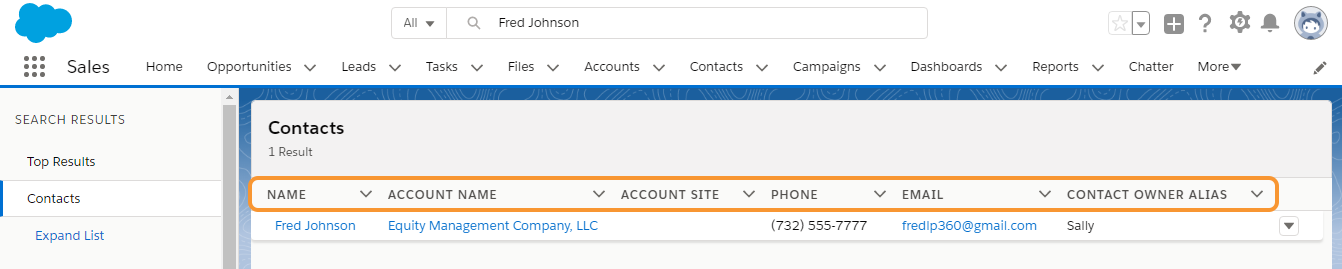
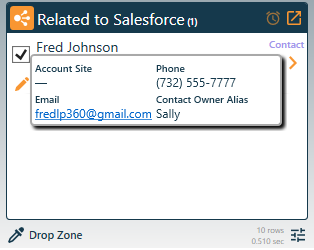
SnapShots display high-level Salesforce details for records throughout the Side Panel. In the Search Results, the SnapShot will show to up 10 fields. This display is unique to each customer’s Salesforce configuration and is driven by the search page layout for the object. These are automatically detected and refreshed once daily by LinkPoint Connect. Customers who wish to change the fields or arrangement of fields in the SnapShot will require a Salesforce admin to update the search page layout for the object(s).
For example, contact records will show the fields and values that match the contact search screen in Salesforce.
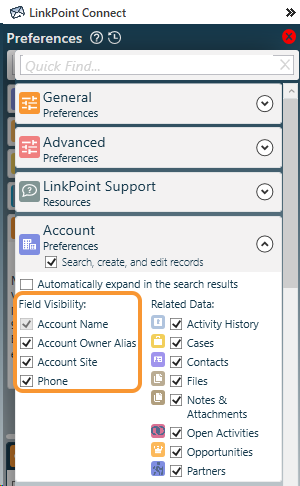
Users can display or hide discovered Salesforce fields in a SnapShot with different settings for each object. Click the Preferences icon in the Side Panel and locate an object in the list. Click the Expand icon to view all of the available fields for the object SnapShot. Enable or disable the fields using the Field Visibility checkbox(es).
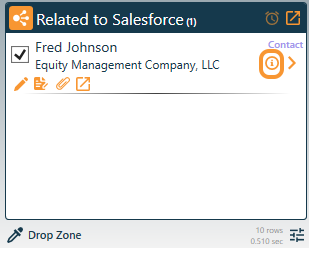
SnapShots are available in the Related To Salesforce section of the Side Panel in a Compact view. Mouse over the info icon to view content.
SnapForms
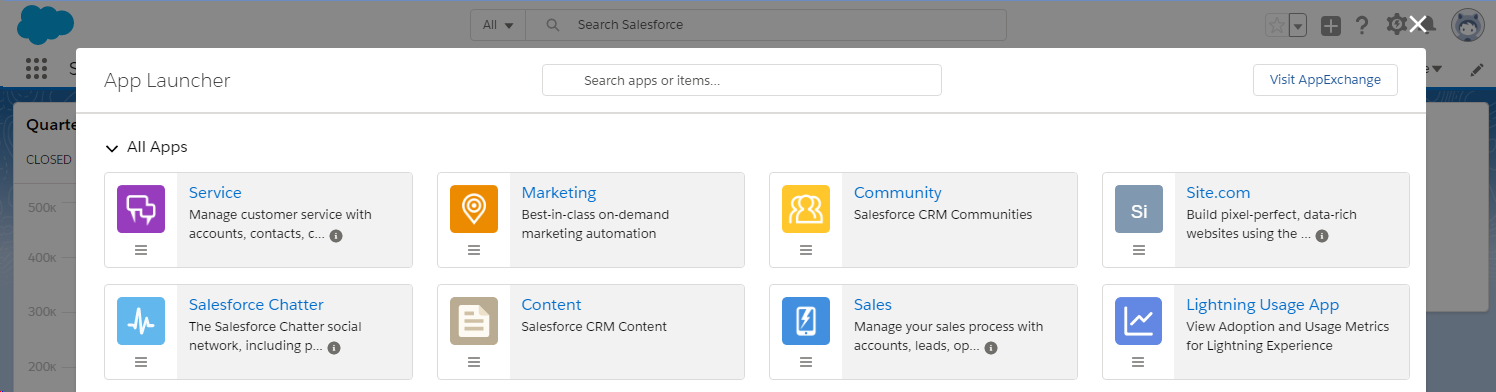
SnapForms provide Salesforce record creation and editing functionality in Outlook. SnapForms are unique to each customer’s Salesforce configuration and follow each user’s individual Salesforce permissions for creating and editing records. Available SnapForms are automatically detected and refreshed once daily by LinkPoint Connect. Objects are available in the Side Panel if they are included as tabs in the user’s Salesforce instance in any Salesforce App the user has access to. The task and event objects are included by default for all users.

The complete list of available objects for SnapForms is listed in the Preferences Pane in the Side Panel for each user. Objects are enabled as SnapForms in the Create New Records menus if the user has access to and has also actively engaged with the object in Salesforce. Objects can be enabled for SnapForm usage. Click the Preferences icon in the Side Panel and locate an object in the list. Enable or disable the checkbox to Search, create, and edit records as needed. Note that disabling an object will also remove its records from the Search Results.
SnapForm fields are driven by the object page layout in Salesforce. These are automatically detected and refreshed once daily by LinkPoint Connect. Record types are supported, where applicable. All required fields are presented with an indicator. All fields types, including dependent fields and picklists, are supported by default with the exception of formula fields, geolocation fields, and fields driven by external data in third-party applications. SnapForm field layout will reflect the order, groupings, labels, and tool tips as they are displayed in Salesforce. Customers who wish to change the fields or the arrangement of fields in the SnapForm will require a Salesforce admin to update the page layout for the object(s) in Salesforce.
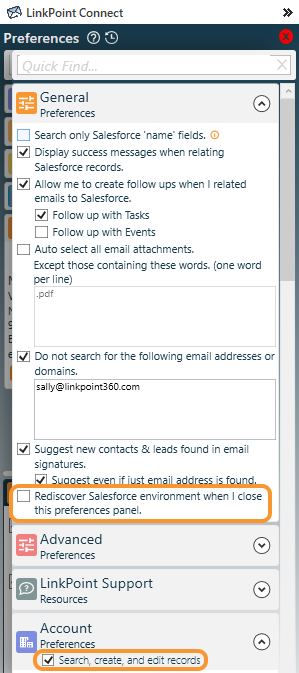
SnapForms are updated once every 24 hours automatically by LinkPoint Connect if there are changes to the object(s) or field(s) in Salesforce. Users can individually force a rediscovery for SnapForms. Click the Preferences icon in the Side Panel and expand the option for General Preferences. Select the checkbox for Rediscover Salesforce environment when I close this preferences panel. Users will need to enable the new object(s) to be searchable and useable as SnapForms. These objects will be listed in the Preferences Pane for the user to select the option to Search, create, and edit records as needed.
All Salesforce object names, fields, labels, validation messages, and tooltips will be displayed in the user’s language as configured in Salesforce. LinkPoint Connect labels and settings such as window titles, preferences settings, Tracker details, and help documentation are currently presented in English only.
![]() Download: Access the complete LinkPoint Connect User Guide in .pdf format. Get the User Guide
Download: Access the complete LinkPoint Connect User Guide in .pdf format. Get the User Guide
