Configuring Contact Sync Jobs (Exchange + Salesforce)
Cloud Edition includes a variety of flexible synchronization settings for managing the flow of data between Microsoft Exchange and Salesforce. Before enabling Contact Sync, it is important for users to become familiar with the available Cloud Edition sync settings. The synchronization of emails, calendars, contacts, and tasks works similarly but can be managed separately based on user preference. In this section, you will learn how to access and alter the Contact Sync settings available with Cloud Edition.
Tip: Cloud Edition Admins have the ability to set default sync settings and/or lock down these settings to prevent end user override. Your instance of Cloud Edition may not allow you to change any/all of the settings described in this section, depending on how your Admin has configured your access. Settings that are preset and locked by an Admin are visible to end users but are grayed out and cannot be edited.
Click the images throughout the Knowledge Base to see full size versions of screen captures.
Configuring Contact Sync Jobs
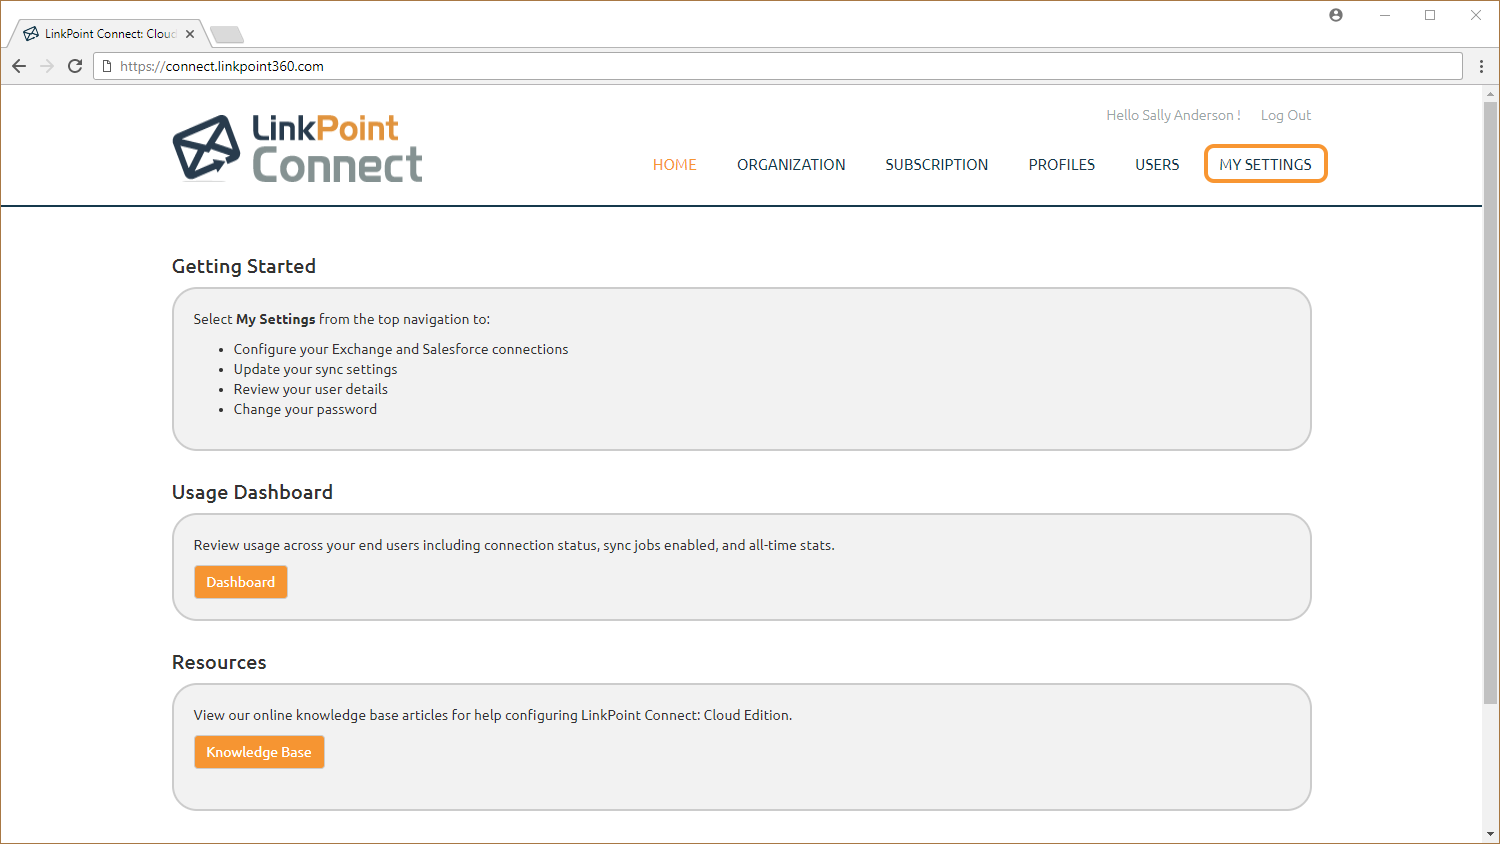
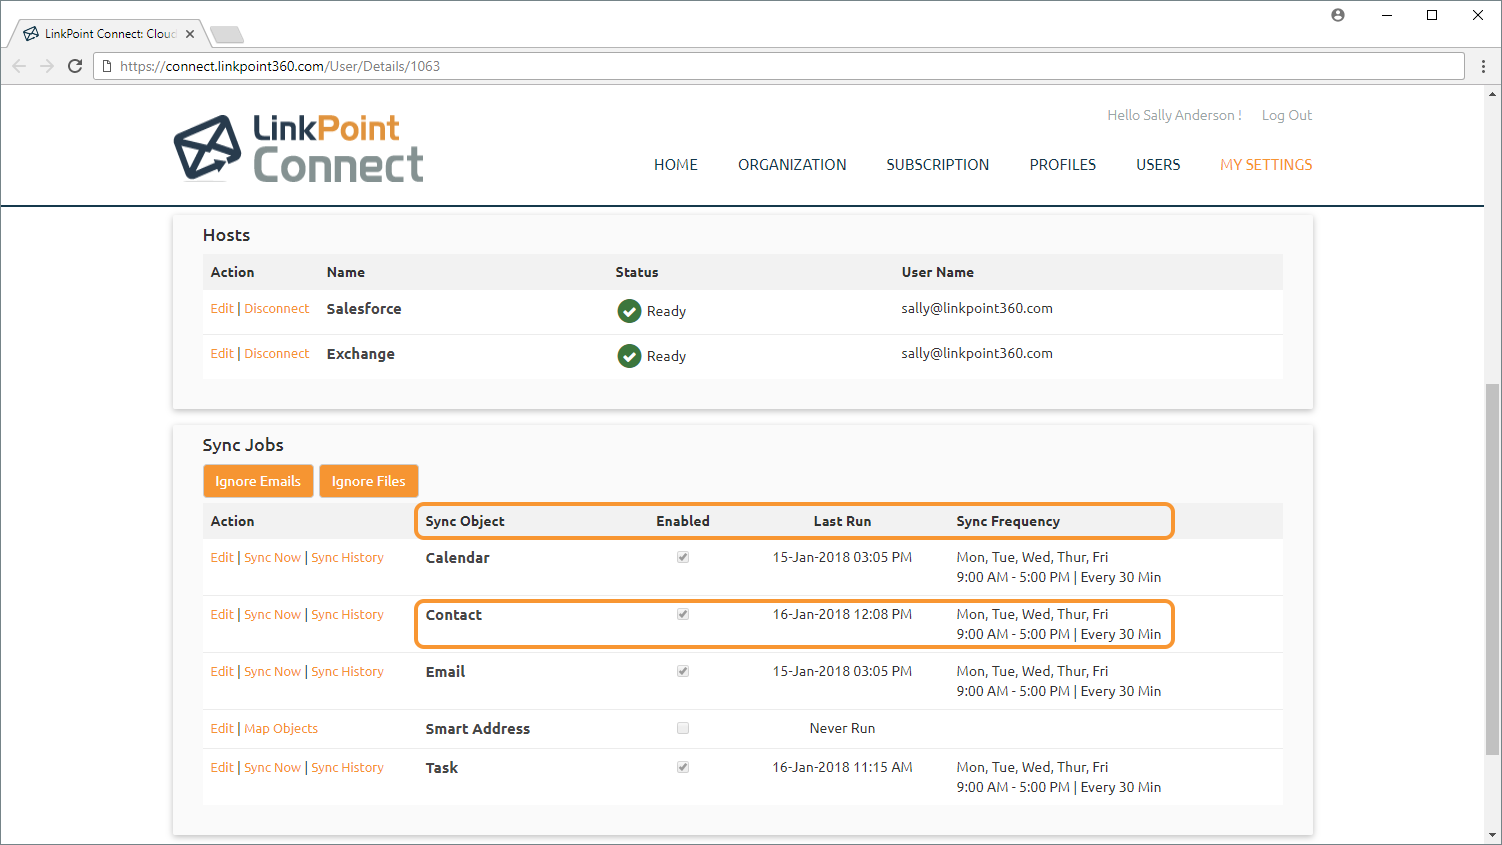
Log in to Cloud Edition, and select My Settings in the top right corner of the screen.
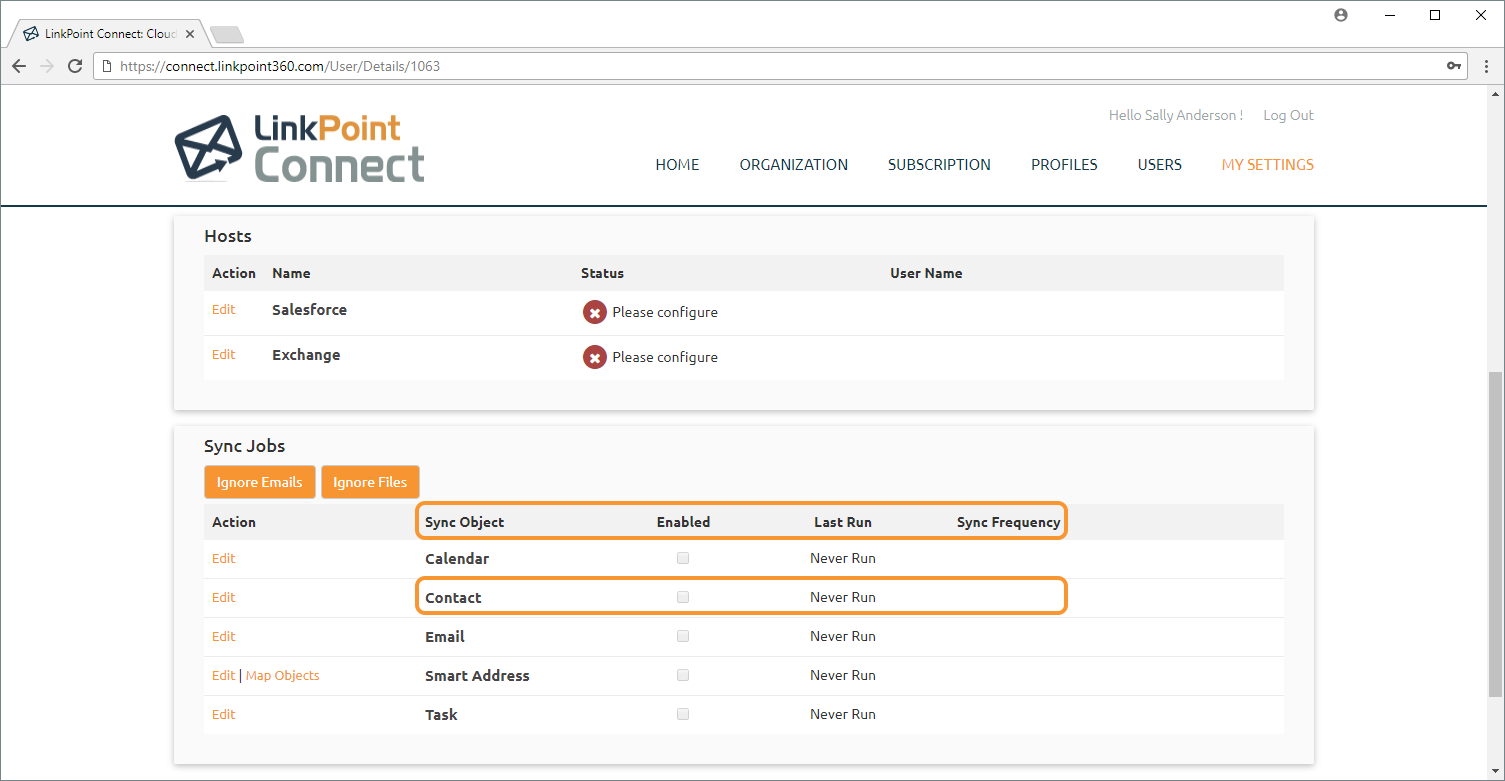
Locate the Sync Jobs section and note the information displayed for the Contact Sync
Object. At a glance, users can see whether the Contact Sync is Enabled, when the sync was Last Run, and the configured Sync Frequency.
Tip: The first time you set up your Contact Sync, the Enabled checkbox will be deselected, the Last Run date and time will be listed as Never Run, and the Sync Frequency will be blank.
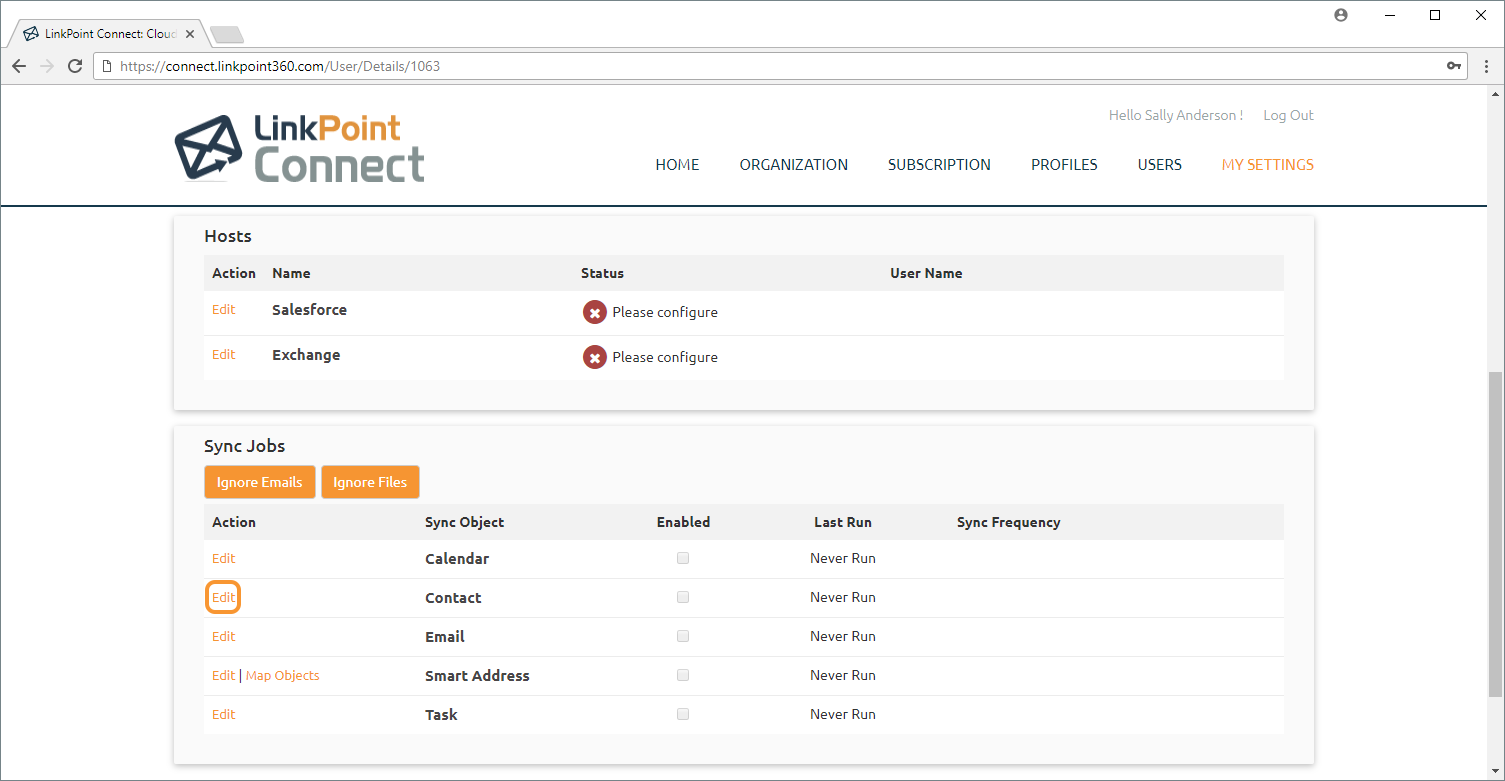
Select the Edit link for the Contact Sync Object to view the available sync options.
Tip: To review the sync settings without making changes, you can select Contact to open the Contact Sync Settings window. This will show all of the settings as read only. You can click the Edit button to make changes to the settings if needed.
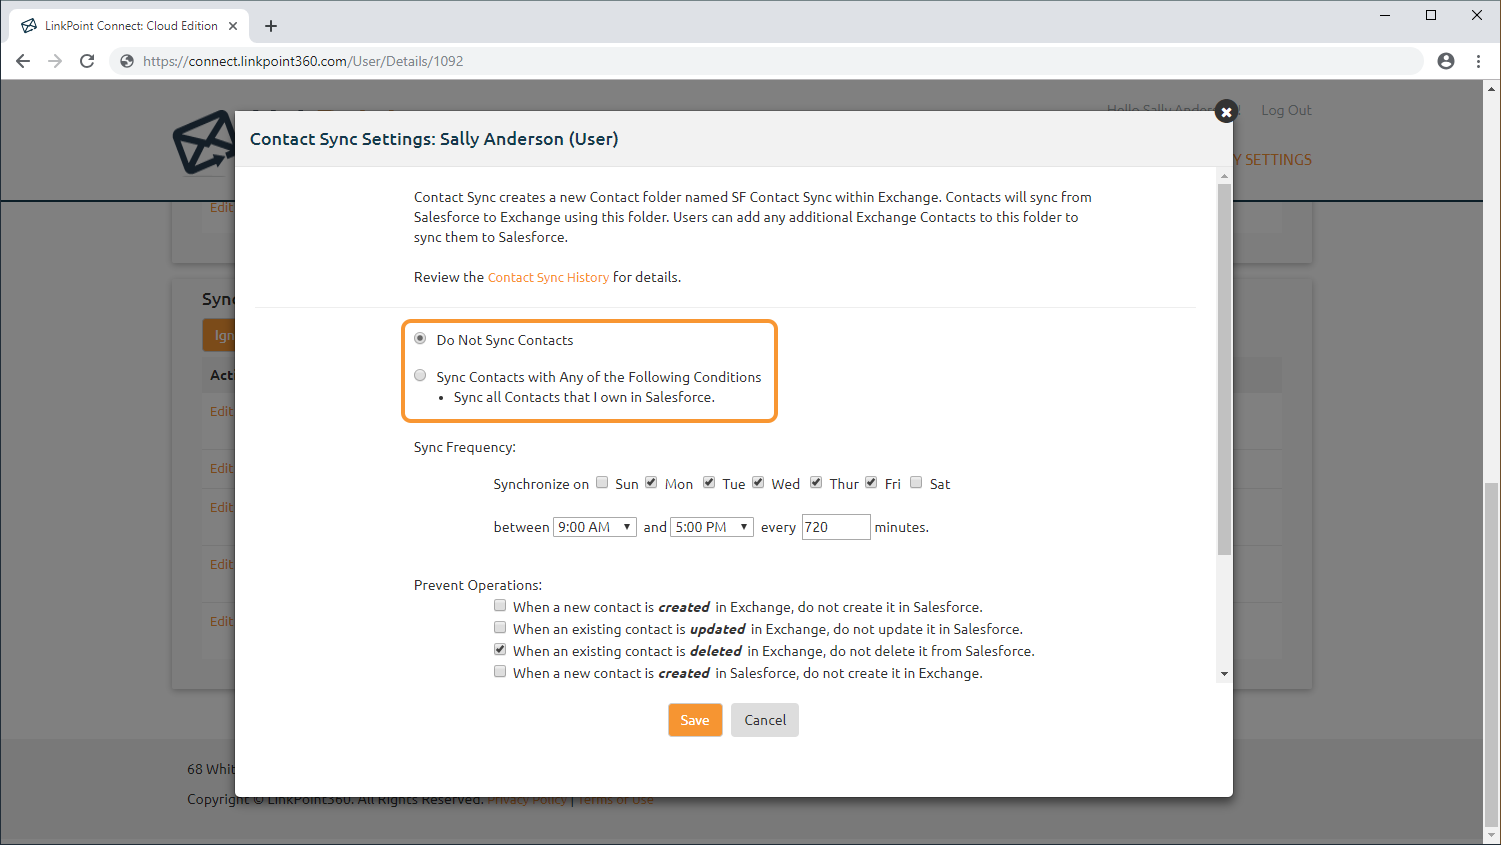
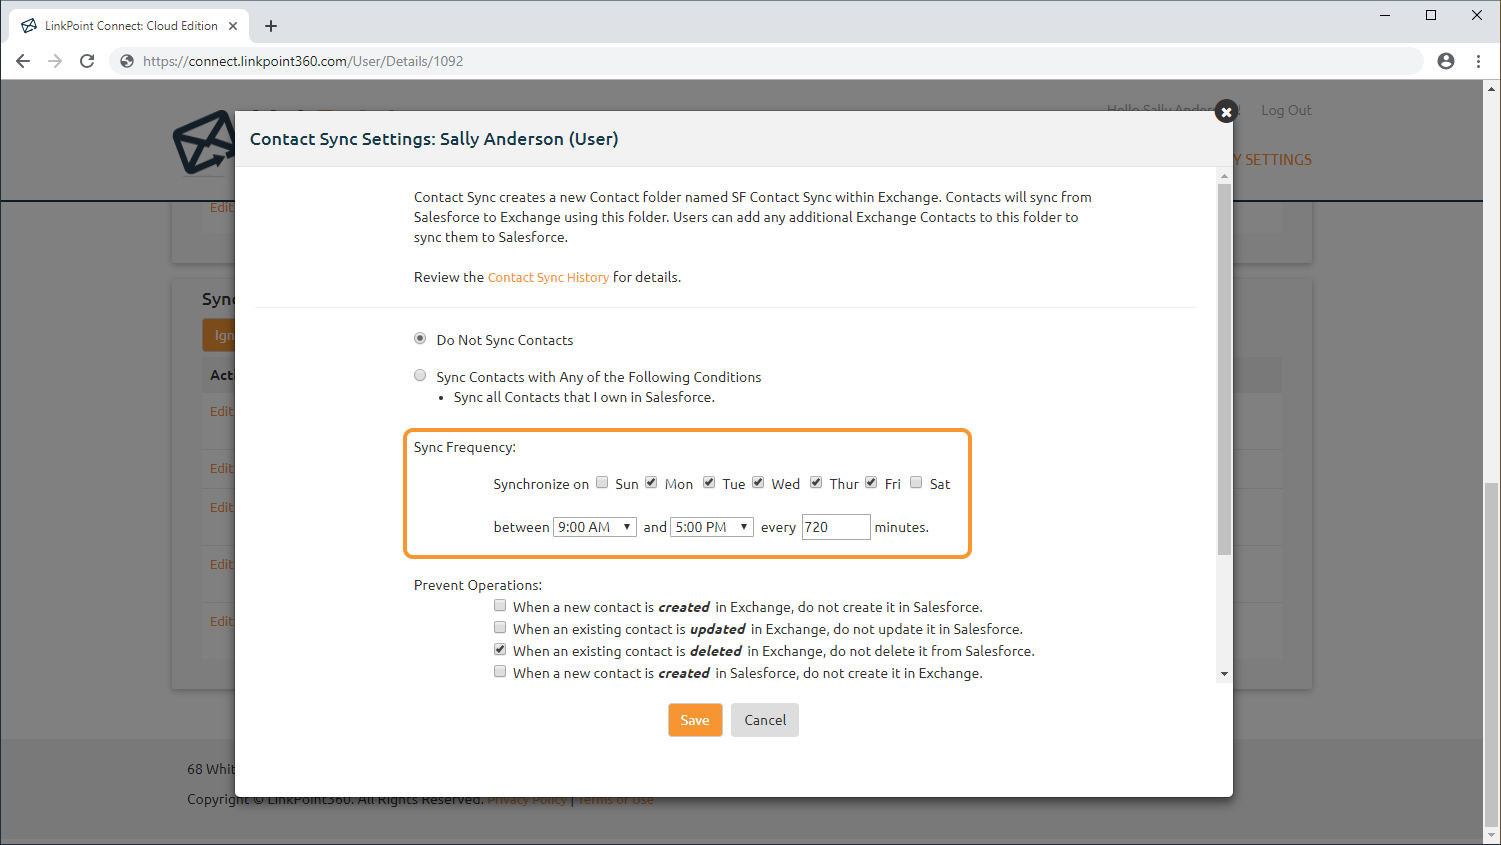
Select a sync option to enable Contact Sync. Note that there are two modes to choose from based on how you would like the data to be handled.
Do Not Sync Contacts: Disables Contact Sync. Contact Sync is off by default for all new accounts and new users.
Sync Contacts with Any of the Following Conditions: Enables Cloud Edition to sync Contacts based on the displayed criteria. By default, all users are configured to sync the Contacts that they own within Salesforce.
Tip: If an option other than Do Not Sync Contacts is already selected for you, your Admin may have preconfigured the setting. If you are not able to change the setting selection, your Admin may have locked down the setting.
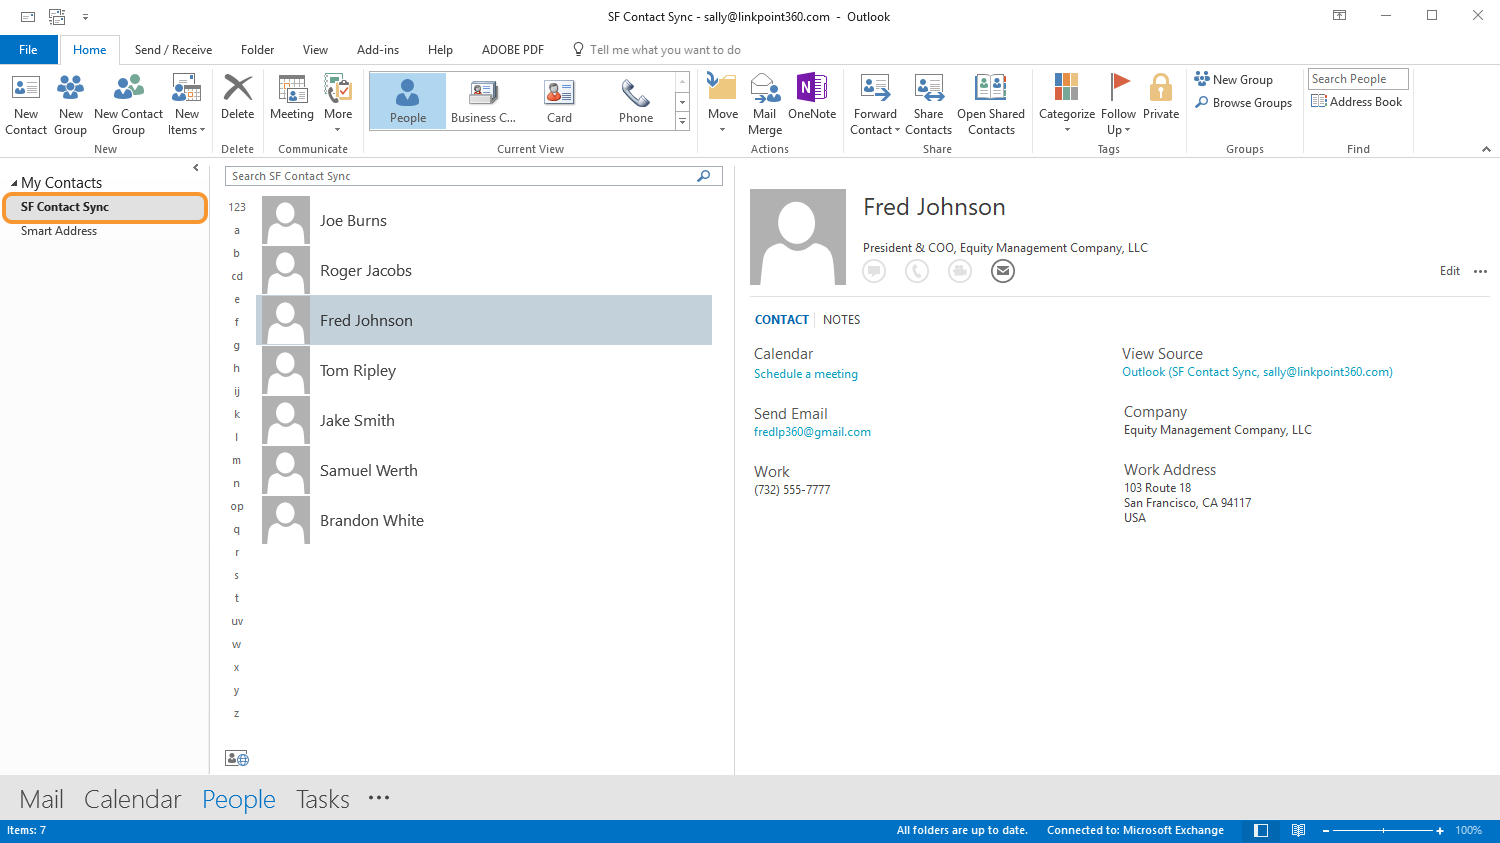
Tip: Contact Sync creates a separate Contact folder called SF Contact Sync within Exchange the first time the sync is enabled. Contacts will sync from Salesforce to Exchange using this folder. Users can add any additional Exchange contacts to the Contact Sync folder to sync bi-directionally or to Salesforce based on user settings.
Tip: Admins can request a consultation with LinkPoint360 Professional Services to expand the sync criteria for Contacts to meet workflow requirements.
Enter the preferred Sync Frequency in the provided fields. Select the day and time range during which you want the sync to run. Note that these times will be based on the time zone you set for your user account.
Tip: The maximum sync frequency cannot exceed 30 minutes. Users cannot sync more than 30 days of past items or more than 365 days of future items.
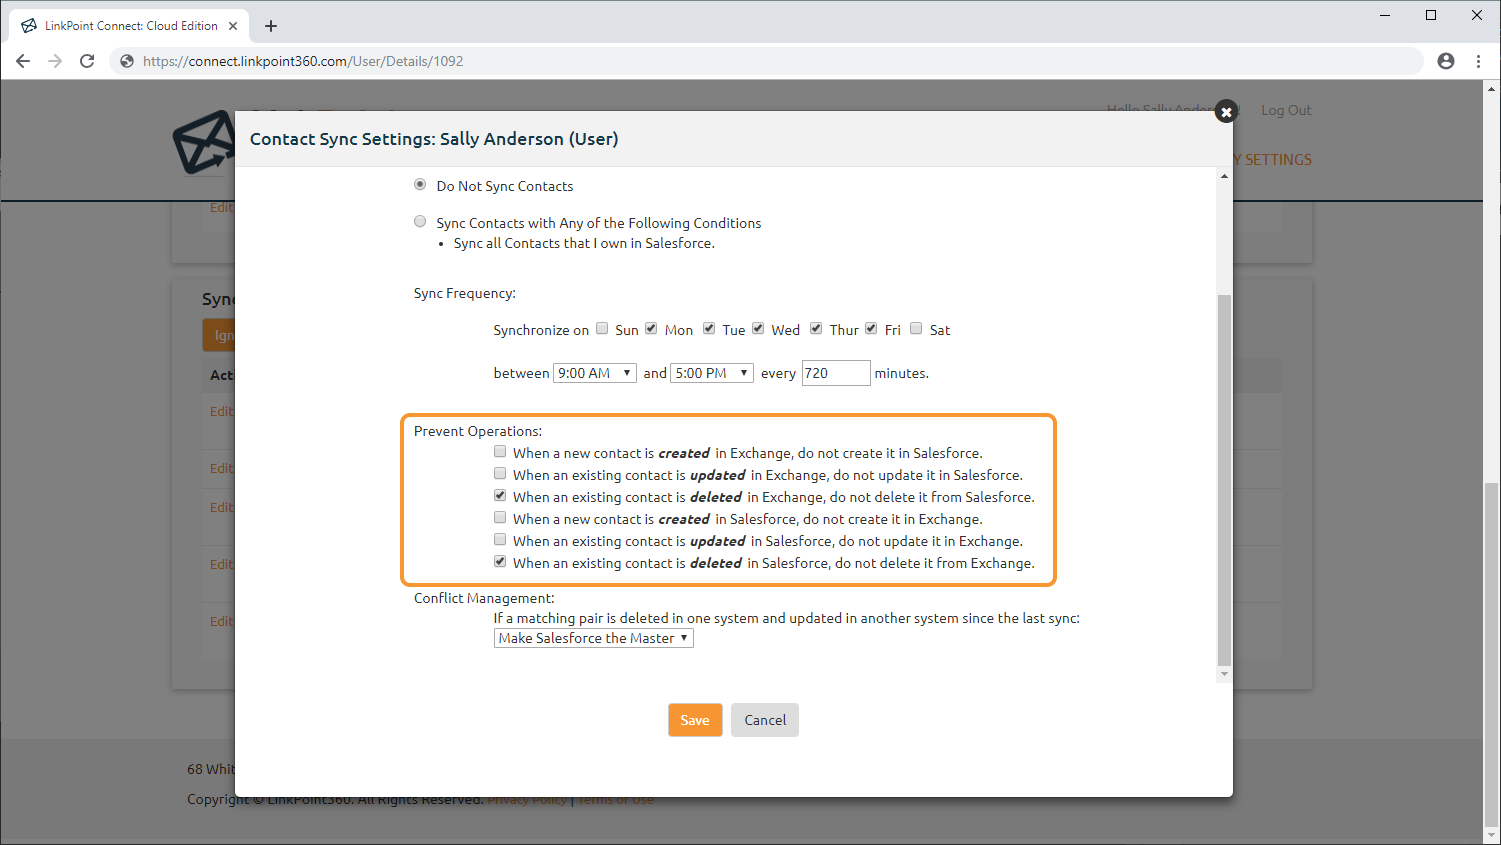
Set your Prevent Operations preferences. Indicate whether Cloud Edition should create, update, or delete items in Salesforce or Exchange for new and existing contacts. By default, the options to prevent deletion in both Salesforce and Exchange are enabled.
Tip: Users can prevent Cloud Edition from creating, updating, or deleting items regardless of any Salesforce settings. Users can set this individually for Salesforce and Exchange, effectively creating bidirectional or one-way sync rules. The Prevent Delete options are enabled by default to prevent new users from deleting Contacts when configuring their initial sync.
Warning: Prevent Operations settings override typical sync behavior. For example, choosing prevent a contact from being created in Salesforce and then adding a new contact to the SF Contact Sync folder in Exchange will result in the item not syncing to Salesforce.
Tip: If you enable a Prevent Operations option and run your sync, the items included in the sync attempt will be excluded moving forward.
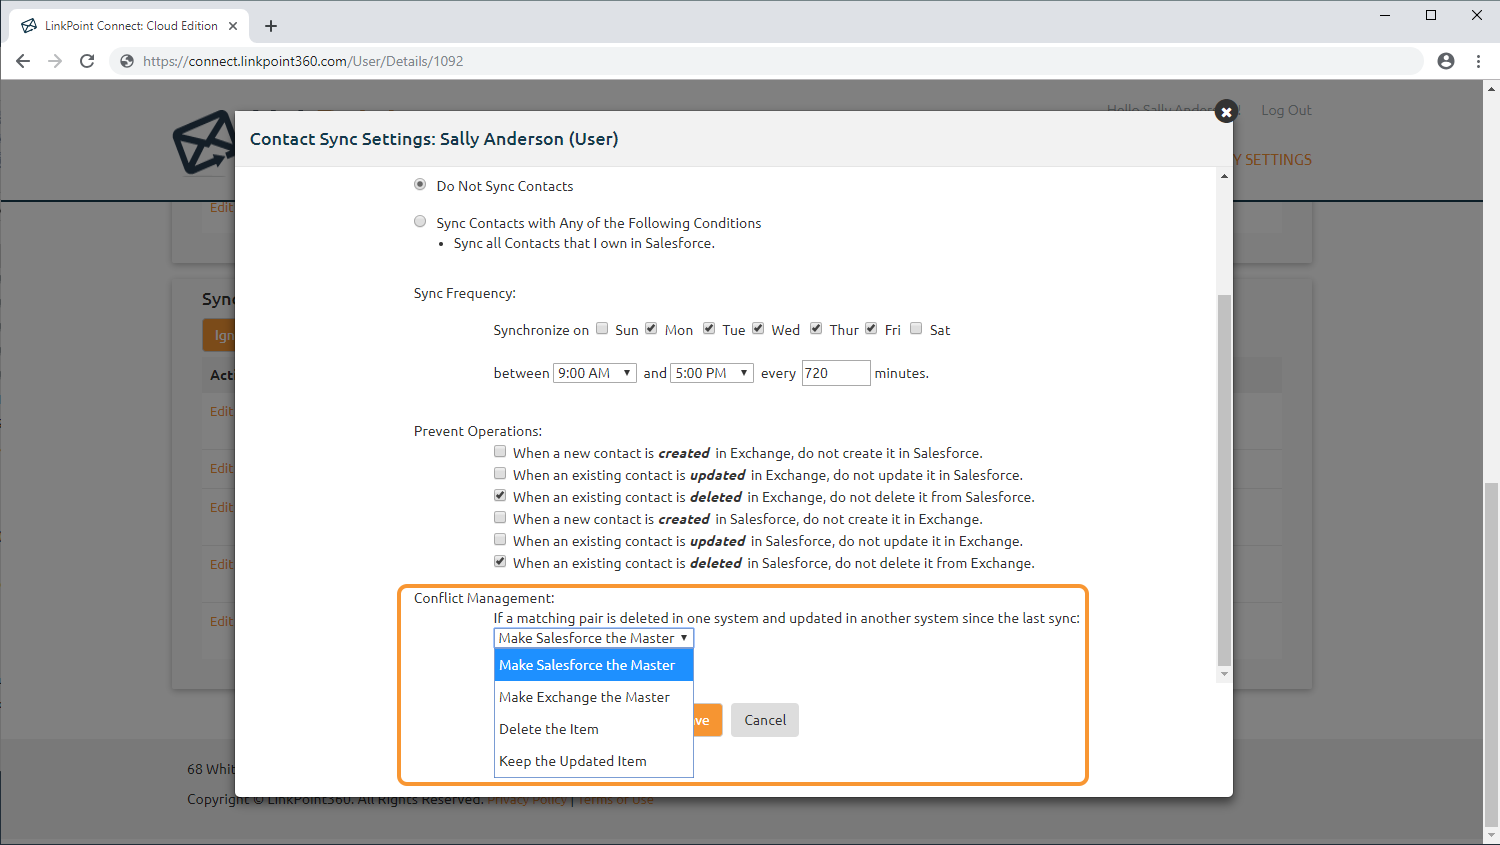
Set the Conflict Management rule for when a contact is deleted in one system but updated in another system since the last sync.
Make Salesforce the Master: The action that occurred in Salesforce applies to the Exchange version of the item.
For example, if the item is deleted in Exchange and updated in Salesforce, the item will be updated in both systems (not deleted).
Make Exchange the Master: The action that occurred in Exchange applies to the Salesforce version of the item.
For example, if the item is deleted in Salesforce and updated in Exchange, the item will be updated in both systems (not deleted).
Delete the Item: If the item is deleted in one system, it will be deleted from the other as well.
For example, if the item is deleted in Exchange and updated in Salesforce, the item will be deleted in both systems (not updated).
Keep the Updated Item: If the item is updated in one system, it will be updated in the other as well.
For example, if the item is updated in Salesforce and deleted in Exchange, the item will be updated in both systems (not deleted).
Warning: Prevent Operations settings override any selections you make for the Conflict Management rule. For example, choosing prevent a contact from being deleted in Exchange and then selecting the Conflict Management rule Delete Wins will result in the item not being deleted from Exchange.
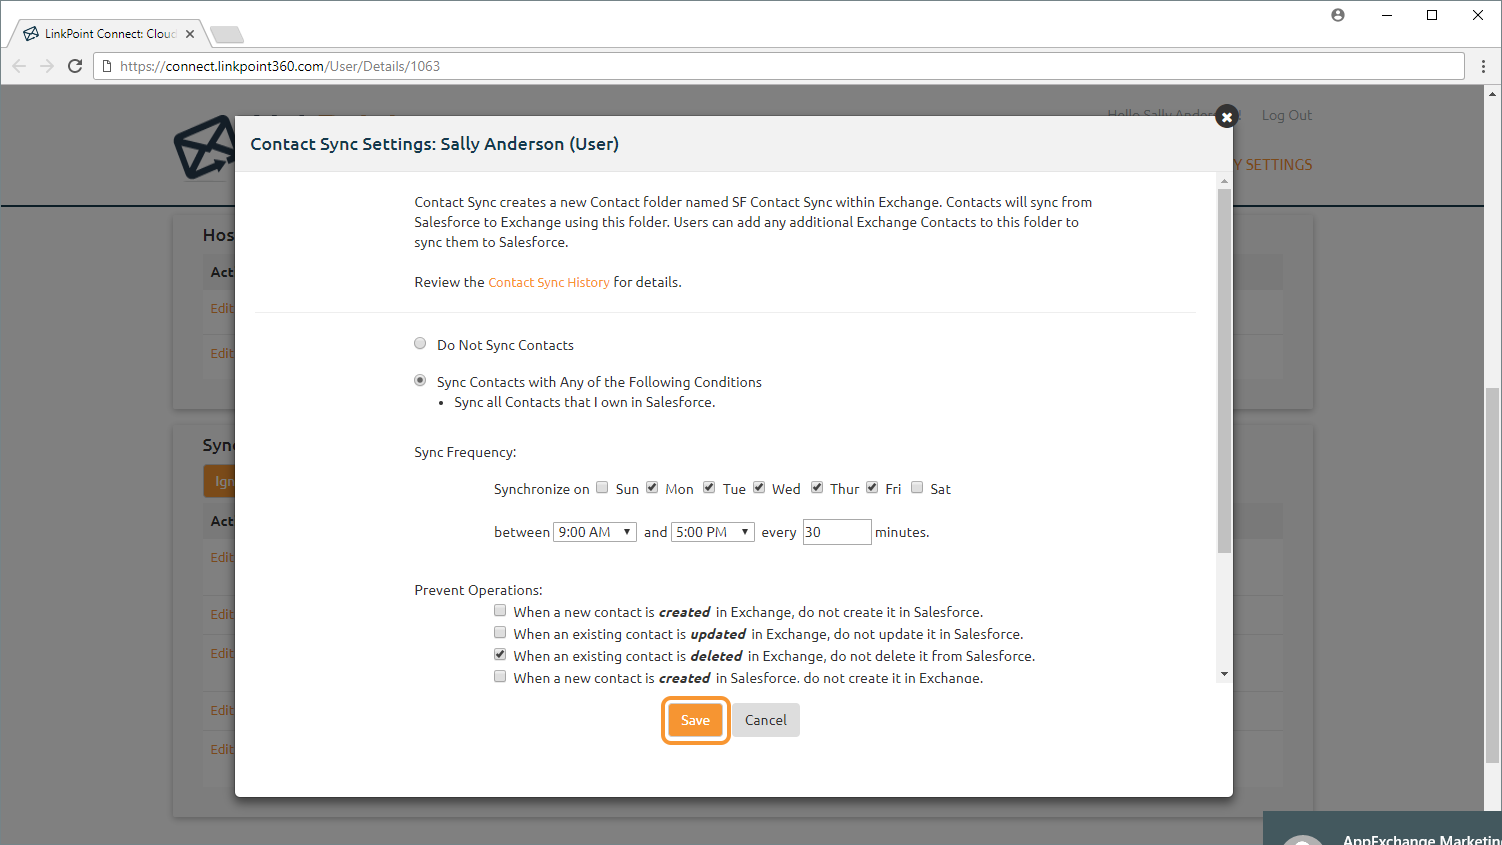
Click the Save button when finished. Then close the Contact Sync Settings window.
The Contact Sync will run immediately after it is enabled. The Sync Jobs will show the last run date and time and will reflect the Sync Frequency that was selected when editing the sync.
Tip: To run the Contact Sync again, you can click the Sync Now option. This will place the Sync Job in the queue for processing. This does not mean that the sync immediately runs. The process can take several minutes depending on the amount of data that meets the sync criteria. To click Sync Now again, refresh the page.
The SF Contacts folder in Exchange will populate with Salesforce Contacts based on the selected sync settings. Mobile users will find their Salesforce Contacts are added to their address book or contact lists on their devices.
Download: Access the complete LinkPoint Connect: Cloud Edition (Exchange + Salesforce) User Guide in .pdf format. Get the User Guide