Configuring LinkPoint Connect Record Functionality (Outlook + Salesforce)
LinkPoint Assist guides users through simple configuration processes to adapt LinkPoint Connect to individual and organizational needs. Various settings are available for managing the way that LinkPoint Connect displays Salesforce data, records emails, and syncs information between systems. In this section, you will learn how to modify several settings that impact how, when, and what items are recorded to Salesforce from Outlook.
Click the images throughout the Knowledge Base to see full size versions of screen captures.
Configuring LinkPoint Connect Record Functionality
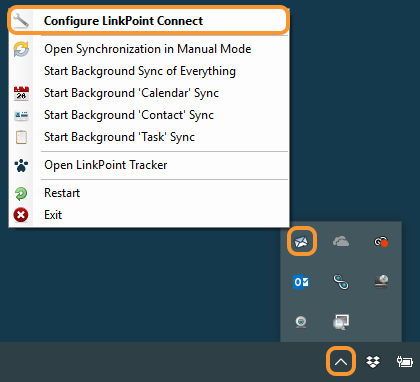
Click the LinkPoint Assist icon in the system tray with the right mouse button and then select Configure LinkPoint Connect.
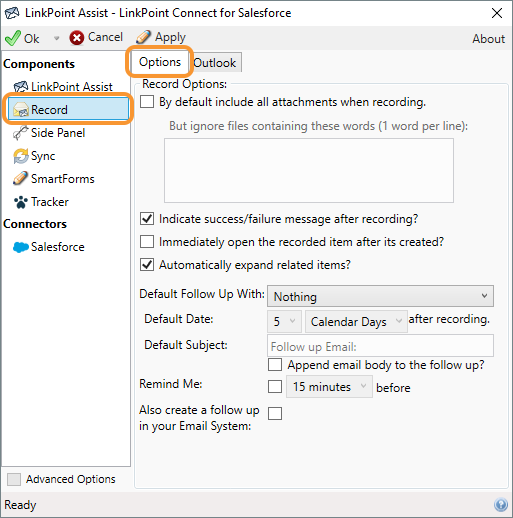
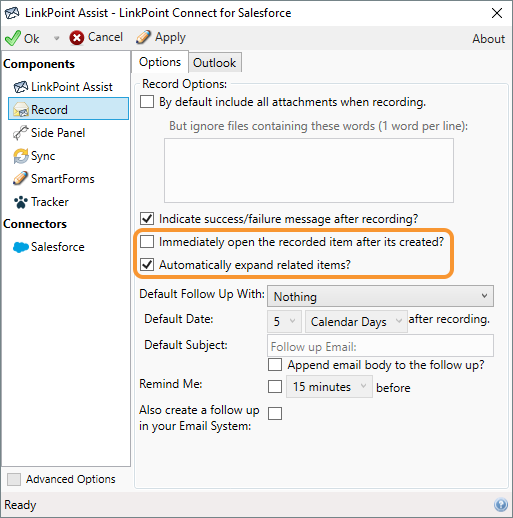
Select Record from the Components list on the left side of the LinkPoint Assist window and then select the Options tab.
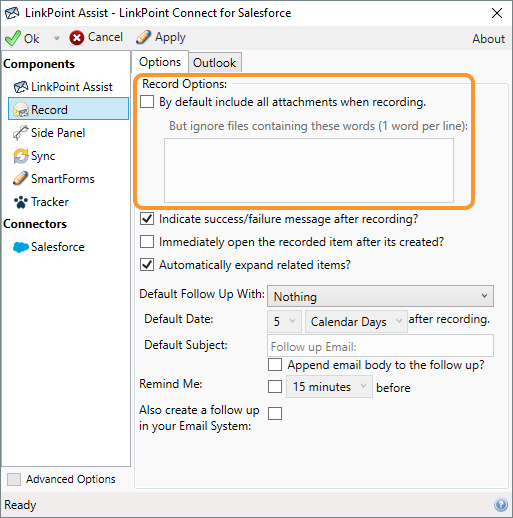
Set whether attachments should be recorded by default by selecting the corresponding checkbox. Indicate which file types to exclude from this by entering the file names or types in the field box.
Example: You can list file extensions such as .png or .jpg to screen out images commonly found in email signatures. You can filter out files with words such as brochure or pricing to exclude items you commonly send to people that do not need to be saved over and over again in Salesforce, especially if they are already in your Salesforce Document Library.
Tip: Note that by default, this option is turned off to prevent unnecessary items from being recorded to Salesforce and counting against Salesforce storage limits.
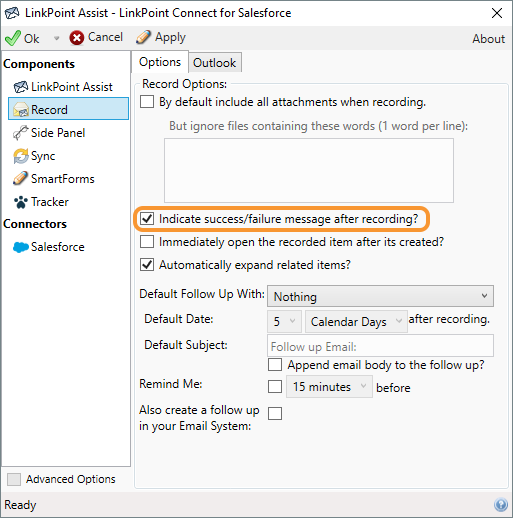
Select the Indicate success/failure message after recording checkbox to display or hide pop-up notifications after recording items.
Select the additional Record Options based on user or company workflow preference.
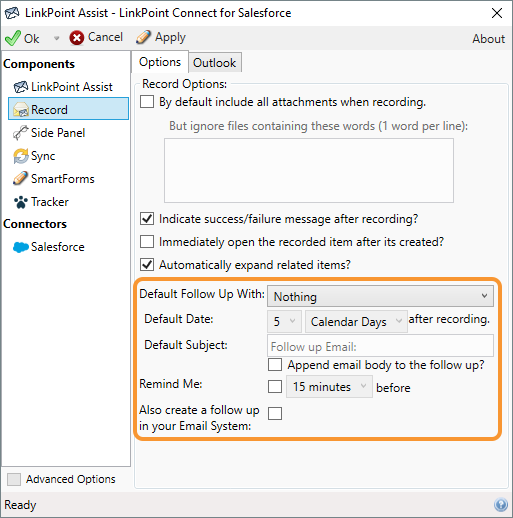
Set the preferred default Follow Up options for use during the recording process. By default, LinkPoint Connect is configured with Nothing as the follow up option.
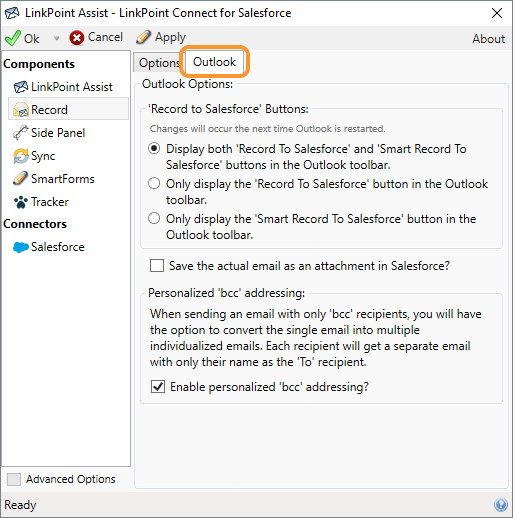
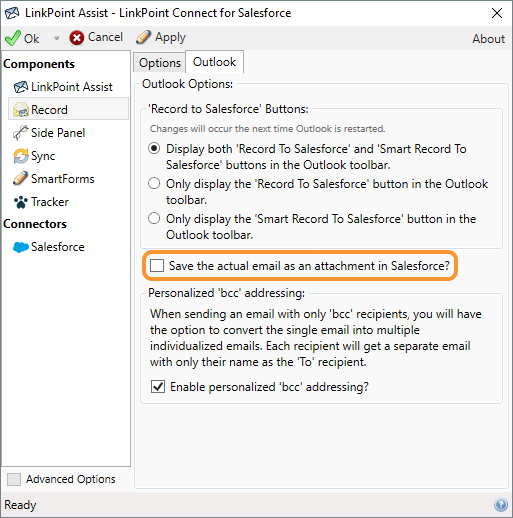
Select the Outlook tab.
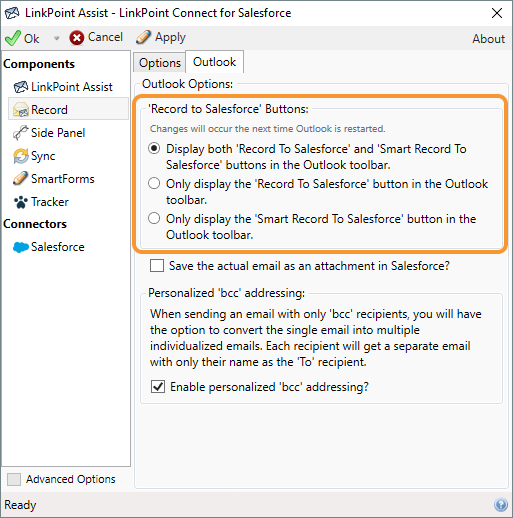
Select the option to display the Record to Salesforce buttons in the Microsoft Outlook ribbon. Choose to display both the Record to Salesforce and Smart Record to Salesforce buttons or only one of the buttons.
Choose whether to save the email as an attachment in Salesforce when recording. This will add the email to the Activity History as well as the Attachments on the corresponding Salesforce record(s).
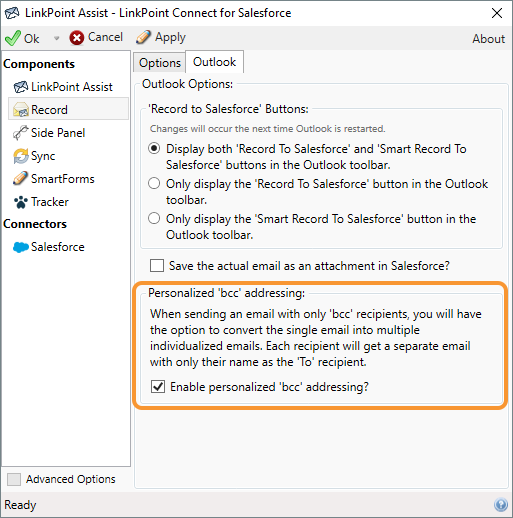
Select the checkbox to Enable personalized ‘bcc’ addressing? to enable the option to send a separate email to each individual included in the bcc field on an email.
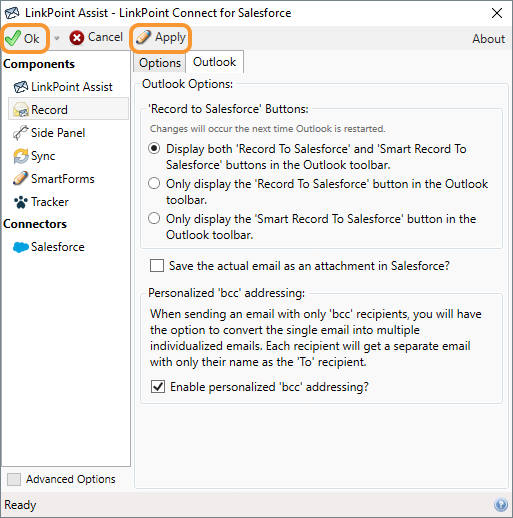
Click the Apply button to confirm the selection and click the OK button to finish and exit LinkPoint Assist.
Download: Access the complete LinkPoint Connect: Outlook + Salesforce User Guide in .pdf format. Get the User Guide