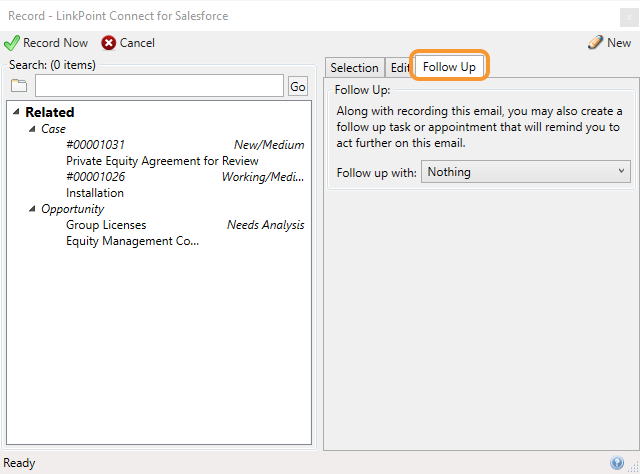
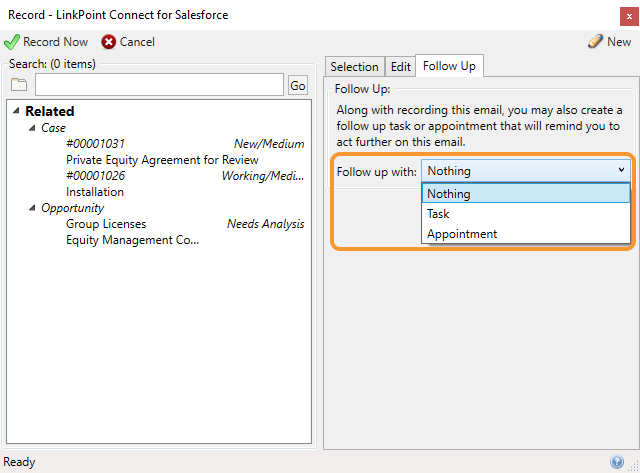
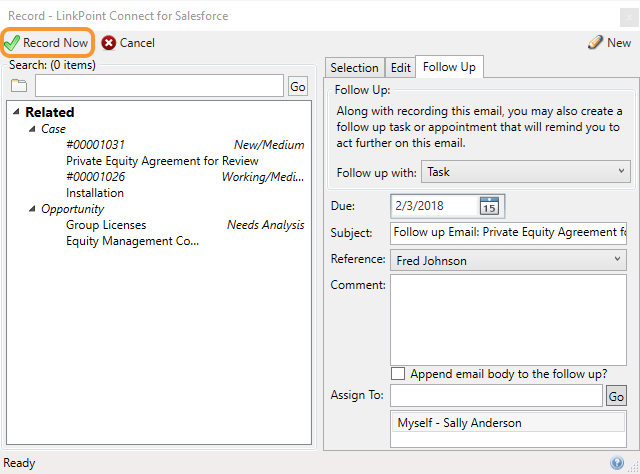
LinkPoint Connect users are able to create follow up Tasks for themselves or team members when recording an email. This helps users capture next steps with a prospect or customer while working with the communication. In this section, you will learn how to create a follow-up action as part of the email recording process.

Click the images throughout the Knowledge Base to see full size versions of screen captures.
Scheduling Follow Up Actions When Recording Emails to Salesforce from Outlook


Tip: Users with Smart Forms enabled for the Follow Up Task or Event option within the Record window will see a different layout for the follow up item.
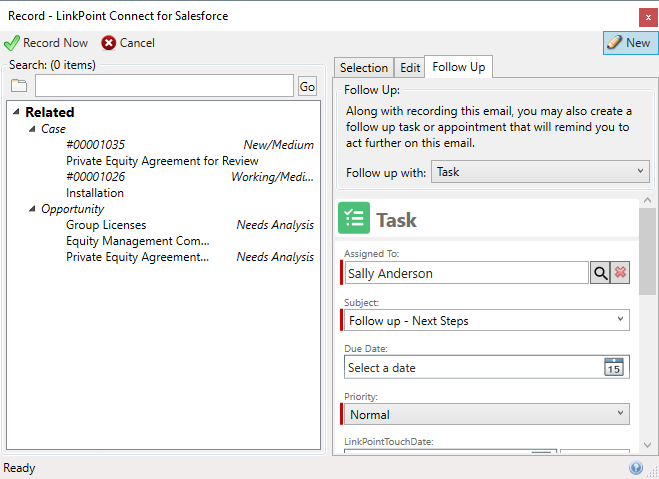

Additional Resources: Refer to the Configuring Smart Forms section of this User Guide for more information.

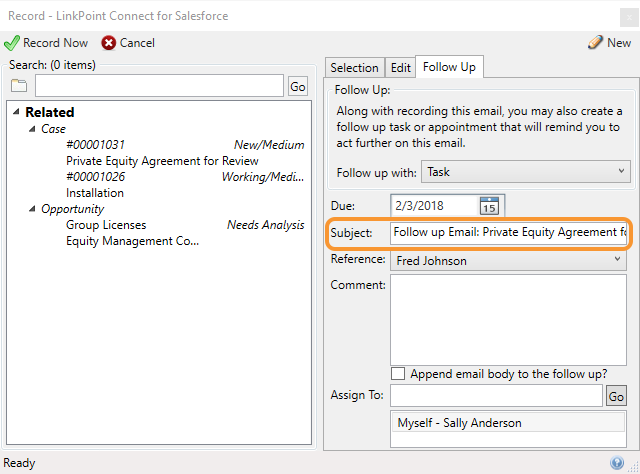
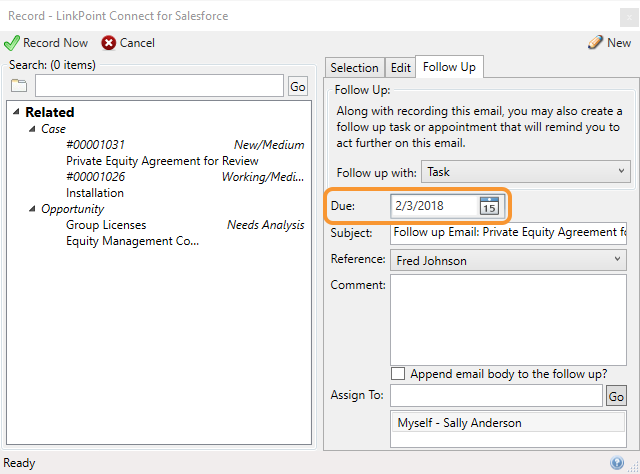
Tip: Changing the Subject for a scheduled Task or Appointment can make it easier to find when looking at the item in your calendar or task list at a later date. Often with back and forth communication, the same subject line is reused. Changing this field will not change how the actual email subject line is displayed to the recipient.


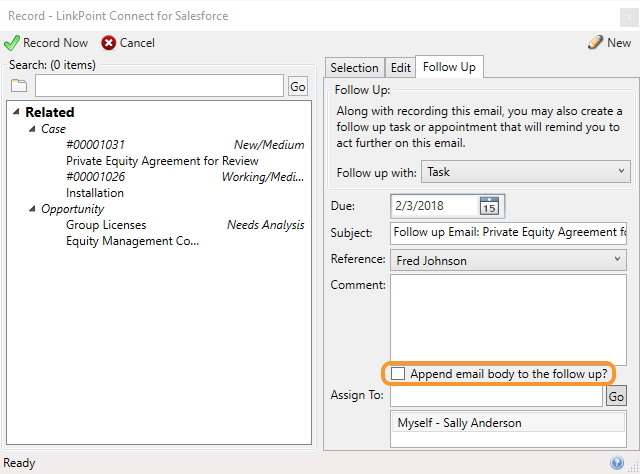
Select the checkbox for Append email body to the follow up? to include a copy of the original email text to the Task or Appointment you are creating.


Click the Record Now button to record and send the email.
Tip: The newly created follow up item (i.e. Appointment or Task) is created within Salesforce and saved to your Salesforce calendar or task list (or a team member’s task list if assigning to another user) as part of the Record process. Depending on your LinkPoint Connect Sync settings, the Salesforce calendar item or task will sync with your Microsoft Outlook calendar and task list.
![]() Download: Access the complete LinkPoint Connect: Outlook + Salesforce User Guide in .pdf format. Get the User Guide
Download: Access the complete LinkPoint Connect: Outlook + Salesforce User Guide in .pdf format. Get the User Guide
