

Tip: Integration with Microsoft Exchange is off by default for all new accounts and must be requested as part of the implementation process. Adding this level of integration allows Meeting Recap access to the Appointments listed on a user’s calendar in order to prompt real-time reminders to submit a Meeting Recap at the close of a meeting.

Click the images throughout the Knowledge Base to see full size versions of screen captures.
Connecting to Exchange

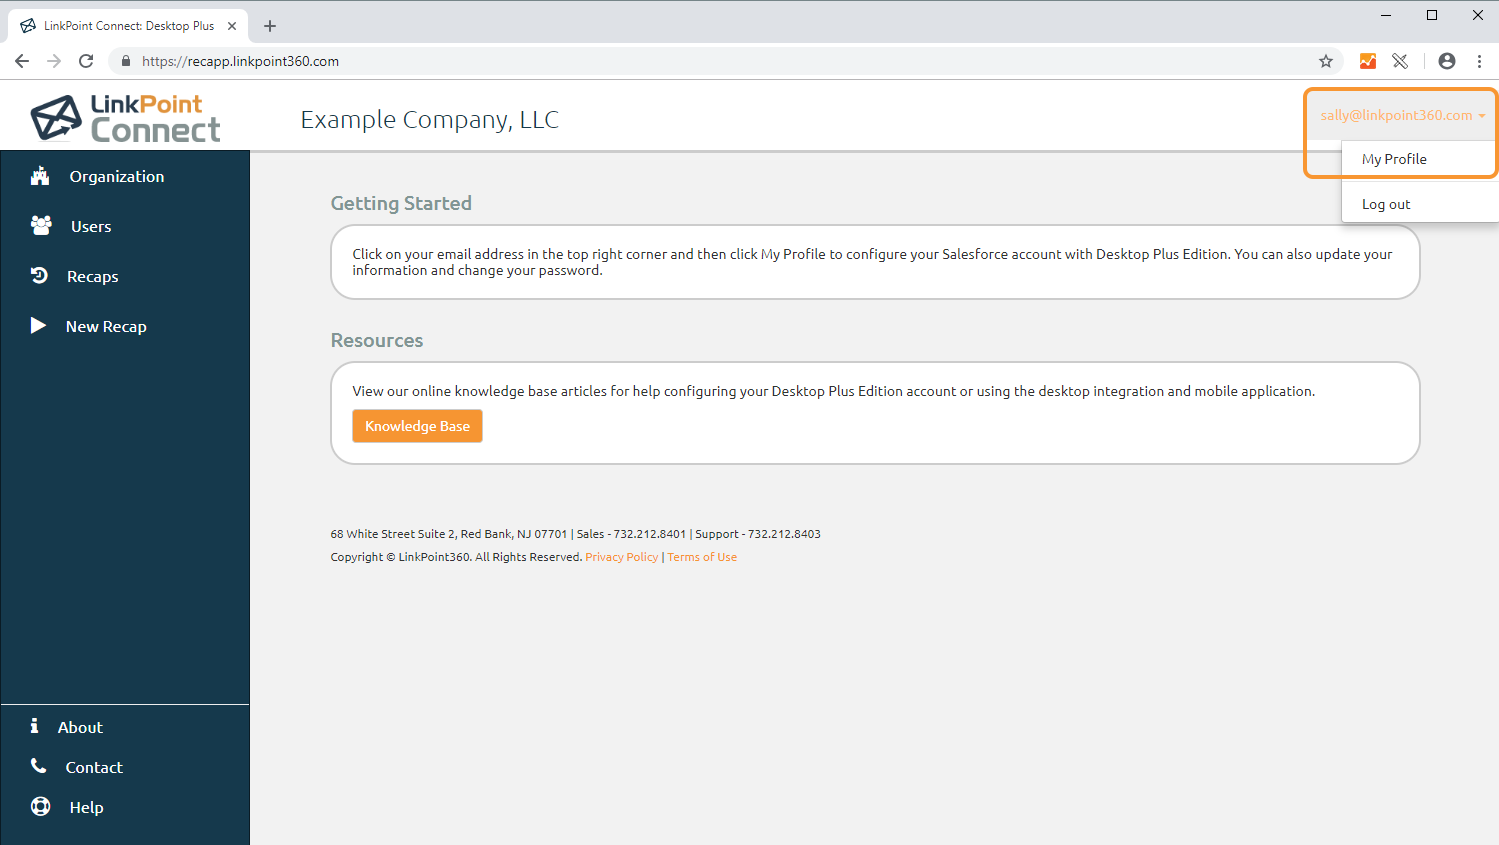
Log in to Desktop Plus, and click the email address in the top right corner. Then click My Profile.

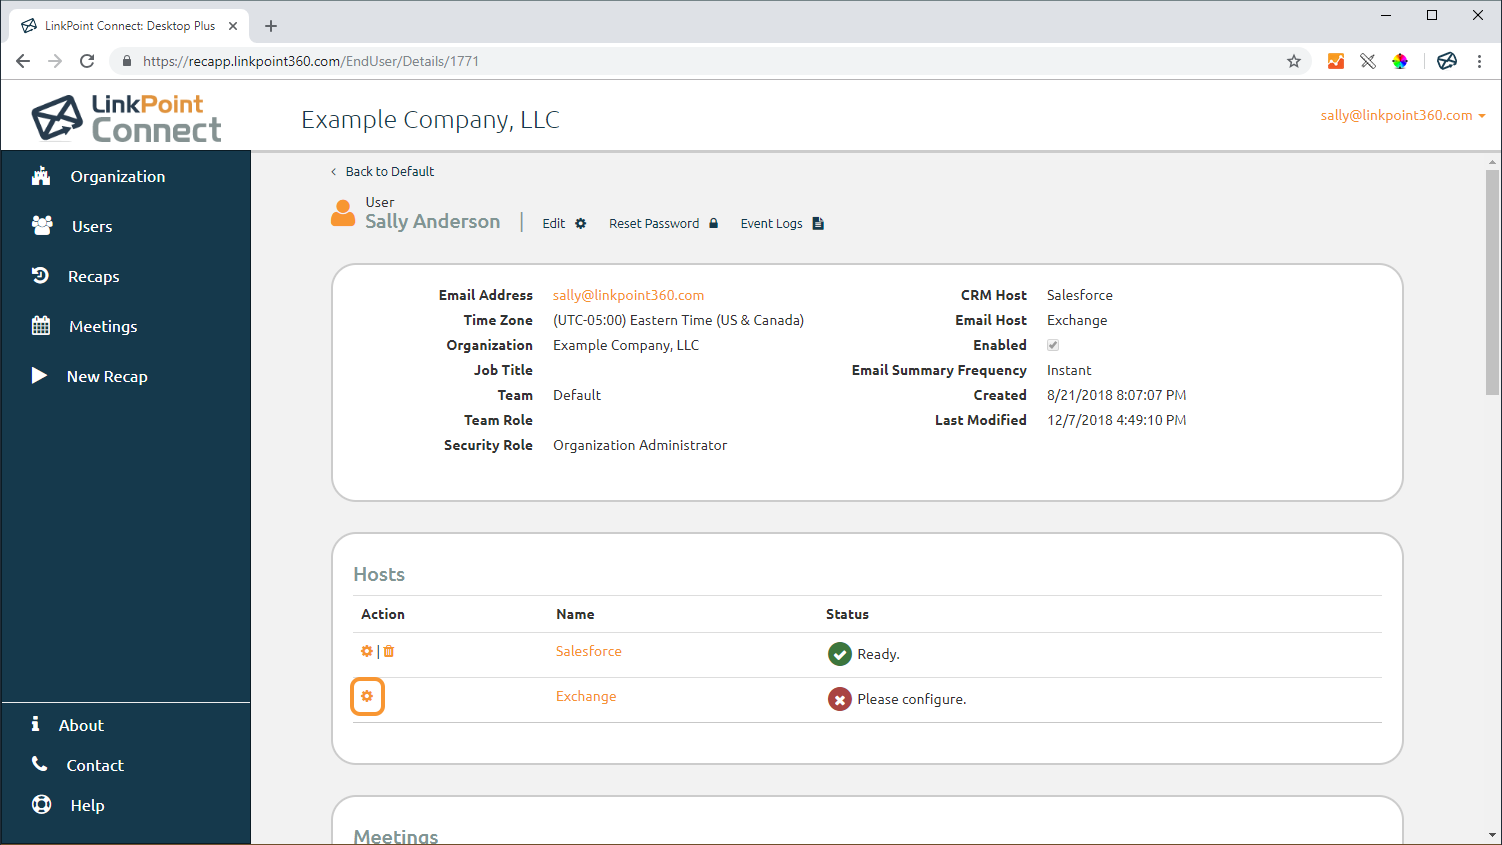
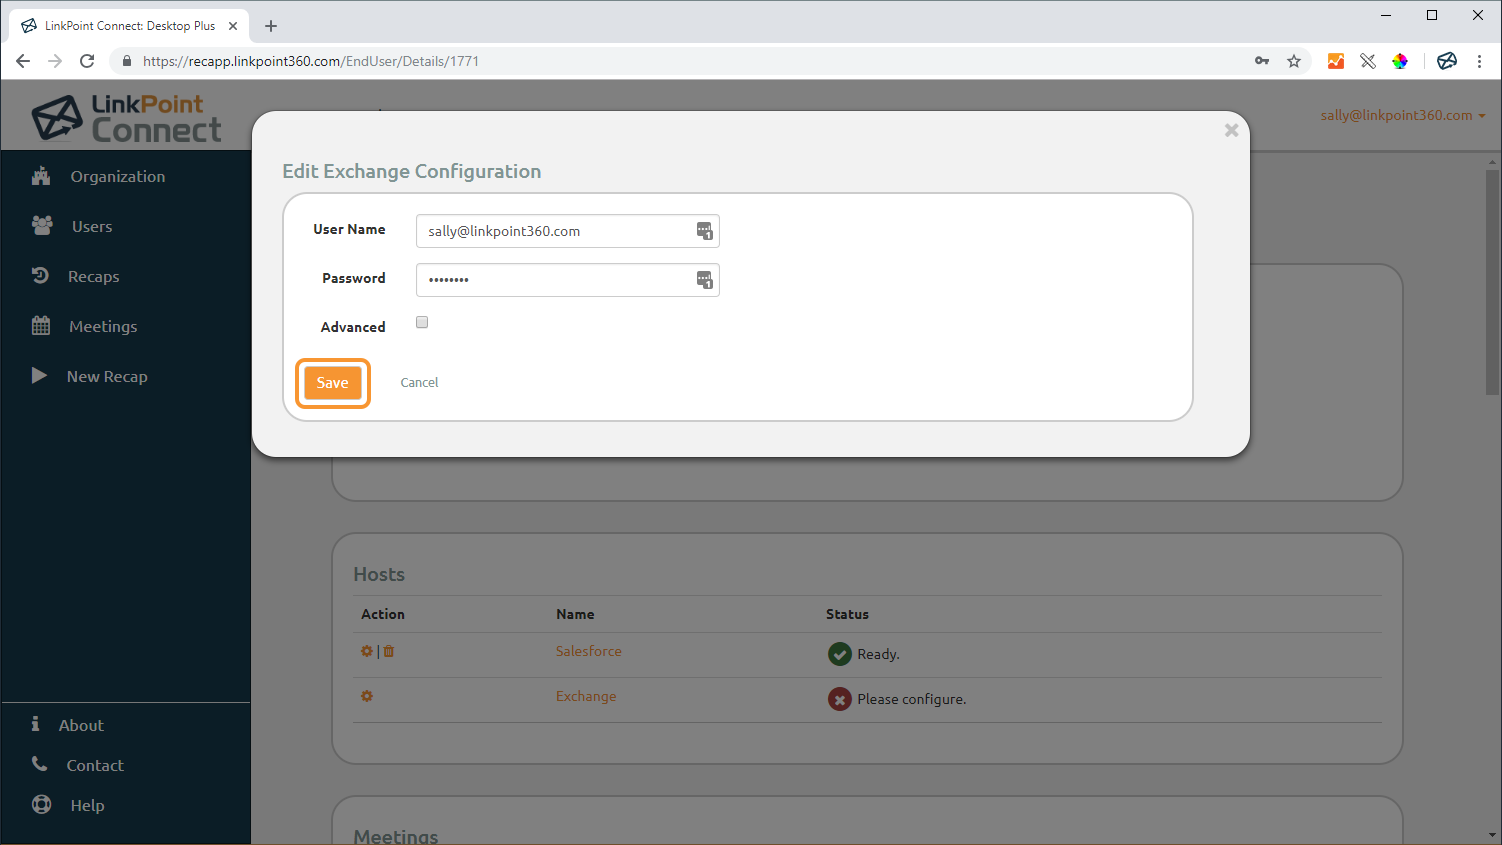
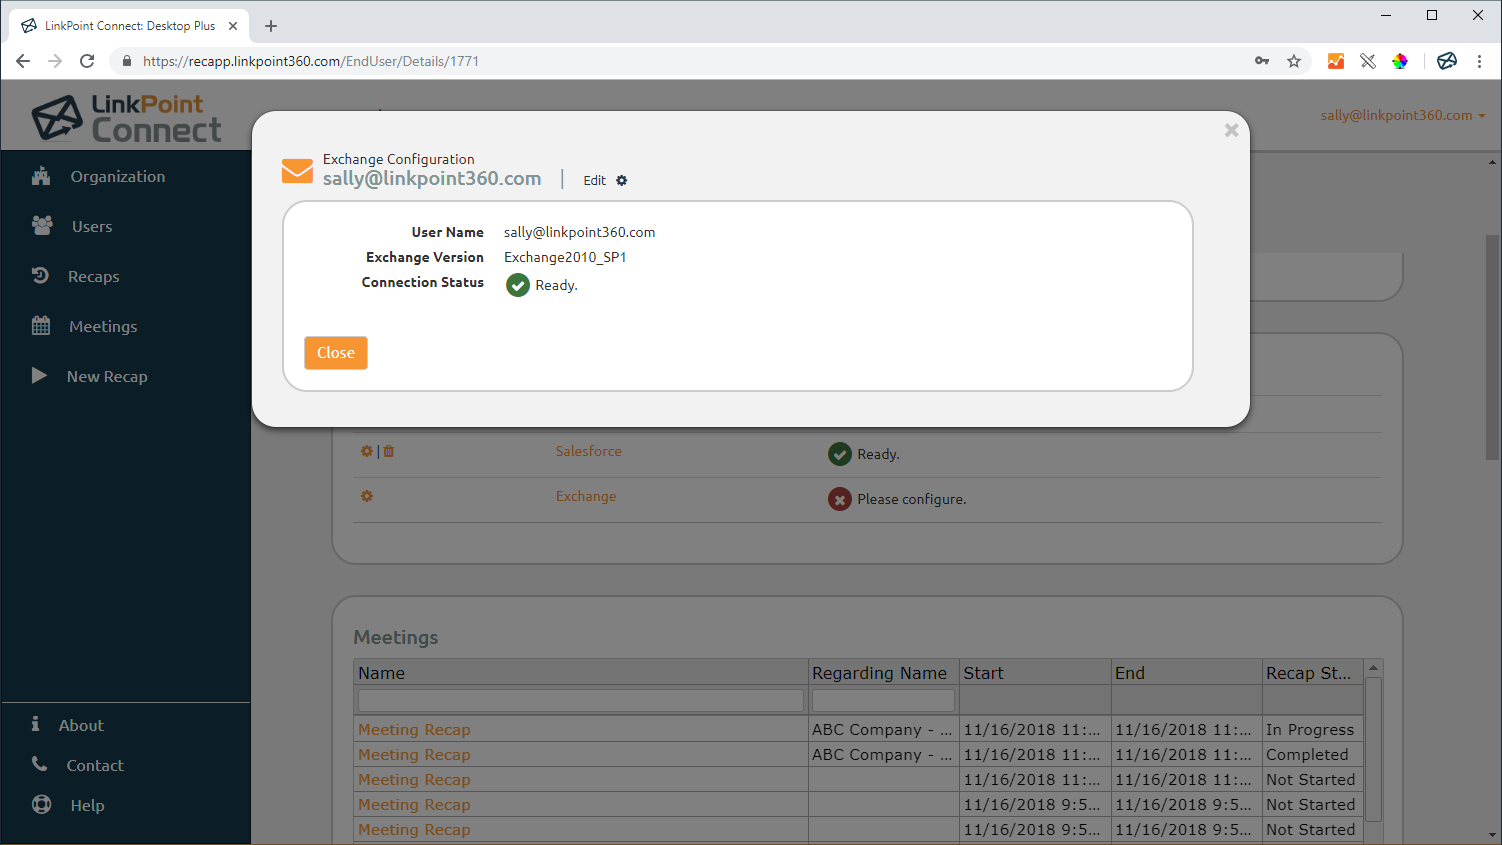
Locate the Hosts section and note the Exchange connection status. The red X and Please configure. status indicate that the user account is not connected to Exchange. The green ✔ and Ready status indicate that the user account is connected to Exchange.


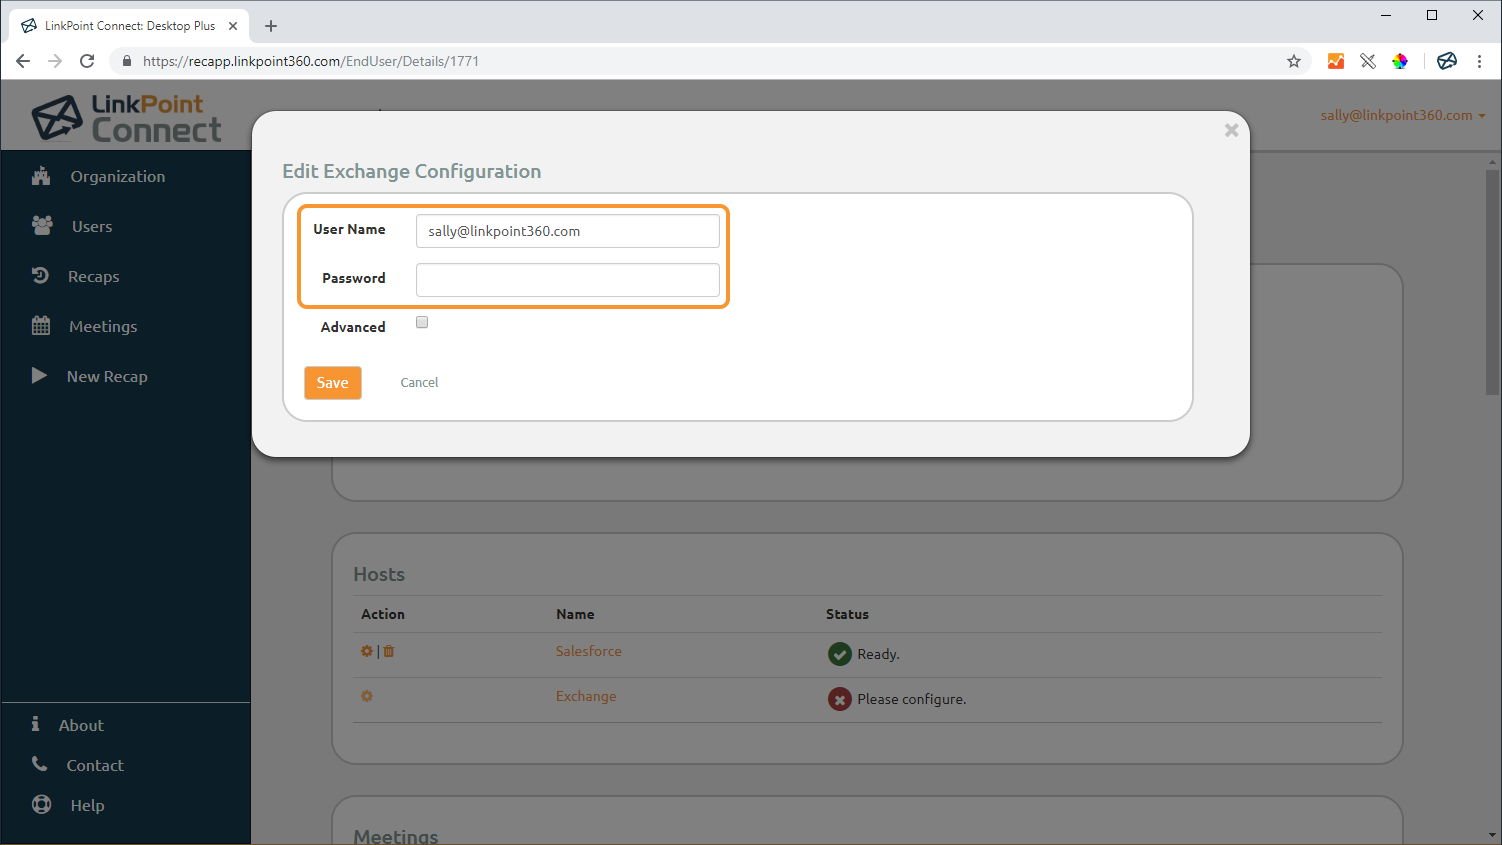
Enter the User Name and Password associated with the Exchange account.
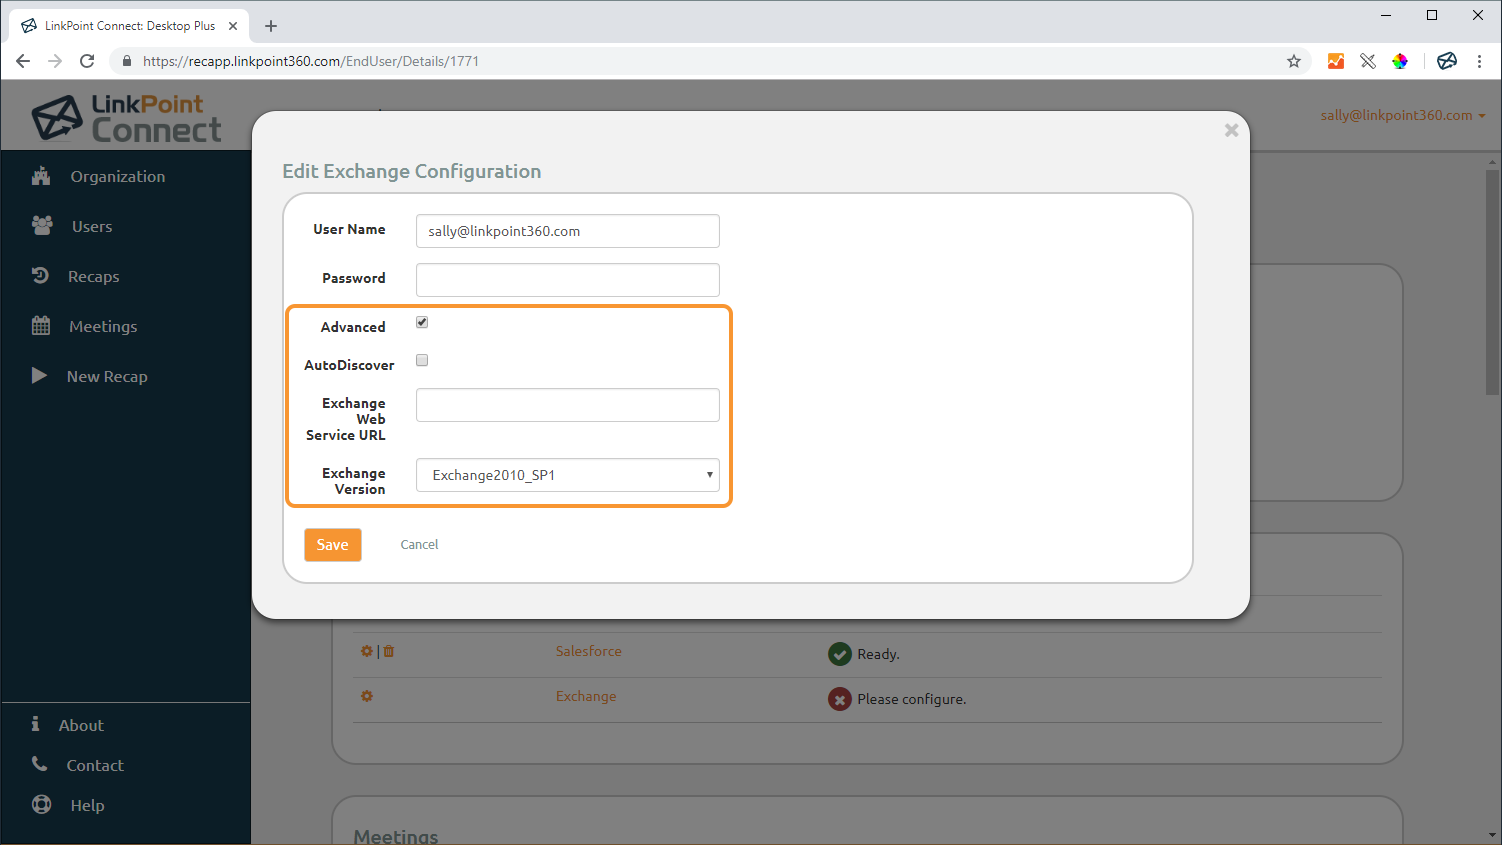
Tip: Some organizations configure their Exchange environments to block autodiscover connections. To troubleshoot, select the Advanced checkbox and deselect the option to Use Exchange Autodiscover Service? Enter the Exchange Web Service URL and Exchange Version for your environment. This should be provided to you by your internal IT Admin.


![]() Download: Access the complete LinkPoint Connect: Desktop Plus Edition User Guide in .pdf format. Get the User Guide
Download: Access the complete LinkPoint Connect: Desktop Plus Edition User Guide in .pdf format. Get the User Guide
