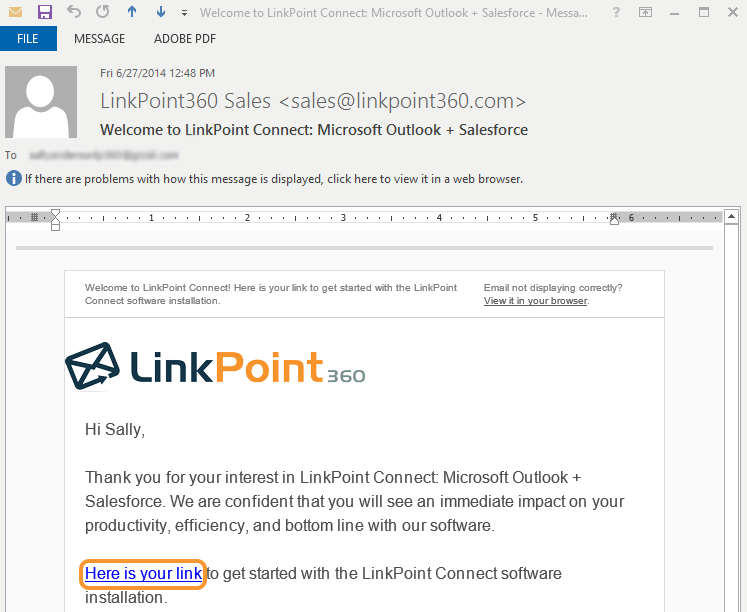
LinkPoint Connect is a PC-installed application that allows users to work with and create Salesforce data directly in desktop instances of Outlook. To get started, users must download the LinkPoint Connect Installer, which is accessible via the Salesforce AppExchange, the LinkPoint360 website, or a direct link provided by a LinkPoint360 Account Executive. All methods provide access to the same Installer for free trial and licensed users.
Click the images throughout the Knowledge Base to see full size versions of screen captures.
Install LinkPoint Connect
Select the link for the LinkPoint Connect Installer provided in the welcome email or enter the URL provided by LinkPoint360 in the browser address bar, and press Enter.
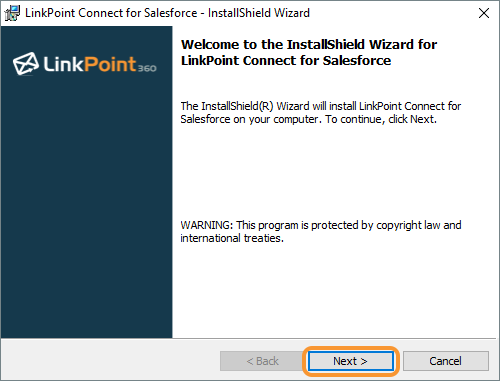
Save the file named LinkPointConnectSF.exe to the computer, and open it to launch the Installer.
Click Next in the LinkPoint Connect for Salesforce – InstallShield Wizard to start the installation process.
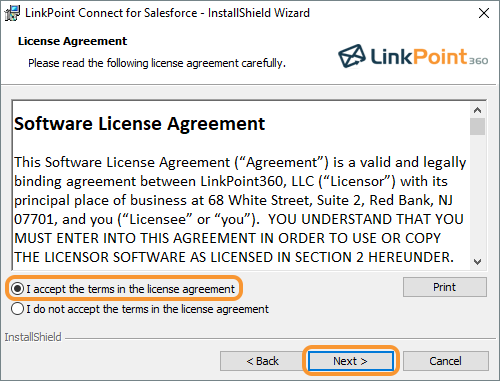
Select the I accept the terms in the license agreement option, and click the Next button.
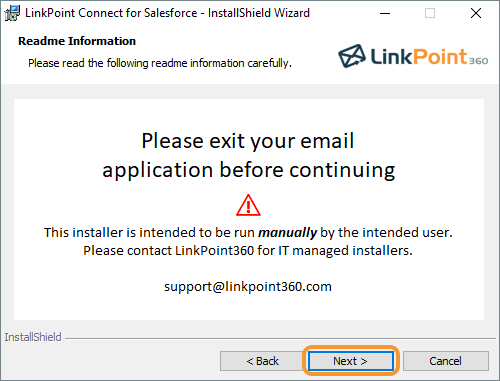
Confirm that Outlook is closed, and click the Next button.
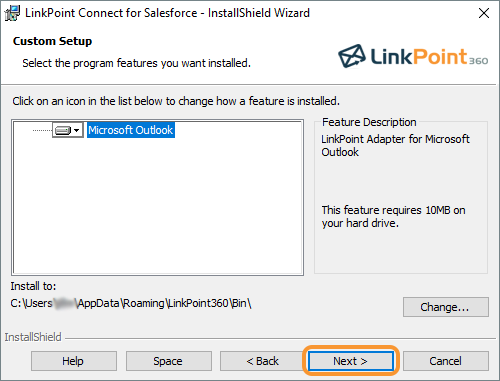
Select the installation preferences in the Custom Setup screen. By default, the Installer will place LinkPoint Connect on the system hard drive. Click Next to continue.
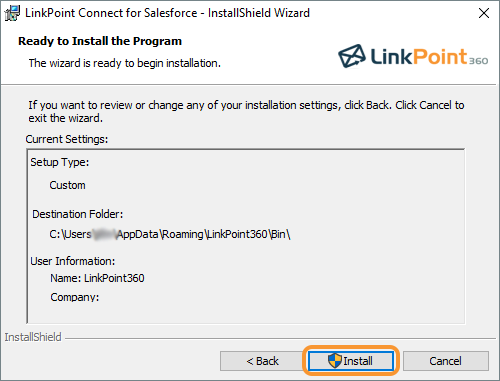
Review the Current Settings. Click Back to make changes, or click Install to start the installation.
Tip: LinkPoint Connect relies on a common Microsoft technology called .NET Framework 4.52 Client Profile which comes pre-loaded on Windows 7 and above. If the computer does not already have this installed, it will automatically be downloaded as part of the LinkPoint Connect installation process.
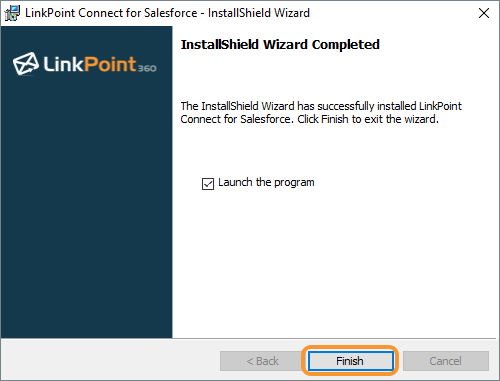
Select the Launch the program checkbox, and click the Finish button to exit the Installer.
Download: Access the complete LinkPoint Connect User Guide in .pdf format. Get the User GuideStill need help?Contact our Support Team.