Installing LinkPoint Connect for Virtual Desktop Environments
LinkPoint Connect is designed to work within virtual desktop environments (VDEs) such as Citrix and Terminal Services to streamline installation and control for organizations working in more complex environments. Organizations that use virtual desktop environments can follow the standard installation instructions for LinkPoint Connect with just a few exceptions. LinkPoint360 provides companies working in VDEs with a custom installer designed to streamline the installation process. This installer only installs the binary files into the Program folder. LinkPoint Connect is installed per machine or per server rather than per user. In this section, you will learn how to run the installer for LinkPoint Connect in a virtual desktop environment.
Warning: The LinkPoint Connect installer for VDEs must be installed and run by a server admin.
Click the images throughout the Knowledge Base to see full size versions of screen captures.
Installing LinkPoint Connect for Virtual Desktop Environments
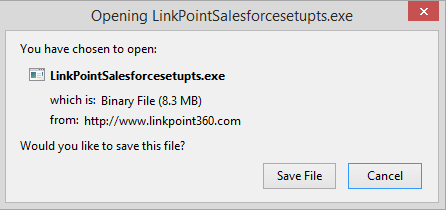
Download the installer via the link provided by LinkPoint360. Click the Save File button within the dialogue box to download the LinkPoint Installer to the network.
Locate the file LinkPointSalesforceSetupTS.exe on the server and double click the file to launch the installer.
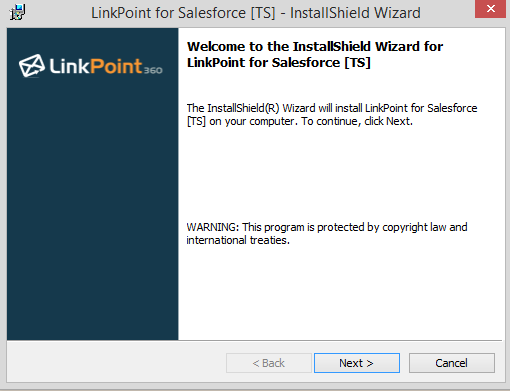
Click Next on the first screen within the LinkPoint for Salesforce – InstallShield Wizard to start the installation process.
Select the I accept the terms in the license agreement option, and then click the Next button to proceed.
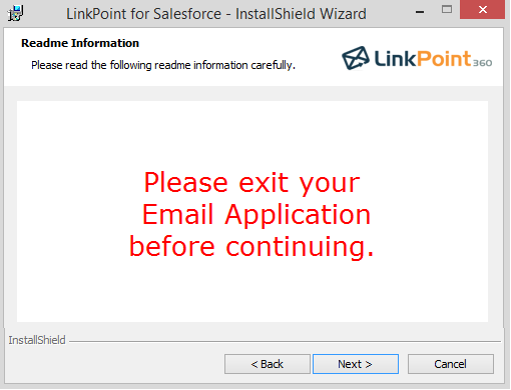
Close Microsoft Outlook or Lotus Notes as the admin on the server you are working on. Be sure to close the email application before clicking the Next button in the Installer to continue.
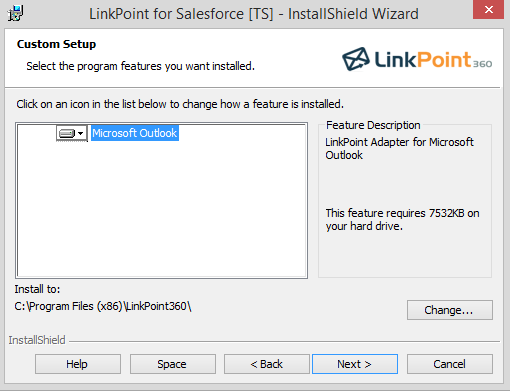
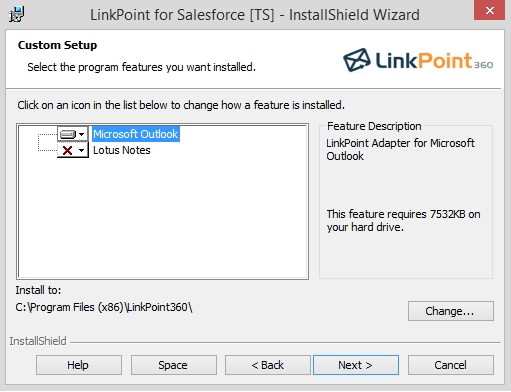
Select the installation preferences within the Custom Setup screen. By default, the Installer will place the LinkPoint Connect software in the system Program folder. Click the Next button to continue. Lotus Notes users will see a similar screen with Lotus Notes as the option in the selection section.
Tip: Organizations that deploy both Microsoft Outlook and Lotus Notes may see both email applications listed in the Custom Setup screen. Be sure to deselect the option that does not apply to your organization’s use of LinkPoint Connect.
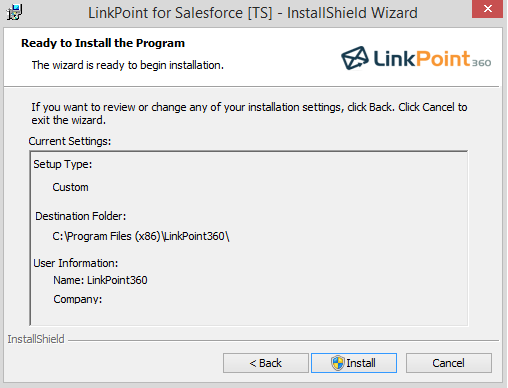
Review the Current Settings for the installation. Click the Back button to make changes, or click the Install button to start the installation.
Tip: LinkPoint Connect relies on a common Microsoft technology called .NET Framework 4.5 Client Profile which comes pre-loaded on Windows 7 and above. If your network does not already have this installed, it will automatically be downloaded as part of the LinkPoint Connect installation process.
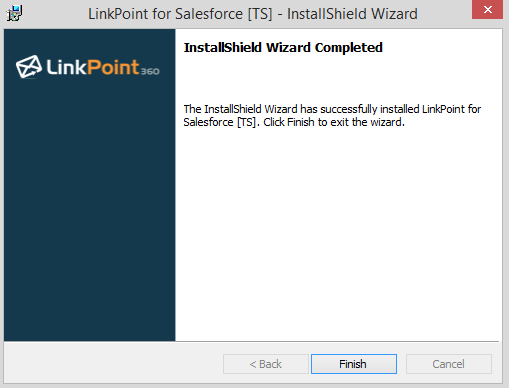
Click the Finish button to exit the installer.
Tip: LinkPoint360 provides a method for storing user configuration settings to a virtual drive mapping regardless of which server the user is accessing. If you are not using Roaming User Profiles, where the Windows AppData path follows the user across servers, and you have multiple Citrix or Terminal Servers where users are load balanced, the server admin will need to add a single file in the LinkPoint Connect installation folder on the server to tell the LinkPoint Connect software where the virtual drive maps to. This allows the LinkPoint Connect software to access the same configuration regardless of which server the user is on.
Navigate to the base installation folder: C:Program FilesLinkPoint360
Create a new .txt file named AppDataPath.txt in the directory. Within the .txt file, enter a single line of text pointing to the folder where your organization stores user profiles (i.e. H:LinkPoint360).
Additional Resources: LinkPoint360 offers implementation services to assist customers with LinkPoint Connect configuration for VDE deployment. This can include prepopulating and locking down fields such as License Key for all users. Contact your LinkPoint360 Account Executive for more information regarding LinkPoint GoLive implementation services.
Tip: If the server is set up as a virtual application environment (vs. virtual desktop), LinkPoint Assist must be launched in the same process as the email application. At certain Citrix sites, two possible issues may arise that this file corrects:
Between sessions the Outlook Add-in becomes unregistered. We believe, but need to yet verify, that the registry and/or COM registration is being removed.
Outlook is unable to instantiate the LinkPoint Assist tray application if it is not already running.
This process will re-register the Add-in with Outlook, launch Outlook, and launch LinkPoint Assist. Before publishing LinkPoint Connect as a Citrix application, change the paths to accommodate the environment. The script can be requested from LinkPoint360 Support (StartOutlookLinkPoint360.cmd) The instructions above are also included inside this file.
Download: Access the complete LinkPoint Connect Virtual Desktop Environment Installation Guide in .pdf format. Get the User Guide