


Click the images throughout the Knowledge Base to see full size versions of screen captures.
Reviewing Email Sync History

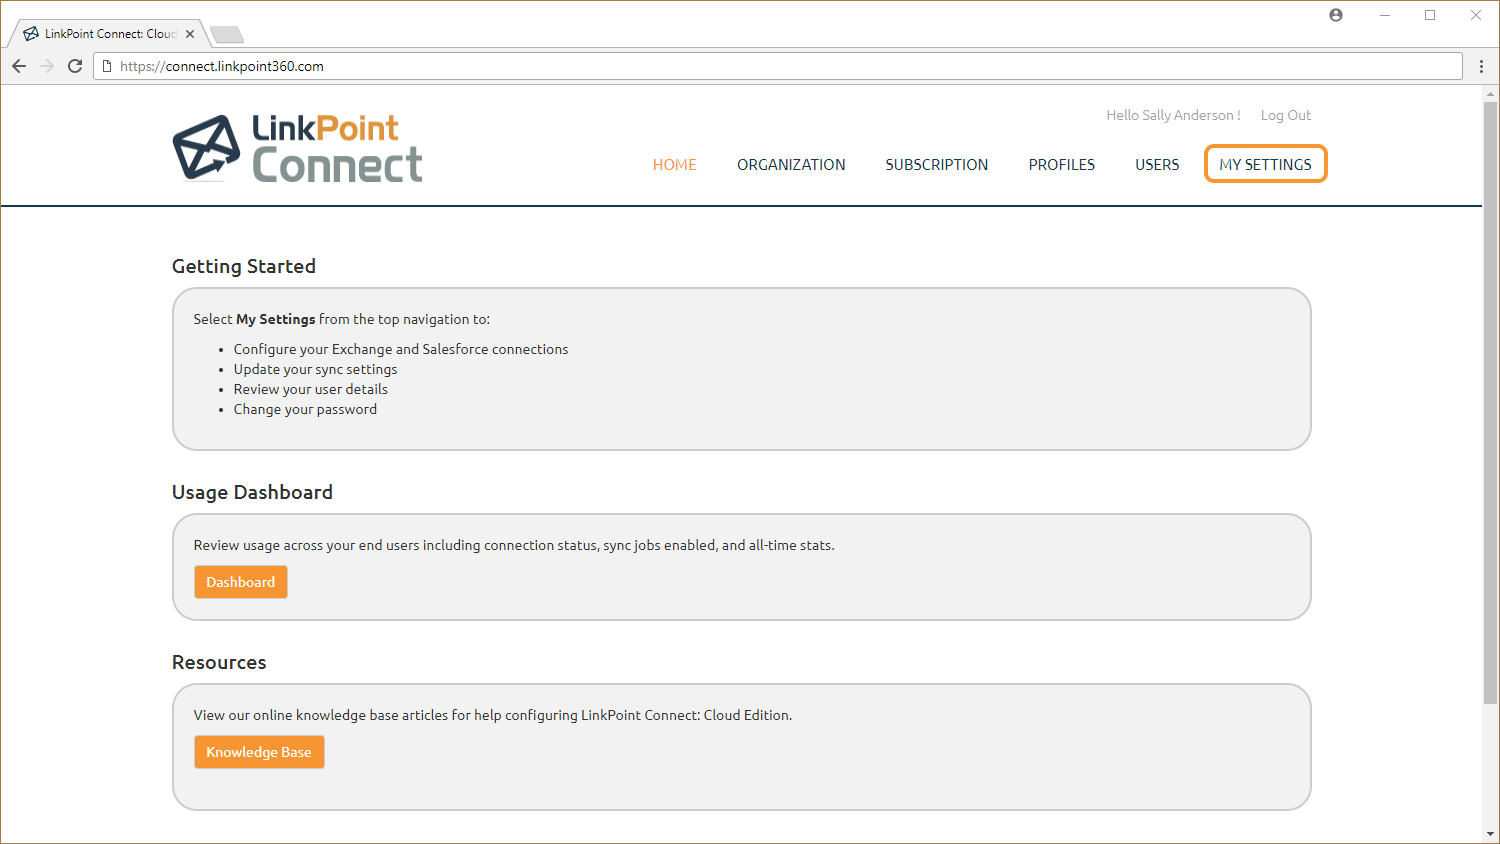
Log in to Cloud Edition, and select the My Settings option in the top right corner of the screen.

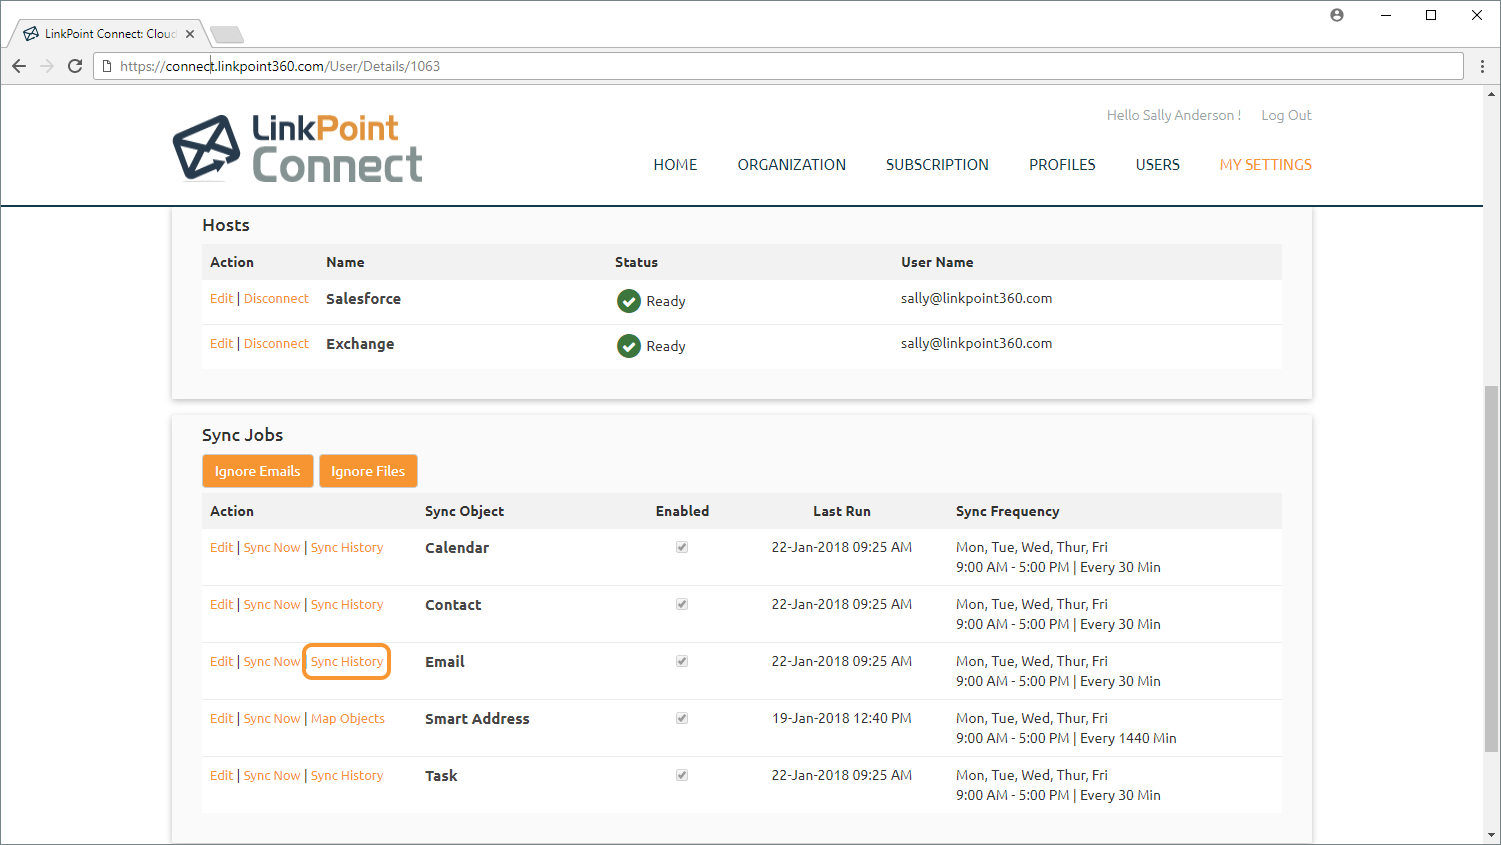
Locate the Email Sync Object in the Sync Jobs section and select the Sync History link.

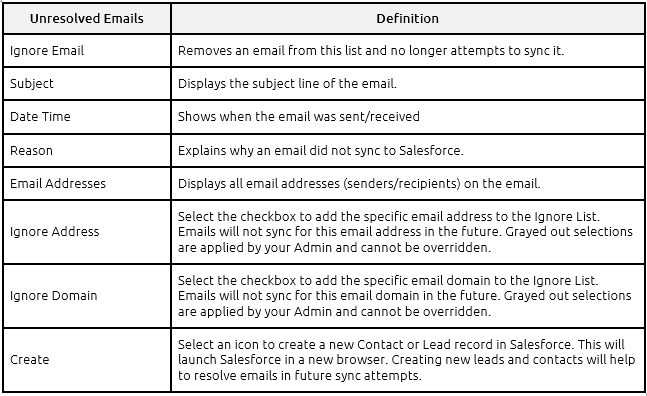
Review the Unresolved Emails tab to view all of the emails that did not sync because items did not have matching Salesforce records or due to system error. Each row lists a single email and the related data.
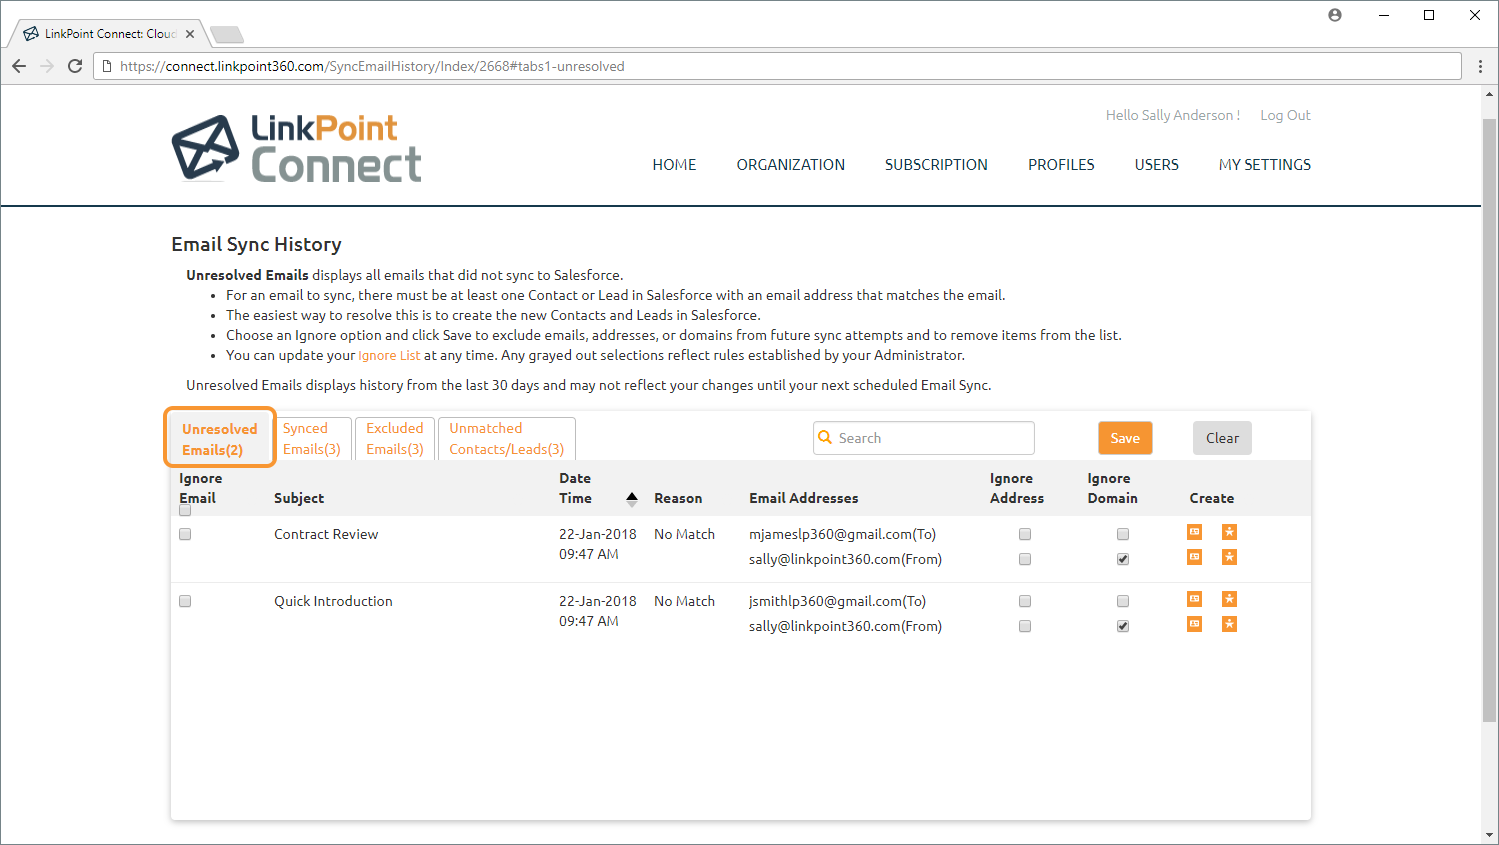

Sort the items by clicking the column headers to view items in ascending or descending order. Search partial or full terms to filter the list and find specific items more quickly.
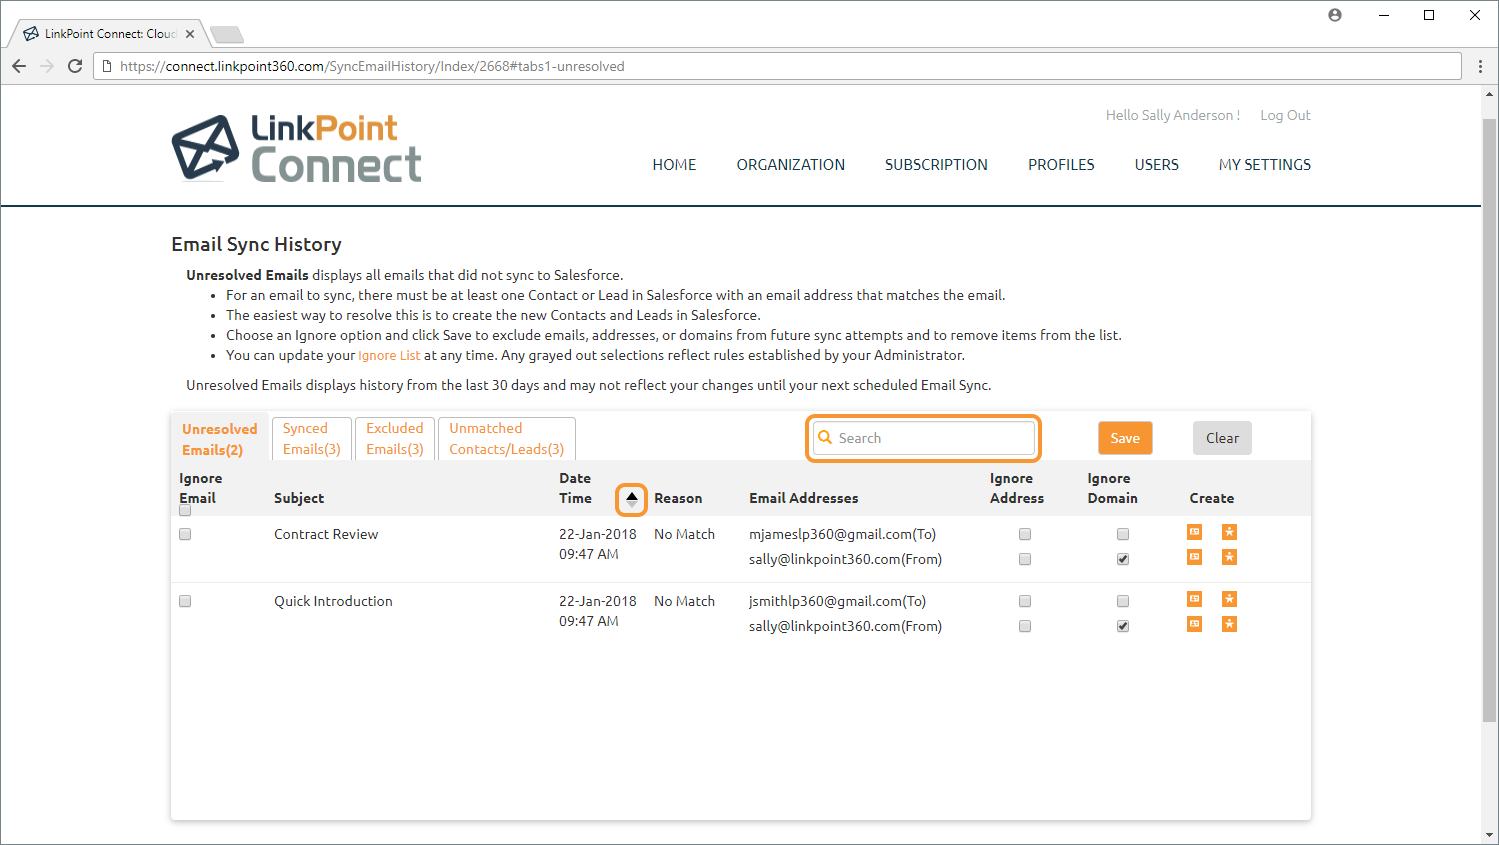


Select the Ignore Email checkbox to select single or multiple emails. Click Save to remove the item(s) from future sync consideration.

Tip: Email Sync attempts to sync items for up to 30 days from the first time the item is created. Emails in the Unresolved Emails tab that you do not want or need to sync (i.e. emails to/from contacts that you do not intend to add to Salesforce) can be selected and excluded from future sync attempts. This will also remove them from the Unresolved Emails list.

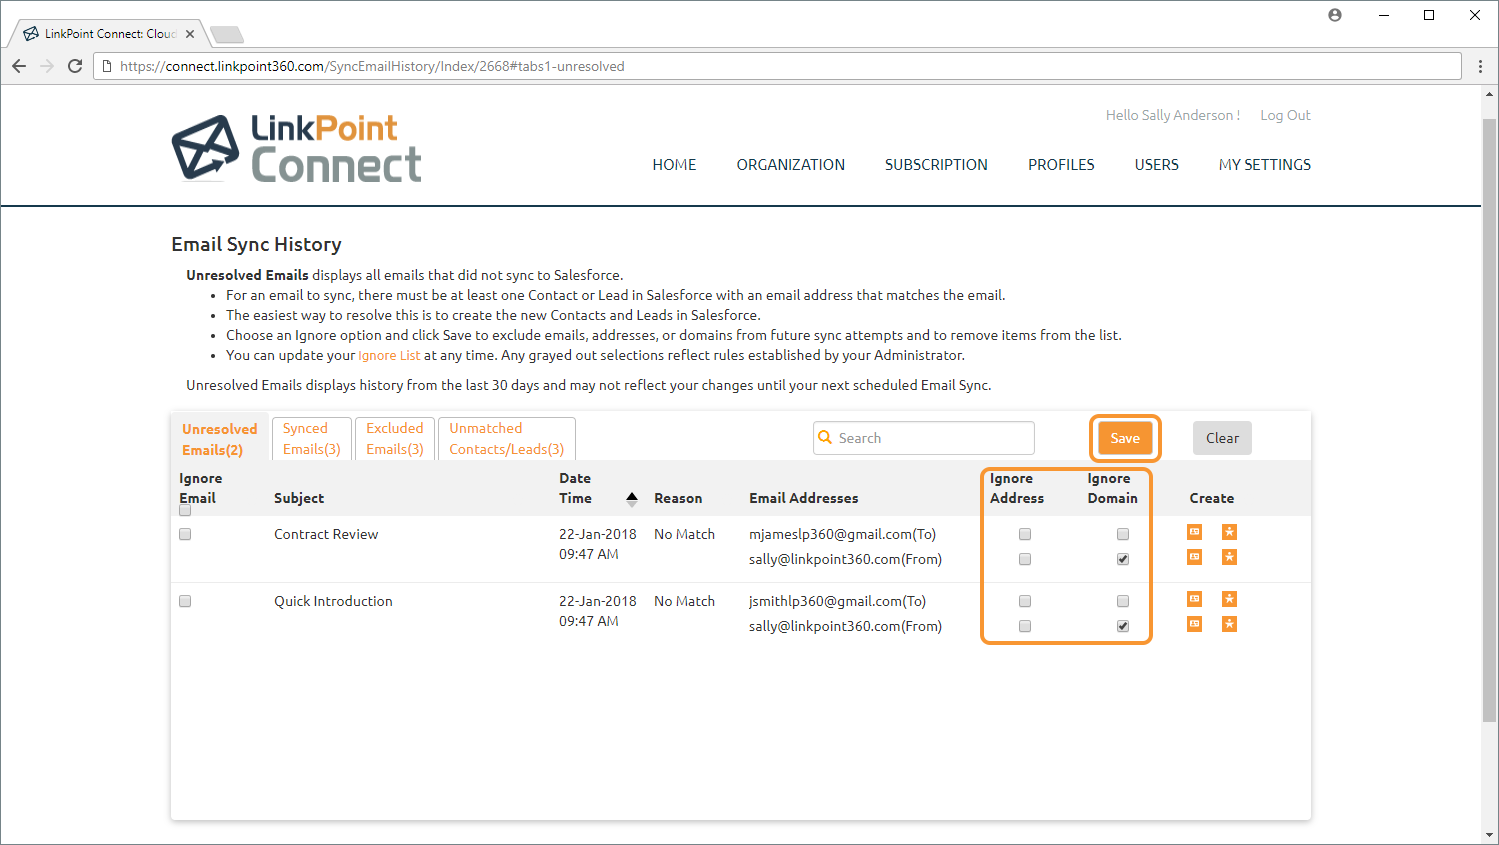
Select the Ignore Address or Ignore Domain checkbox(es) to add email addresses and/or domains to your Ignore List and exclude them from future sync consideration. This is useful for excluding emails from senders that you are certain you do not need to record emails for and/or that do not intend to add to Salesforce. Click Save to keep the changes.

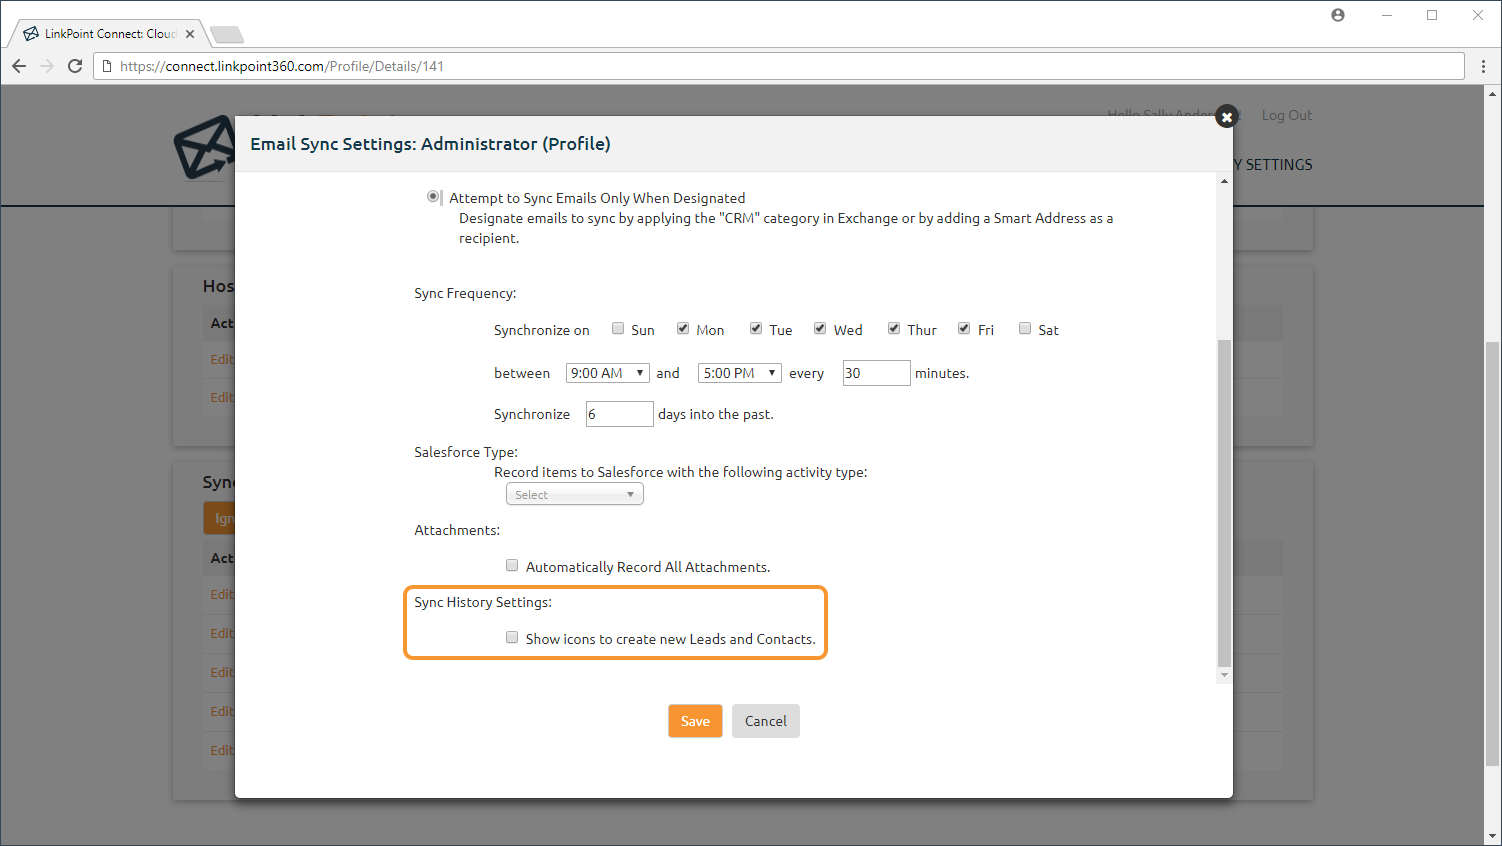
Select a Create icon for Contact or Lead to enter a new record in Salesforce. This will launch Salesforce in a new browser window. Creating new leads and contacts will help to resolve emails in future sync attempts.


Select the Synced Emails tab to view all of the emails that synced based on the established sync settings. Each row lists a single email and the related data.
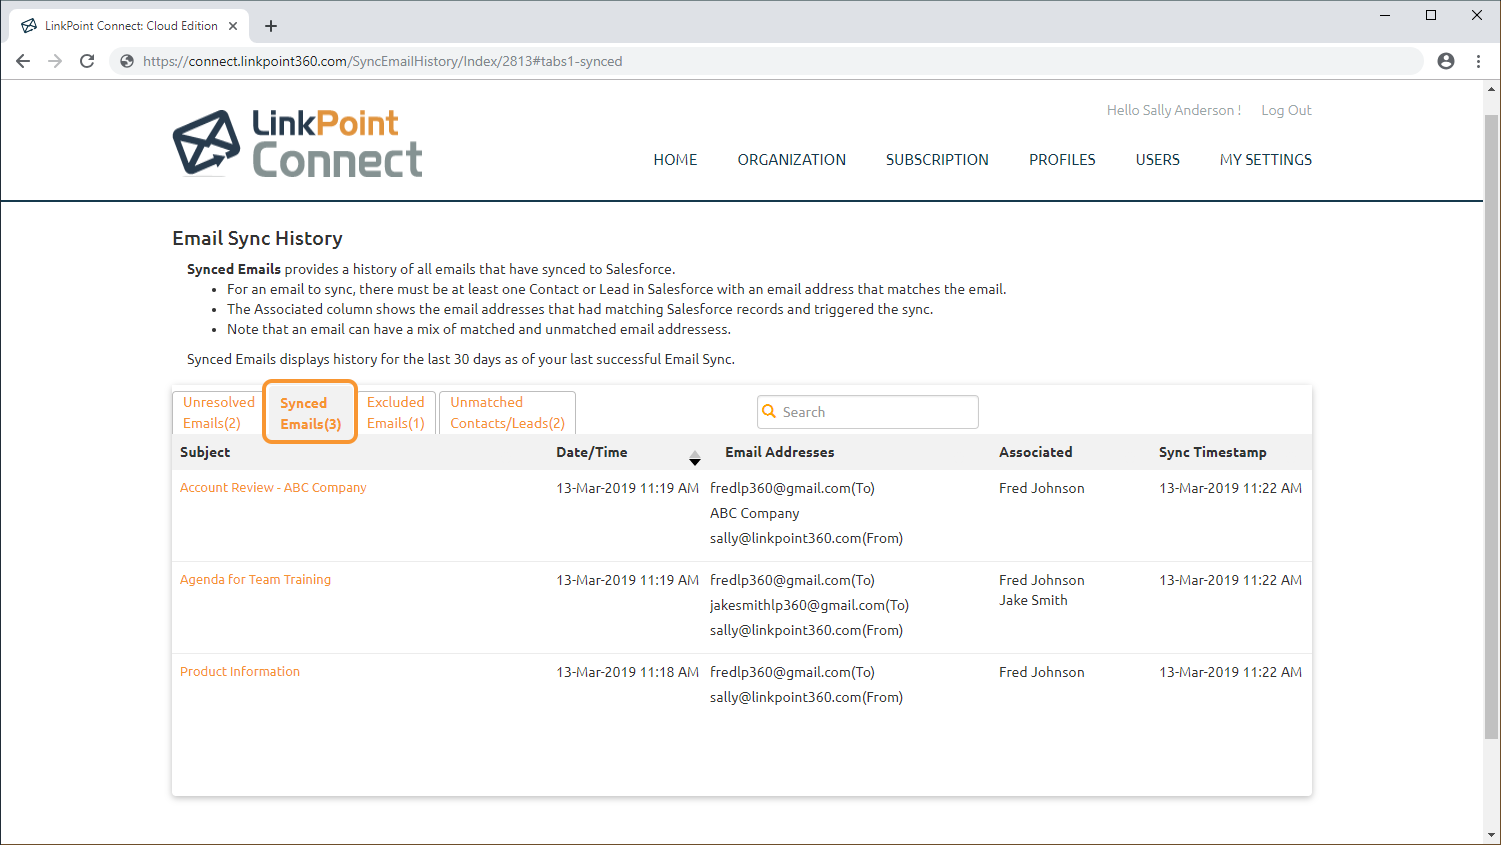
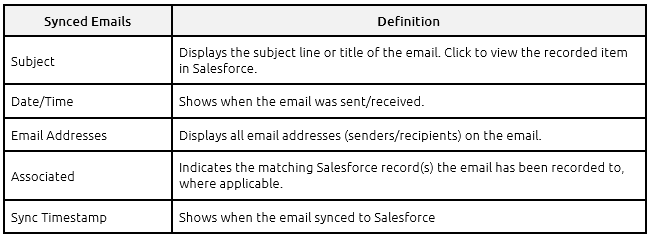

Sort the items by clicking the column headers to view in ascending or descending order. Search partial or full terms to filter the list and identify specific items more quickly.
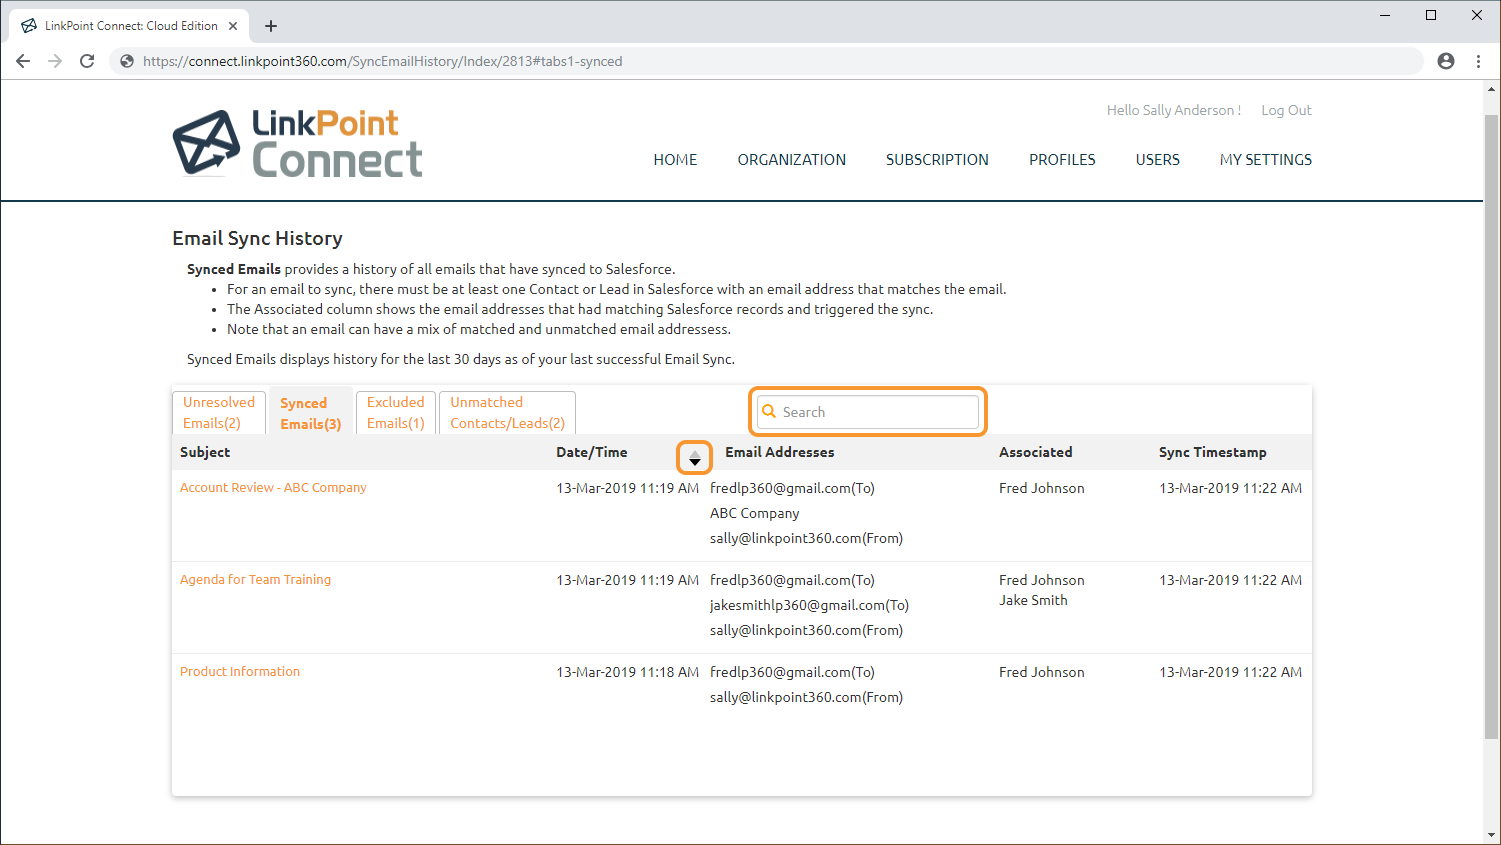
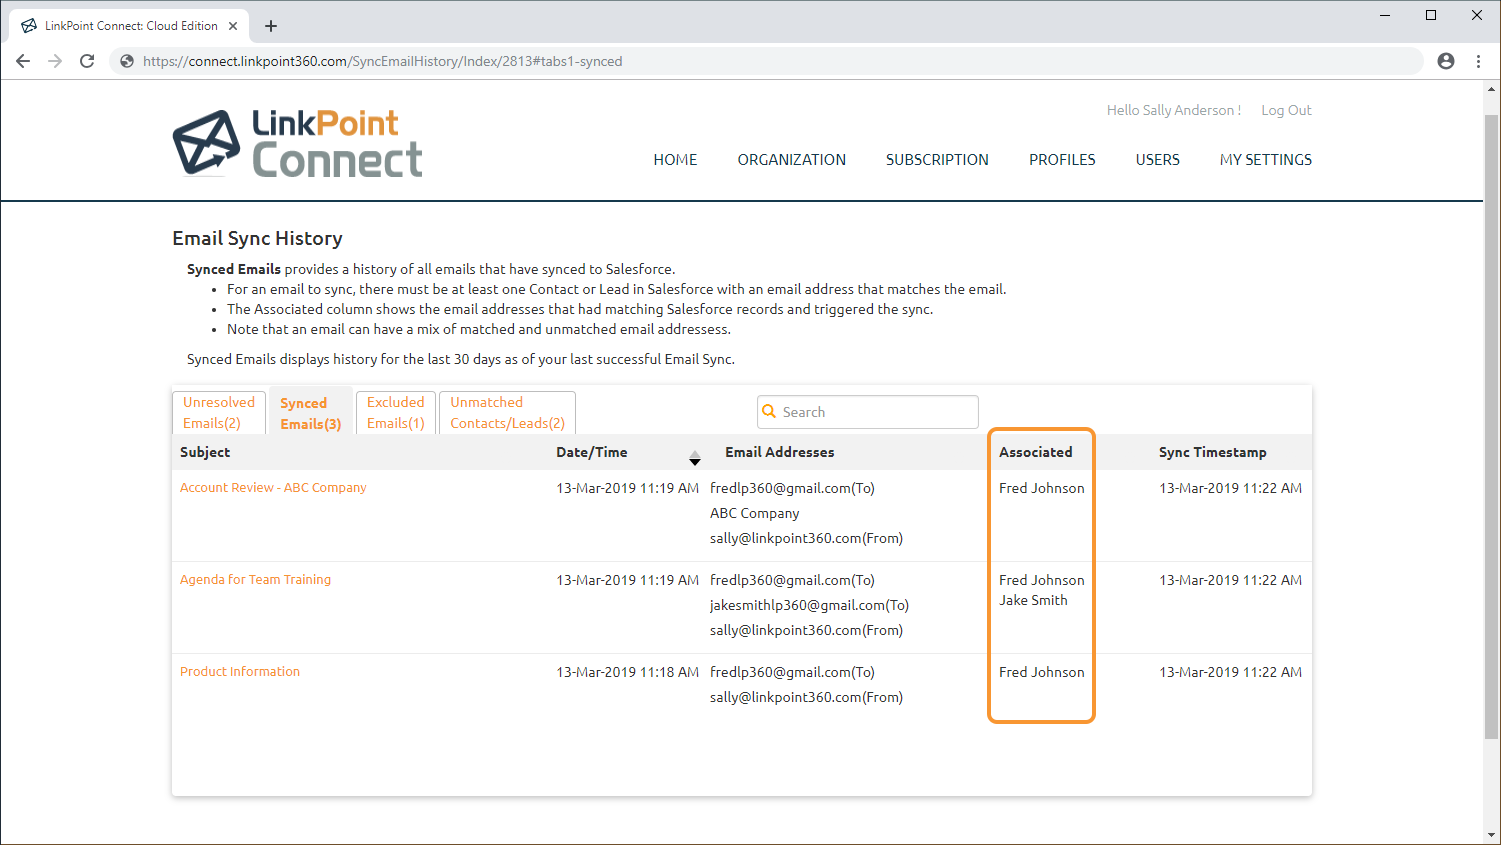
Warning: Salesforce includes several limitations regarding how items can be recorded to multiple Salesforce records. When working with multiple leads or a mix of leads and contacts, items will only sync based on established Salesforce allowances. In these cases, Cloud Edition will indicate all records where the item was recorded with a green checkmark. However, there may be matching Salesforce records that the system was not permitted to record to due to the Salesforce restrictions.

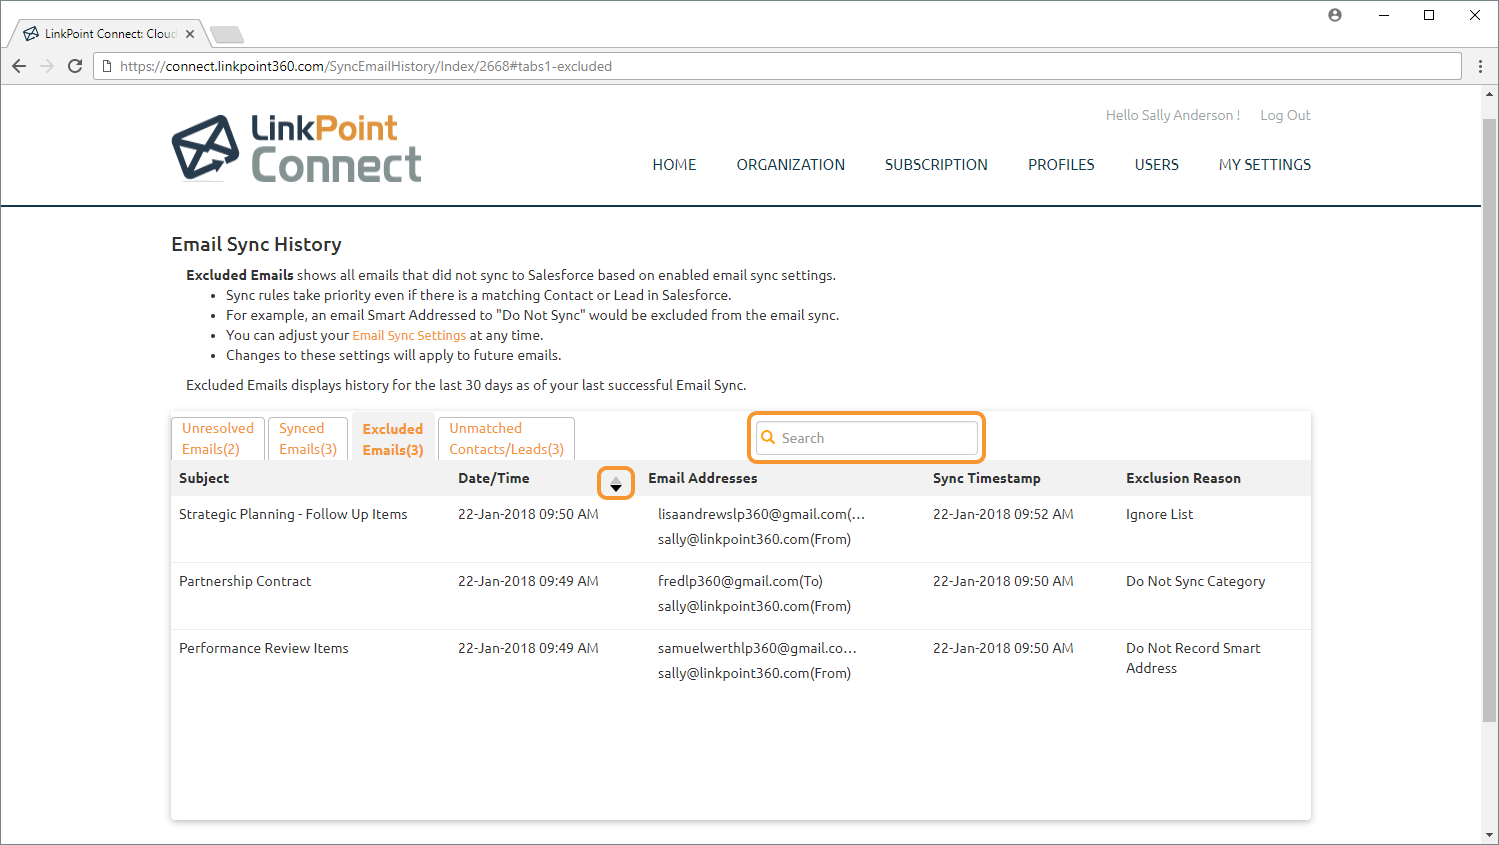
Select the Excluded Emails tab to view all of the calendar items that were excluded from syncing based on the established sync criteria. Each row lists a single email and the related data.

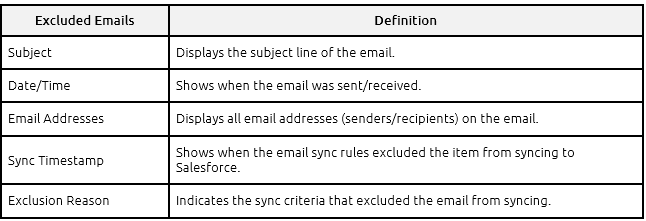
Tip: Different sync settings include different criteria that prevent items from syncing. For example, when selecting the option to Attempt to Sync Emails Only When Designated, emails with a CRM category but where there are no matching email addresses in Salesforce will not sync. Users can also proactively exclude emails from syncing by adding a DoNotSync Category or Do Not Record Smart Address. Items remain in this list for review for 30 days.
Tip: Email addresses and domains included in the Global Exclusion List by an Admin are completely omitted from the sync process and do not appear in the Sync History.

Sort the items by clicking the column headers to view items in ascending or descending order. Search partial or full terms to filter the list and find specific items more quickly.
Tip: Items that do not sync due to Prevent Operations settings will not appear in the Email Sync History since the system completely ignores those items when created, updated, or deleted, as specified.

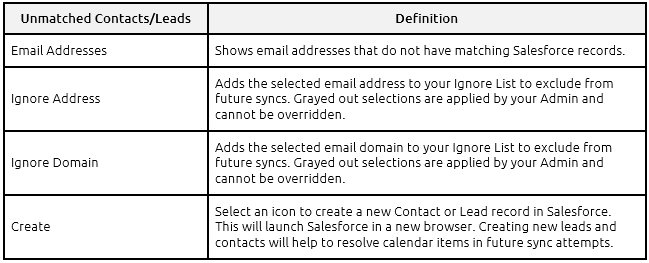
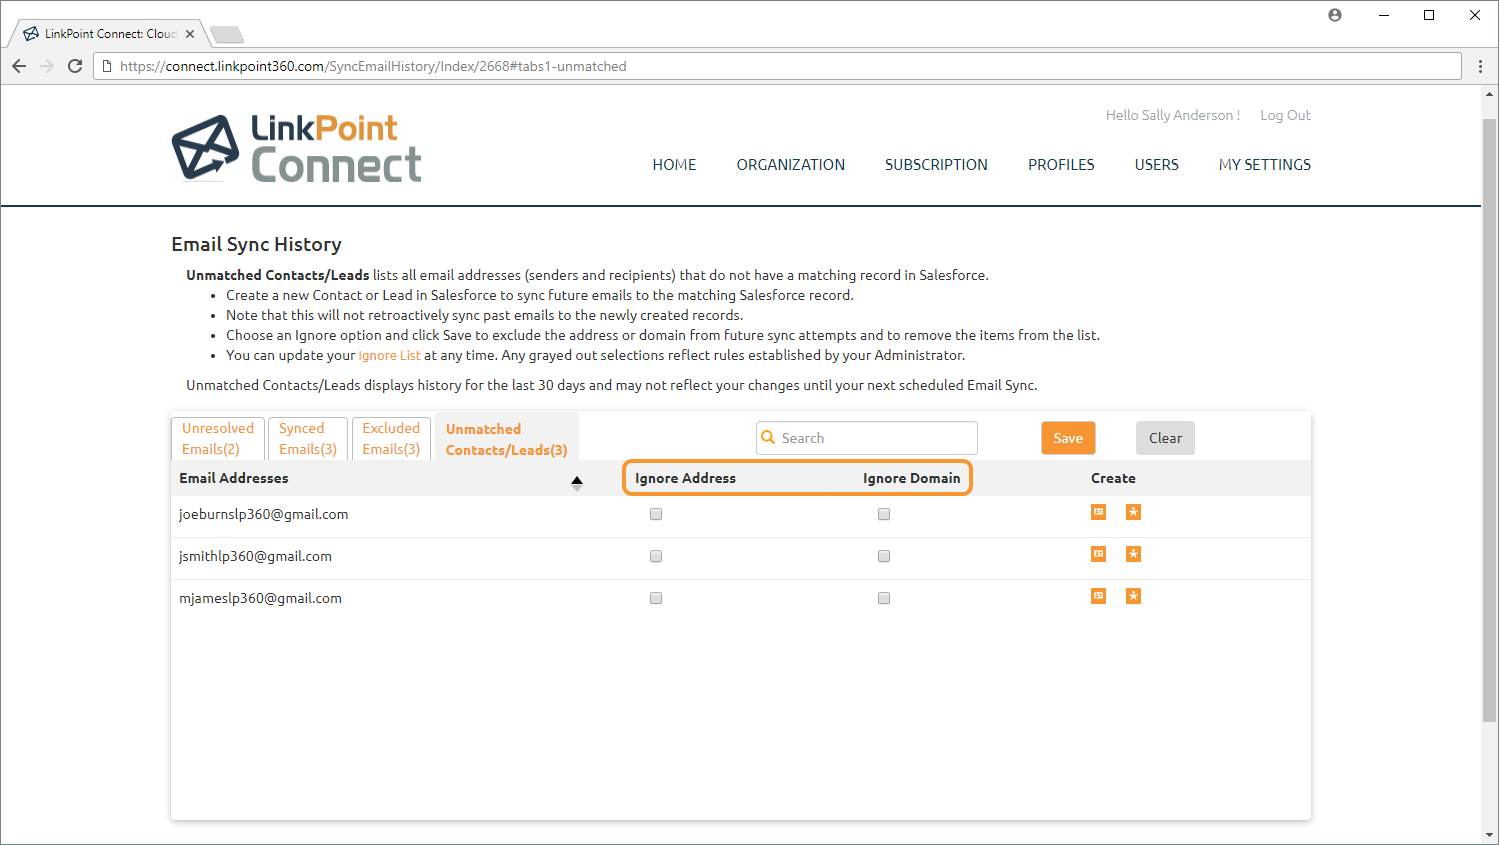
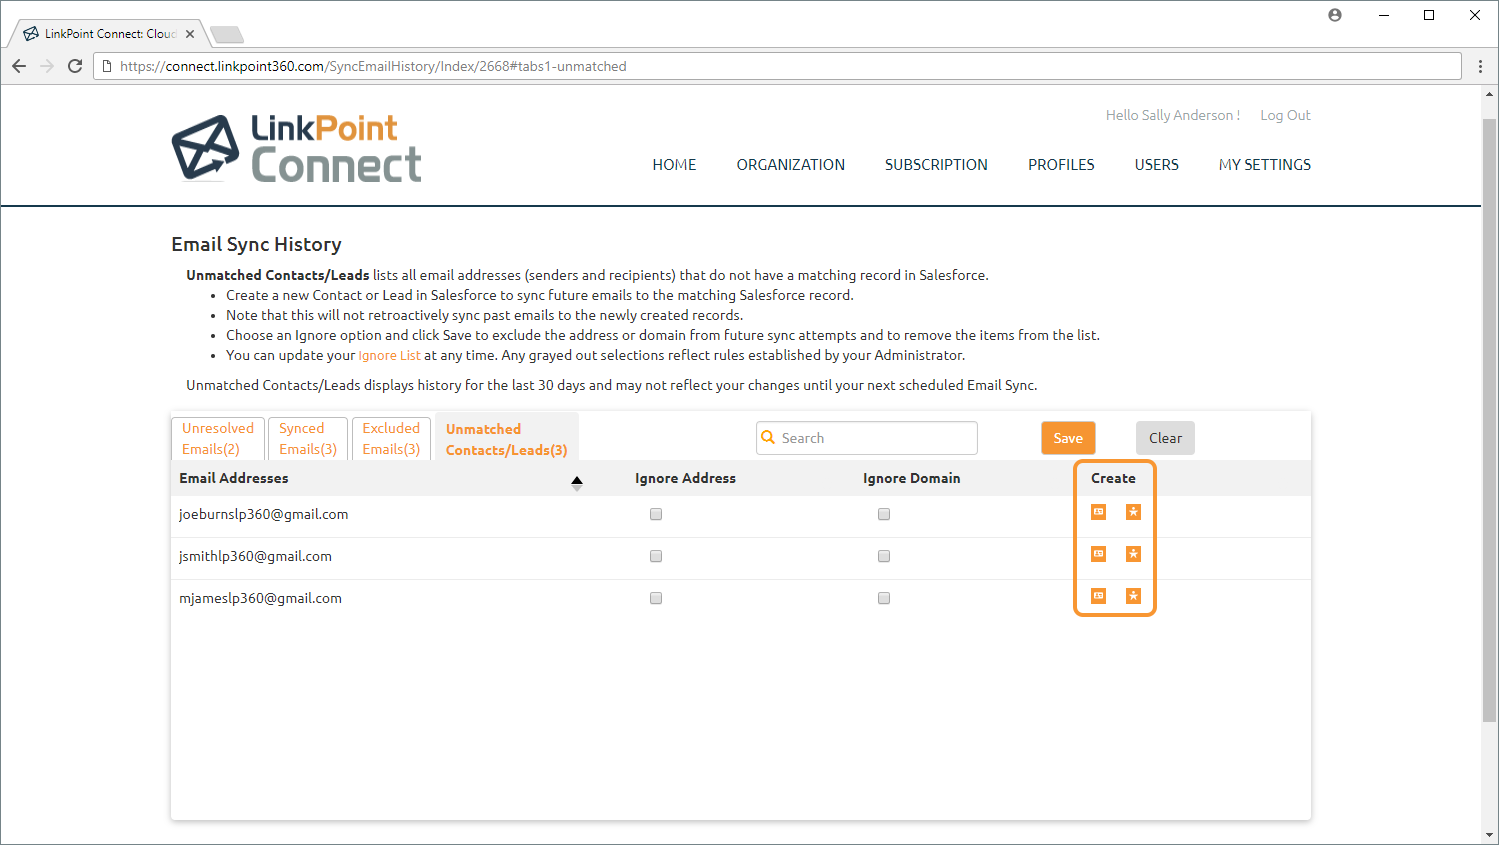
Select the Unmatched Contacts/Leads tab to view a list of all email addresses extracted from emails that do not have a matching Contact or Lead record in Salesforce.
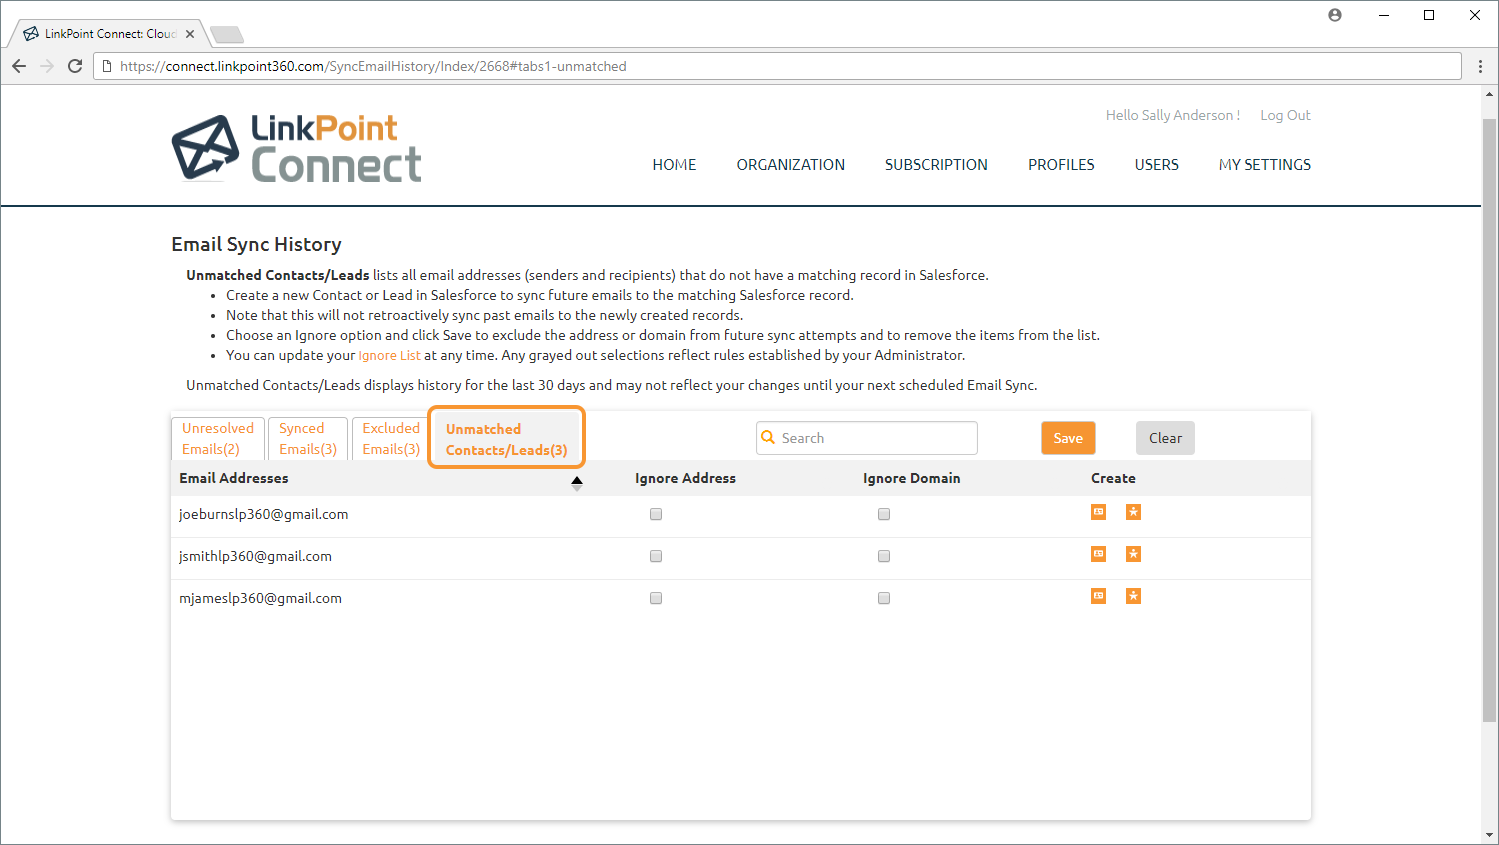
Tip: This screen is designed to make it easier for users to see which email addresses have not been added to Salesforce. For sync modes where matches are required, leaving numerous email addresses with no Salesforce match will result in a large number of unresolved or excluded items. This tab enables users to create records or to exclude email addresses and domains from future consideration with ignore settings. Creating a new Contact or Lead in Salesforce will enable the system to sync future emails. Note that this will not retroactively sync past emails to the newly created records. Items remain in this list for review for 30 days.

Select the Ignore Address or Ignore Domain checkbox(es) to add email addresses and/or domains to your Ignore List and exclude those items from future sync consideration. This is useful for excluding emails from senders that you are certain you do not need to record emails for and/or that do not and will not exist in your instance of Salesforce.
Tip: Email Sync attempts to sync items for up to 30 days from the first time the item is created. Unmatched Contacts or Leads that you do not intend to add to Salesforce can be selected and excluded from future sync attempts.
Tip: Items related to an email address or domain placed on the Global Exclusion List by an Admin will not appear in the Email Sync History since the system completely ignores those items.
Additional Resources: Learn more about excluding email addresses and domains in the Working with Ignore Lists section of this User Guide.

Select a Create icon for Contact or Lead to enter a new record in Salesforce. This will launch Salesforce in a new browser window. Creating new leads and contacts will help to resolve emails in future sync attempts.

![]() Download: Access the complete LinkPoint Connect: Cloud Edition (Exchange + Salesforce) User Guide in .pdf format. Get the User Guide
Download: Access the complete LinkPoint Connect: Cloud Edition (Exchange + Salesforce) User Guide in .pdf format. Get the User Guide
