
Smart Address offers users the ability to tag emails and calendar items and associate them with a Salesforce “What” record as part of the sync process. To do this, Smart Address Sync creates a separate Contact folder within Exchange and generates a unique email address for each object record that is enabled. As users send emails or create meetings, they can add Smart Addresses from their Address Book or Contacts folder wherever they have access to their Exchange account (desktop, web mail, mobile device, etc.). Cloud Edition detects Smart Addresses and uses them to relate the emails and calendar items to additional Salesforce records. Smart Tags can also be used to record attachments or to prevent attachments from recording to Salesforce. In this section, you will learn how to use Smart Address to tag emails and calendar items and associate them with Salesforce “What” records

Click the images throughout the Knowledge Base to see full size versions of screen captures.

Warning: Smart Address functionality is only available when working with Email and Calendar Sync. Smart Addresses cannot be appended to Task or Contact records from Exchange to create associations in Salesforce. The ability to use Smart Tags to sync attachments applies to Email Sync only. This feature is currently not available for Calendar Sync.
Warning: Cloud Edition Admins have the ability to set default sync settings and/or lock down these settings to prevent end user override. Your instance of Cloud Edition may not allow you to change any/all of the settings described in this section, depending on how your Admin has configured your access. Settings that are preset and locked by an Admin are visible to end users but are grayed out and cannot be edited.

Tagging Emails and Calendar Items with Smart Address

Compose an email or meeting invite and address the recipients as needed.


Click the Bcc button on an email or the To button on a meeting invite.
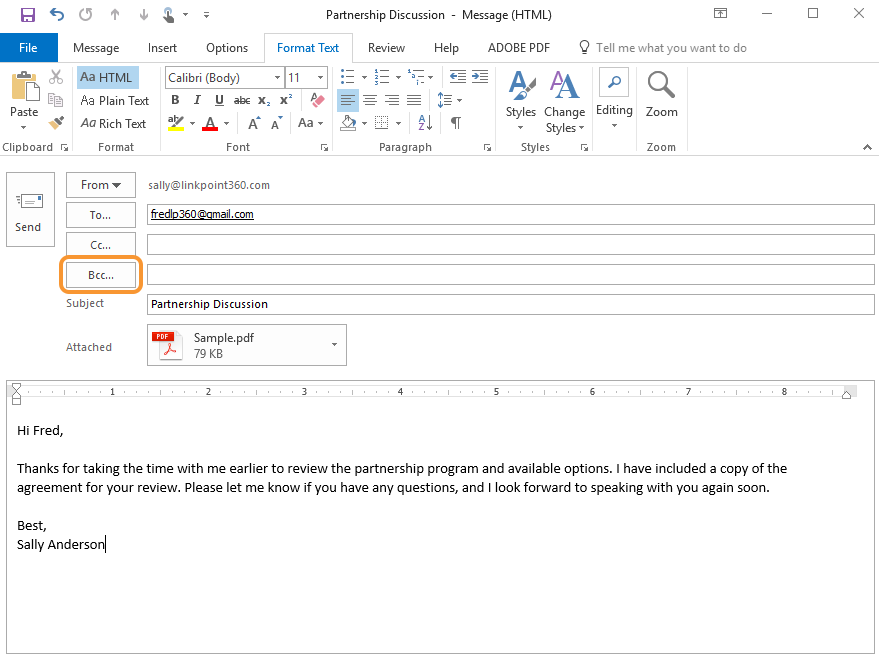
Tip: You can add a Smart Address to any recipient field (To, Cc, Bcc for email; Required, Optional for meetings). However, using the Bcc field is recommended so that other recipients of the email do not see the Smart Address listed.
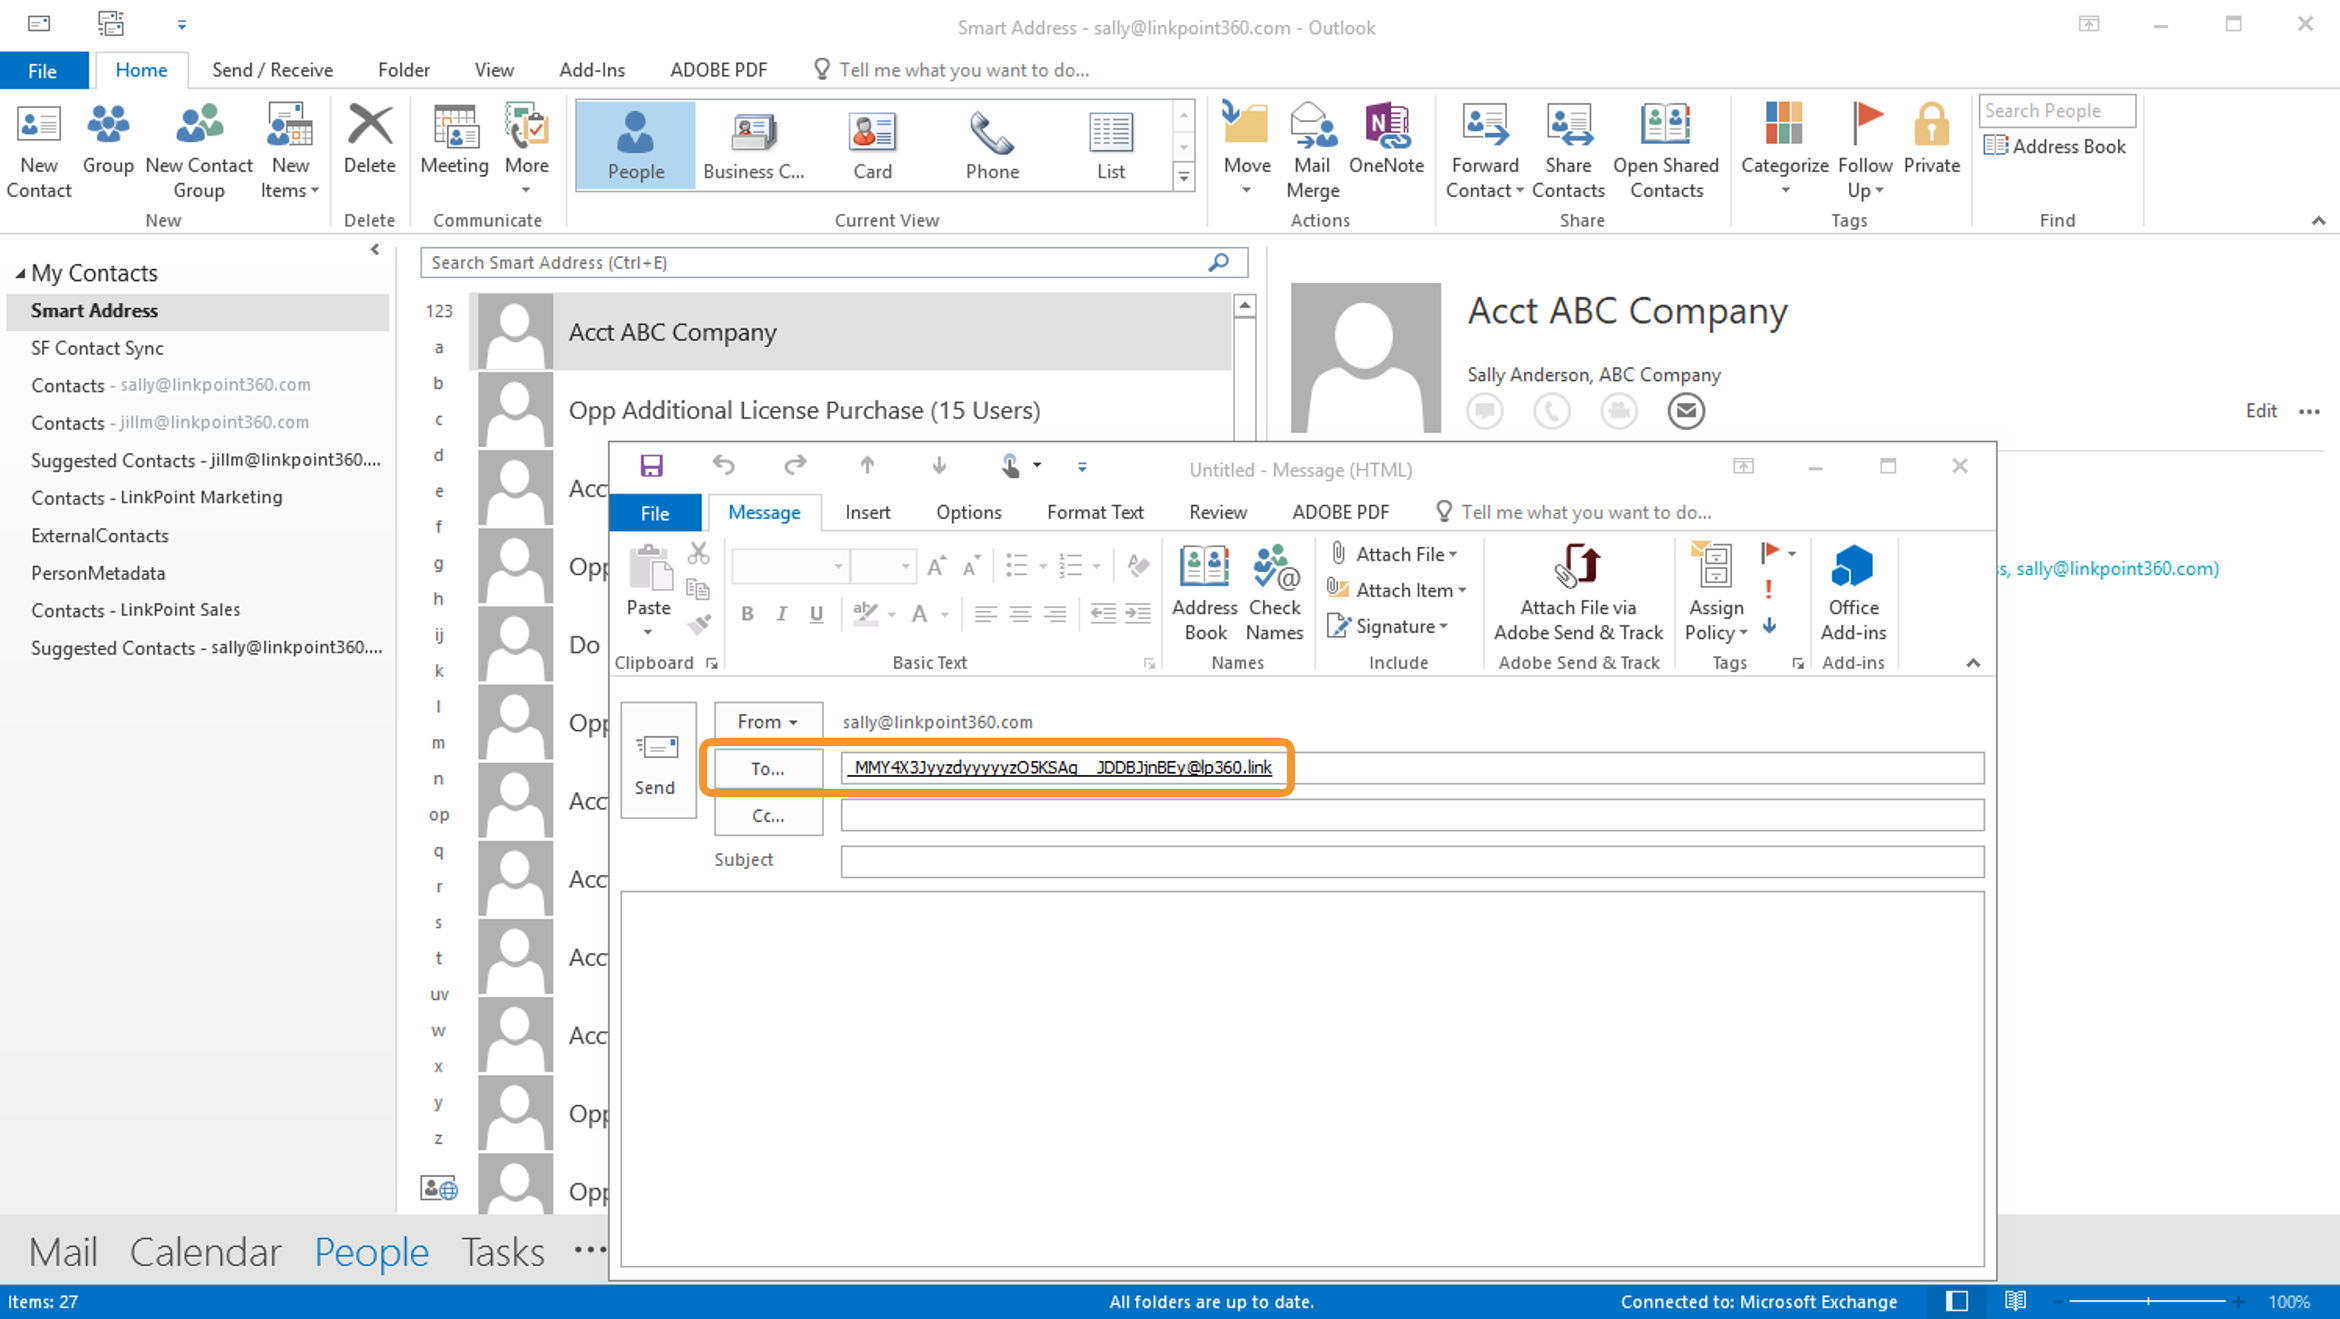
Tip: You can access the Smart Addresses directly from the Contacts or People section in Outlook. However, adding these contacts to an email or calendar item directly from the Contacts or People lists will display the Smart Address in its entirety rather than with its display name. While this will not affect functionality, the data will appear longer to end users as well as in the Cloud Edition Sync History.

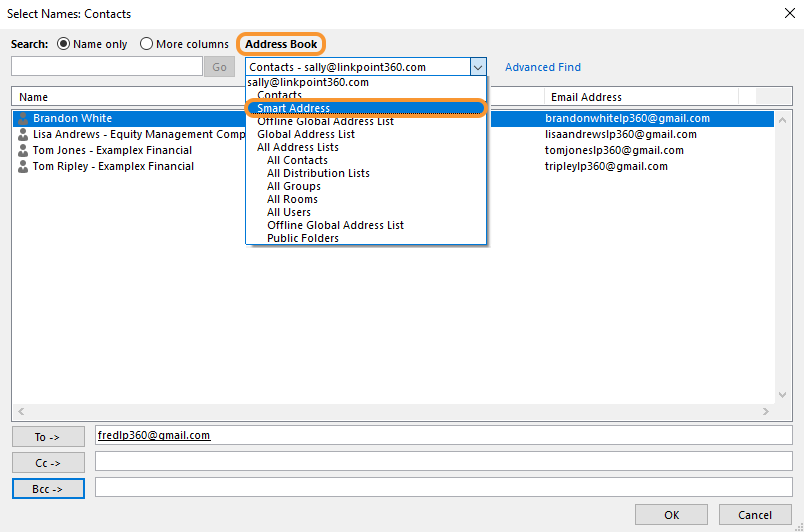
Click the Address Book drop-down list and select Smart Address.

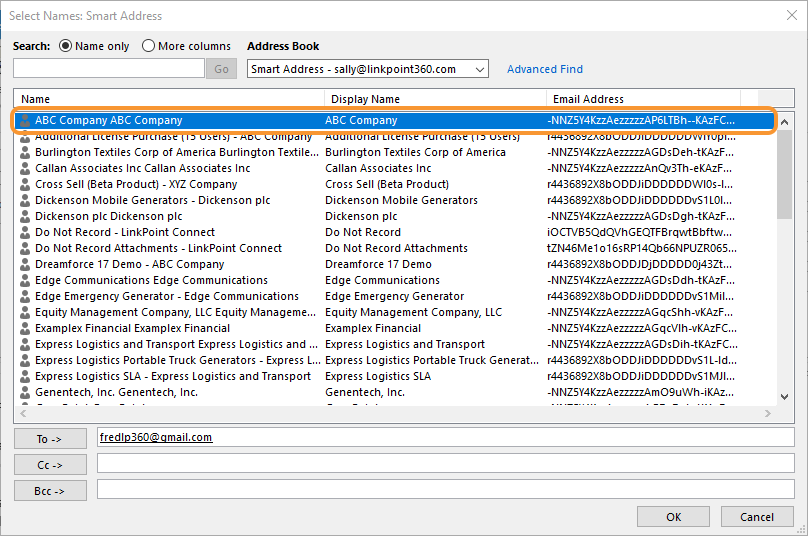
Review the list of available Smart Addresses, and select the Smart Address to add to the email or calendar item.
For mobile users, your application may permit you to search for a Smart Address as a contact by name. Begin entering the name of the Opportunity or Account to refine results and locate the correct Smart Address.

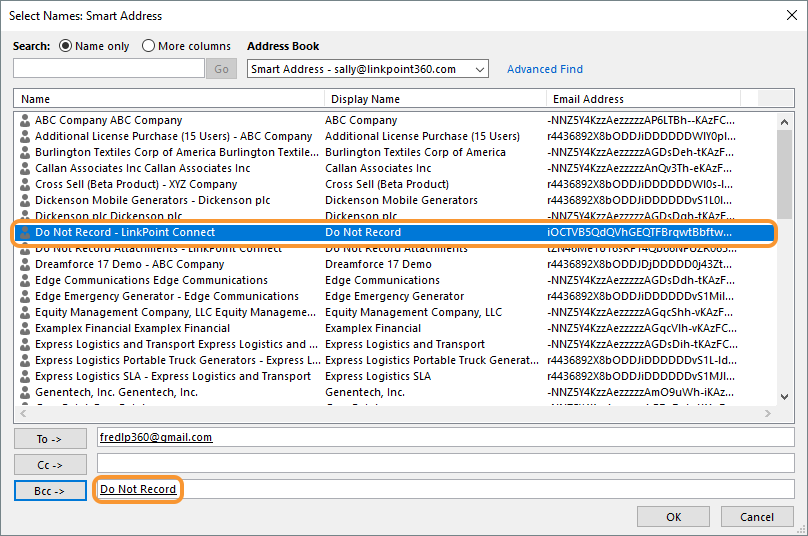
Insert the Do Not Record Smart Tag to prevent the email/calendar item from recording to Salesforce, even if the item would typically sync based on predefined sync criteria.

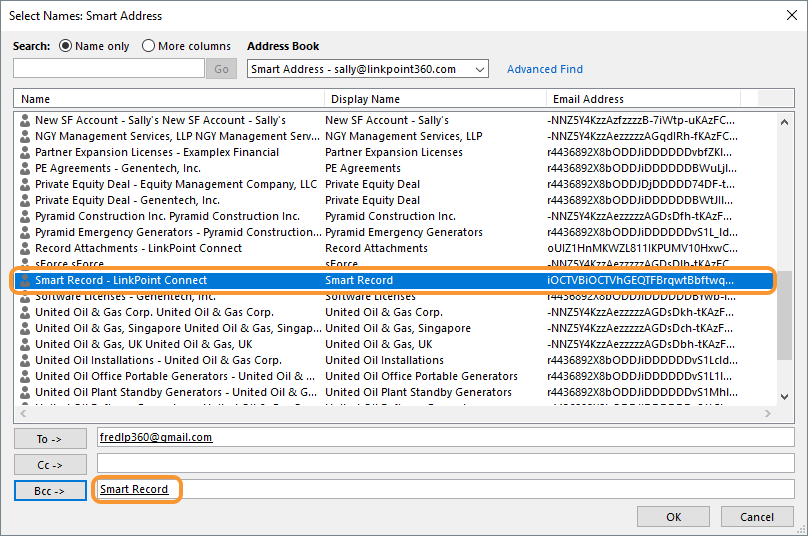
Insert the Smart Record Smart Tag to mark the email/calendar item for sync consideration in keeping with the user’s predefined sync criteria.

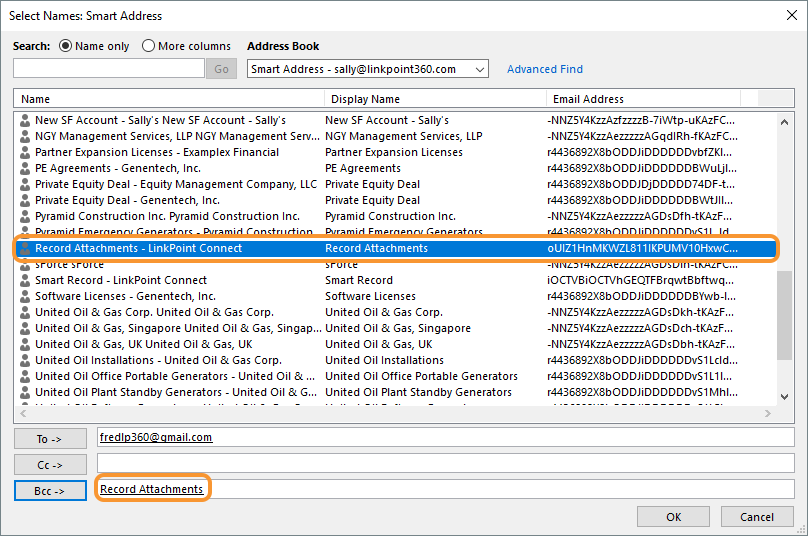
Insert the Record Attachments Smart Tag to record all of the attachments on the email if the email syncs based on the sync criteria.

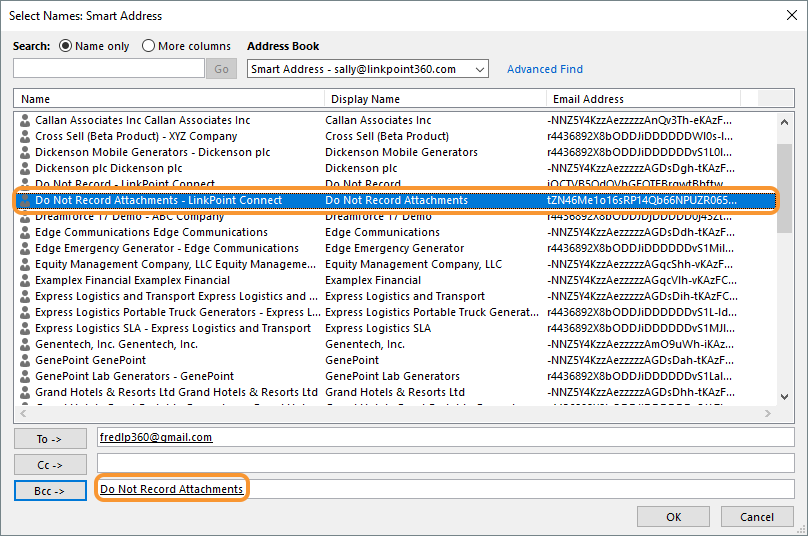
Insert the Do Not Record Attachments Smart Tag to prevent the attachments on an email from recording to Salesforce, even if the option to Automatically Record All Attachments is enabled in the Email Sync settings.

Finish composing the email or meeting invite and send when ready. With Email and/or Calendar Sync enabled, Cloud Edition will automatically detect the Smart Address and record the item to the corresponding Salesforce record in accordance with the established sync settings.
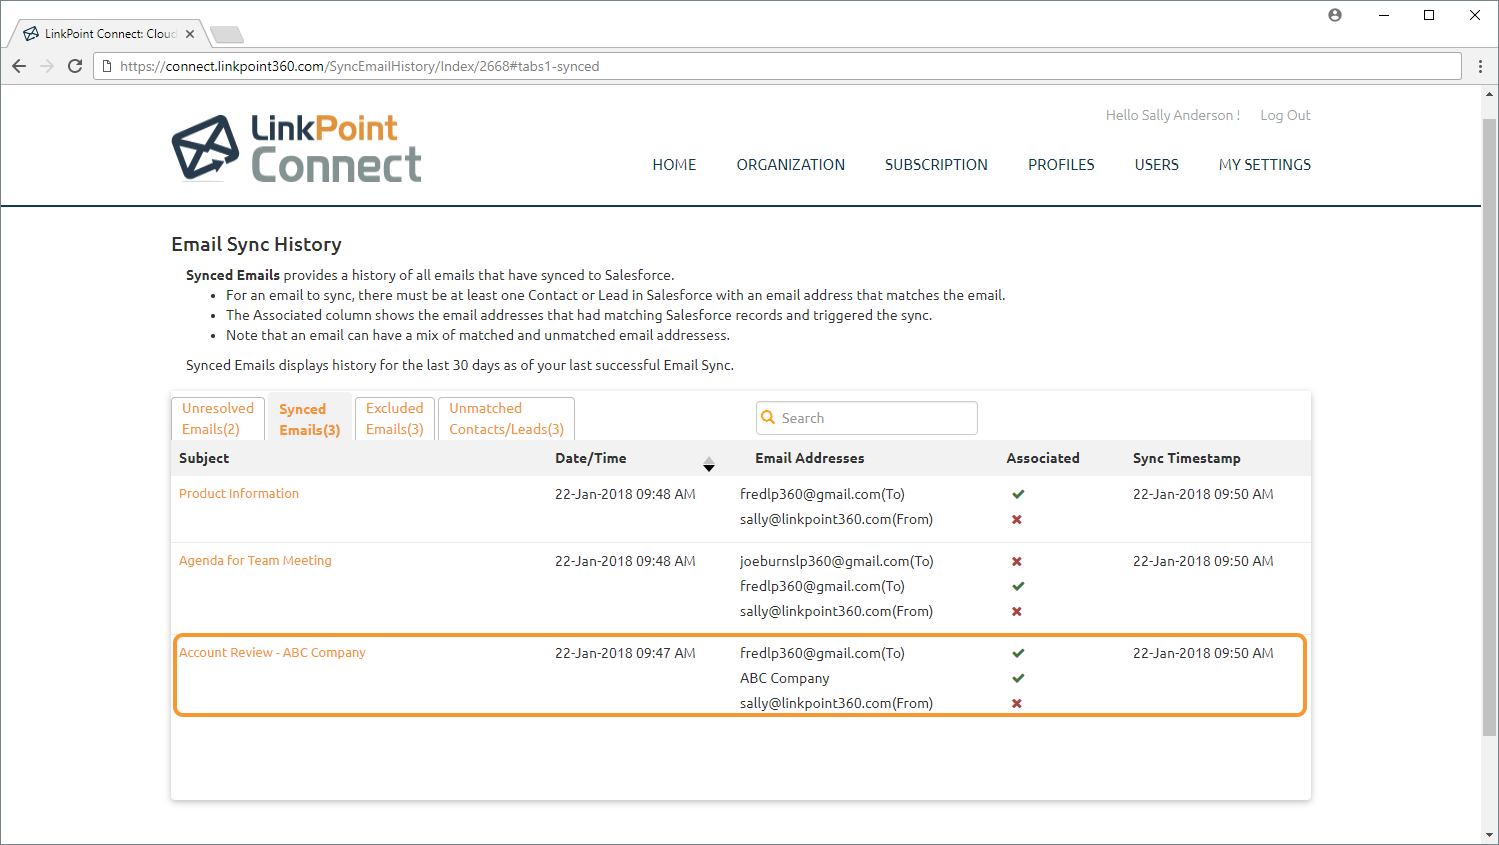
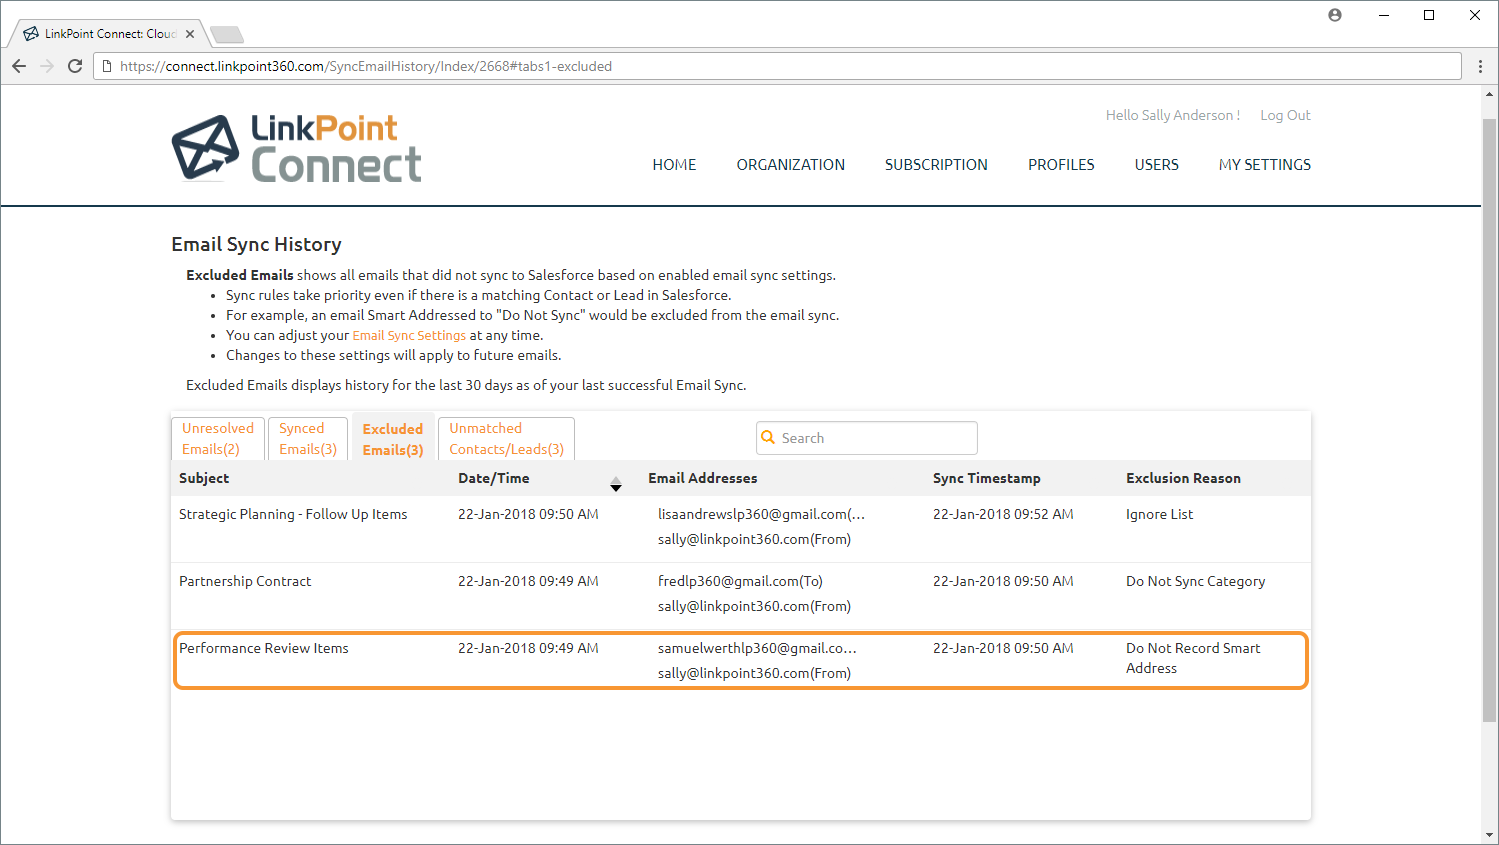
Smart Tags (i.e. Smart Record and Do Not Record) are not listed, but emails that sync or are excluded from sync due to using Smart Tags are noted in the Reason columns, where applicable.
![]() Download: Access the complete LinkPoint Connect: Cloud Edition (Exchange + Salesforce) User Guide in .pdf format. Get the User Guide
Download: Access the complete LinkPoint Connect: Cloud Edition (Exchange + Salesforce) User Guide in .pdf format. Get the User Guide
