Configuring the LinkPoint Connect Salesforce Connector (Outlook + Salesforce)
LinkPoint Assist guides users through simple configuration processes to adapt LinkPoint Connect to individual and organizational needs. Various settings are available for managing the way that LinkPoint Connect displays Salesforce data, records emails, and syncs information between systems. In this section, you will learn how to configure Options and Filters for the Salesforce Connector in LinkPoint Assist.
Click the images throughout the Knowledge Base to see full size versions of screen captures.
Configuring the LinkPoint Connect Salesforce Connector
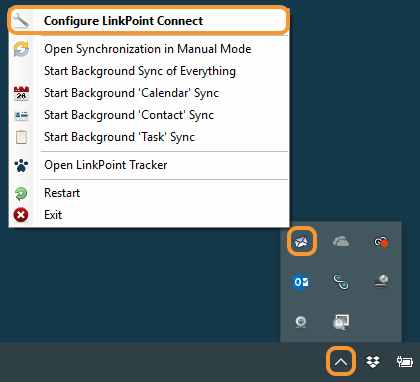
Click the LinkPoint Assist icon in the system tray with the right mouse button and then select ConfigureLinkPoint Connect.
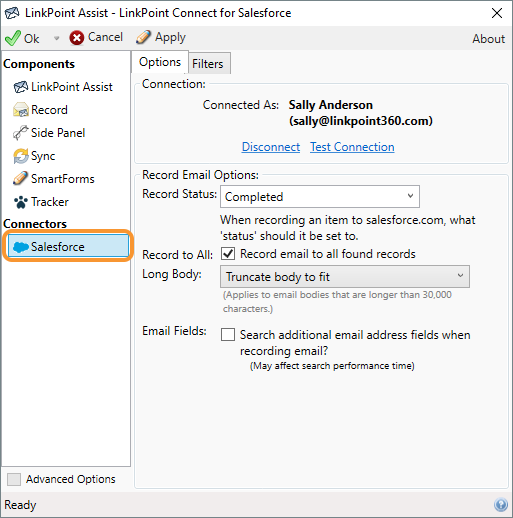
Select Salesforce from the Components list on the left side of the LinkPoint Assist window.
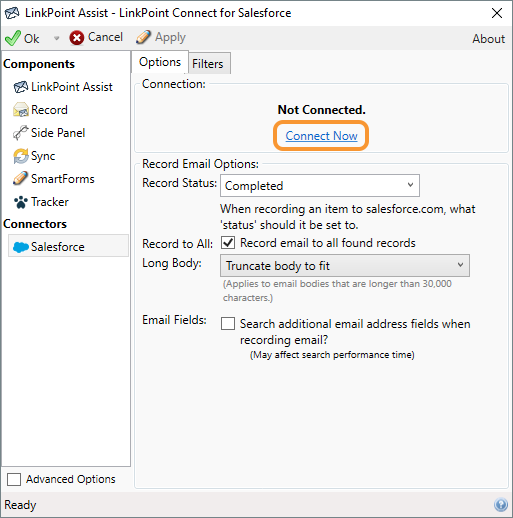
Select Connect Now to relate the Salesforce Account to LinkPoint Connect if not already connected.
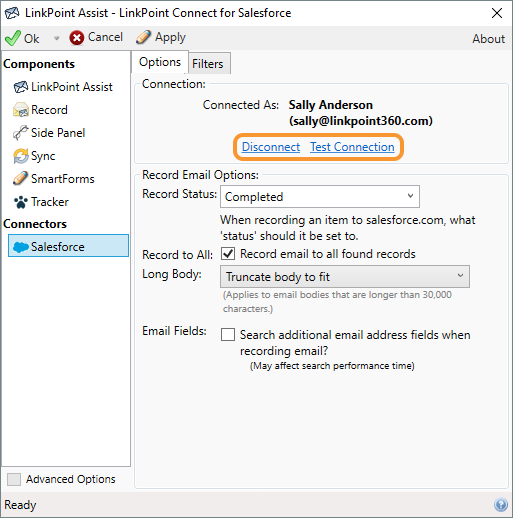
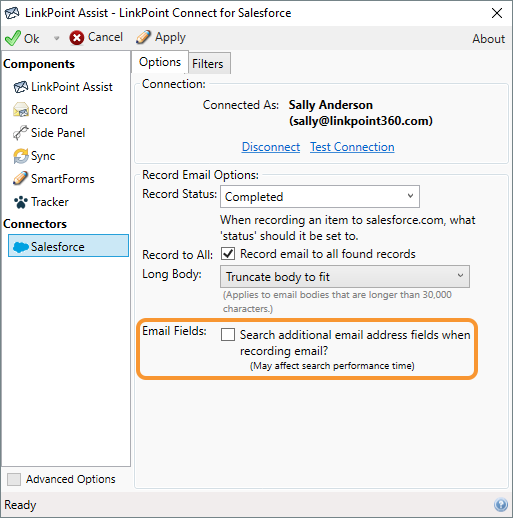
Select Disconnect to disassociate LinkPoint Connect. Select Test Connection to confirm that the Salesforce Account is correctly tied to LinkPoint Connect.
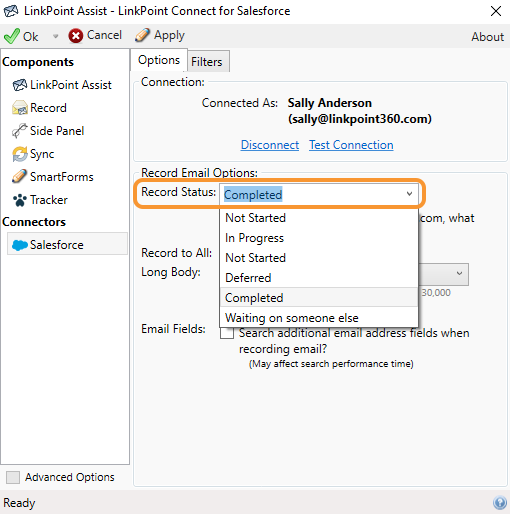
Select the Record Status from the drop-down list to determine the status of the item when it is entered in Salesforce on the Activity History.
Tip: LinkPoint Connect will set the Record Status to Completed and offers a list of 6 default options which mirror Salesforce default statuses. The majority of LinkPoint Connect users leave the Record Status set to Completed so that it does not show as an open activity within Salesforce. If your organization uses custom statuses, you can click in the Record Status field and type the Salesforce Status how it appears in your system.
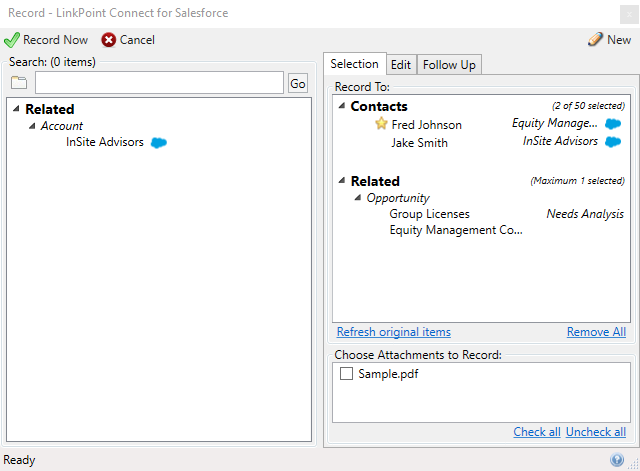
Select Record to All to cause LinkPoint Connect to recommend and add related Contacts to the Record To field in the Record window. This includes Contacts in the To:, Cc:, and Bcc: fields. This option is on by default.
Tip: With the Record to All option enabled, the Contacts related to the email being recorded are automatically entered into the Record To field. Users can remove any Contacts from the field before recording the email.
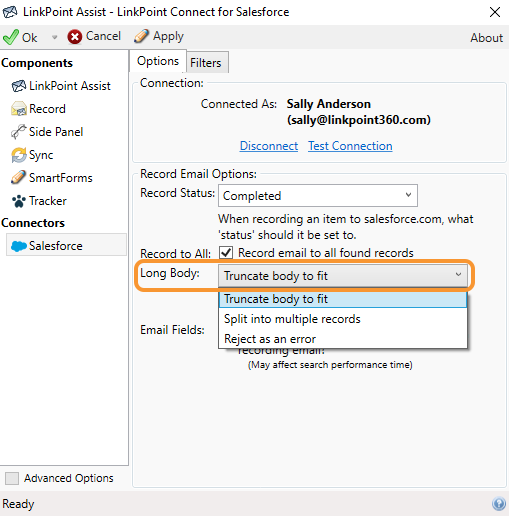
Select the Long Body drop-down list to review the options to handle emails with body content that exceeds the Salesforce limit of 32,000 characters.
Tip: The Truncate body to fit option will only record the content up to the maximum character limit. Any content beyond the 32,000 characters will not be recorded. The Split into multiple records option will split the original email into multiple items in the Salesforce Activity History list when recording the email. Each instance will be identical except the body will include a portion of the original body. The Reject as an error option will not record any emails that have a body character count in excess of 32,000 characters.
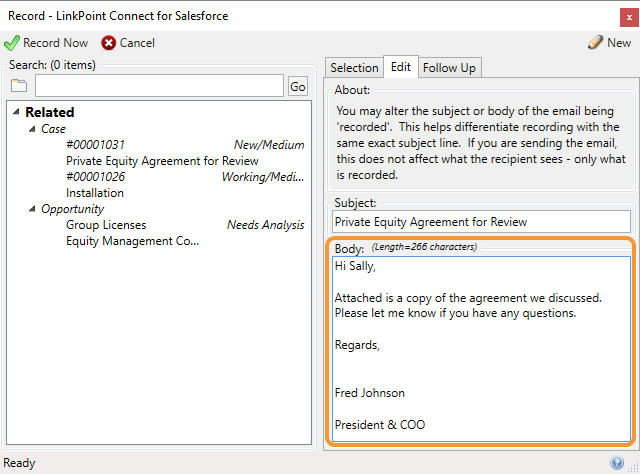
Warning: You can edit the content of longer emails to truncate the information yourself by selecting the Edit tab within the Record window and working with the content in the Body field. This field includes a character count for your reference.
Select the Email Fields checkbox to search for additional email address fields when recording emails.
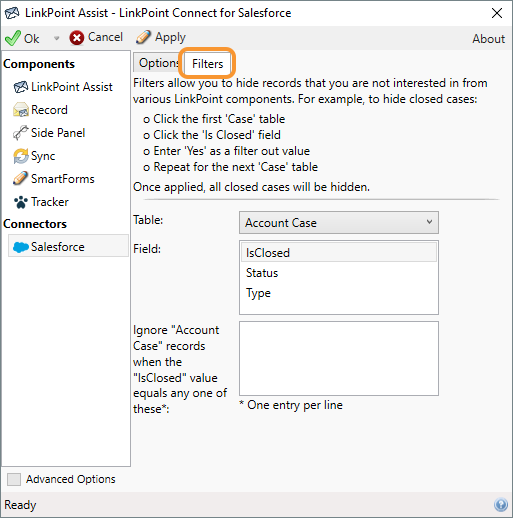
Select the Filters tab. Select the record type to work with, and then select the field associated with the record. Enter the values to determine the action applied to the selected items.
Tip: Users can set specific criteria to hide objects or fields from Salesforce and prevent them from being visible in the LinkPoint Connect. The items in the Field box change dynamically as different Table items are selected.
Example: Some organizations do not want to include closed cases as options for LinkPoint Connect users to record to. In this example, the user or admin would select Account Case or Contact Case as the Table. Then select IsClosed from the Field options. In the final entry box, enter Yes. This tells LinkPoint Connect to check for cases with a status of Closed and then not display them.
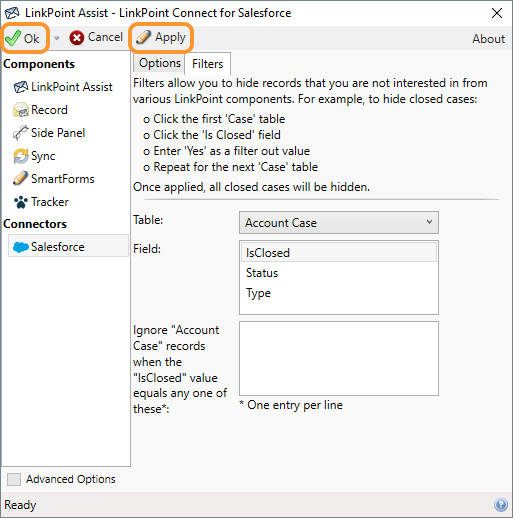
Click the Apply button when finished to finalize the settings. Click Ok to close LinkPoint Assist.
Download: Access the complete LinkPoint Connect: Outlook + Salesforce User Guide in .pdf format. Get the User Guide