Configuring LinkPoint Connect Auto Sync Settings (Outlook + Salesforce)
Users should become familiar with the available LinkPoint Connect sync settings before running a Manual Sync or scheduling an Auto Sync. The synchronization of Calendars, Contacts and Tasks works similarly but can be managed separately based on user preference. Users can set the timing and run schedule for the Auto Sync. Configuration settings for LinkPoint Connect are managed within the LinkPoint Assist window. In this section, you will learn how to configure the sync settings for LinkPoint Connect Auto Sync.
Click the images throughout the Knowledge Base to see full size versions of screen captures.
Configuring LinkPoint Connect Auto Sync Settings
Warning: LinkPoint360 recommends that all first-time users of LinkPoint Connect set up and run a manual synchronization for the first Outlook and Salesforce sync. This offers users the opportunity to review the sync results before they take effect.
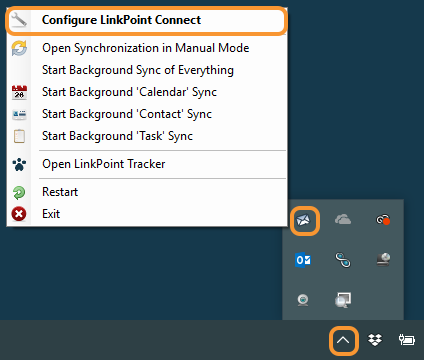
Right click the LinkPoint Assist icon in the system tray and select Configure LinkPoint Connect.
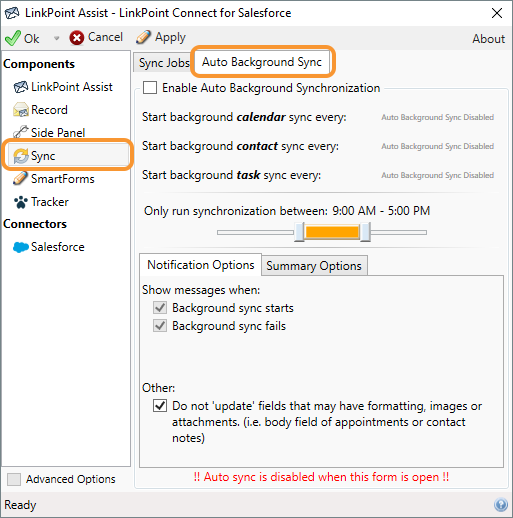
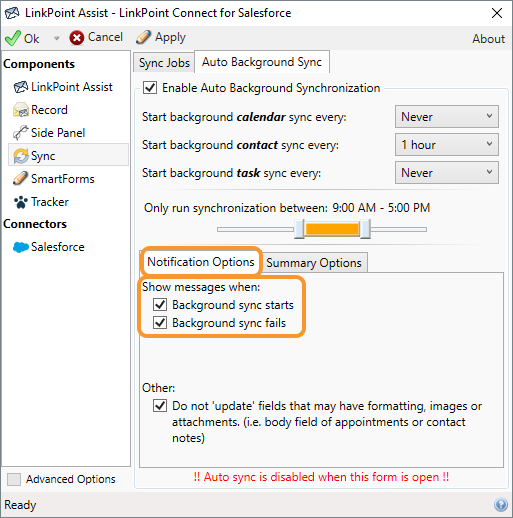
Select Sync from the Components list within the LinkPoint Assist window, and select the Auto Background Sync tab.
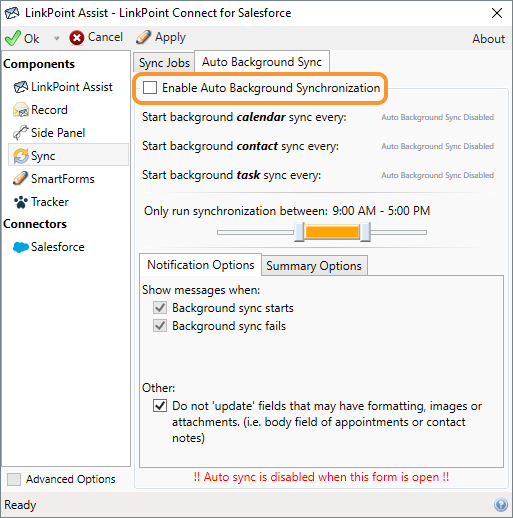
Select Enable Auto Background Synchronization to activate auto sync jobs.
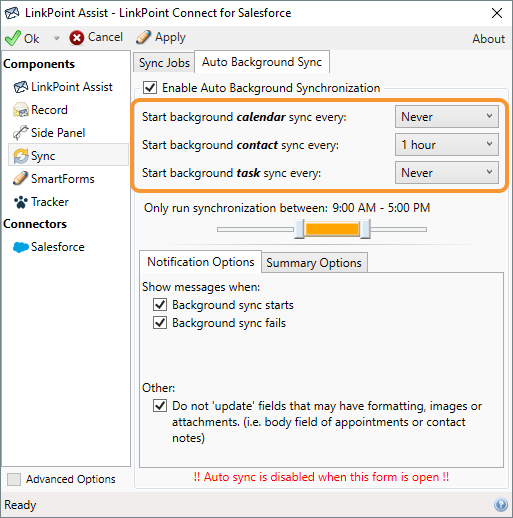
Review the options to Start background calendar sync every:, Start background contact sync every:, and Start background task sync every: and chose the frequency to auto sync for each option.
Select the time frame during which the Auto Sync should run during the day. Slide the selectors to the left or right to adjust the range.
Tip: End users do not need to worry about misplaced appointments due to changes in time zones. LinkPoint Connect will run the sync based on the time zone where the end user computer is located. Calendar items are stored in Salesforce in GMT and then adjusted automatically for each user to match their end user.
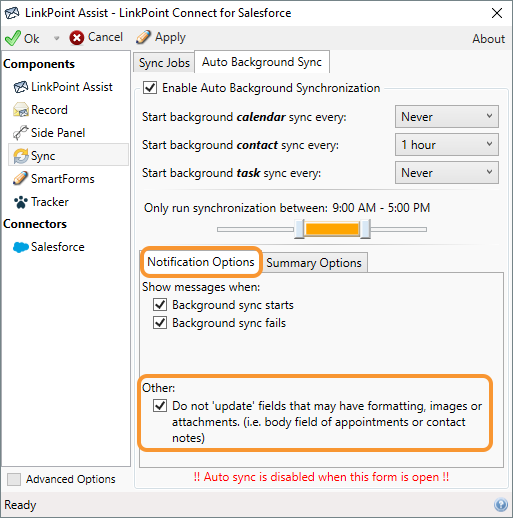
Select the Notification Options tab and select or deselect the checkboxes for the Show messages when options to enable pop-up notifications in the System Tray.
Select the checkbox in the Other section to prevent LinkPoint Connect from updating records in Outlook that have been changed in Salesforce if the original record contained special formatting.
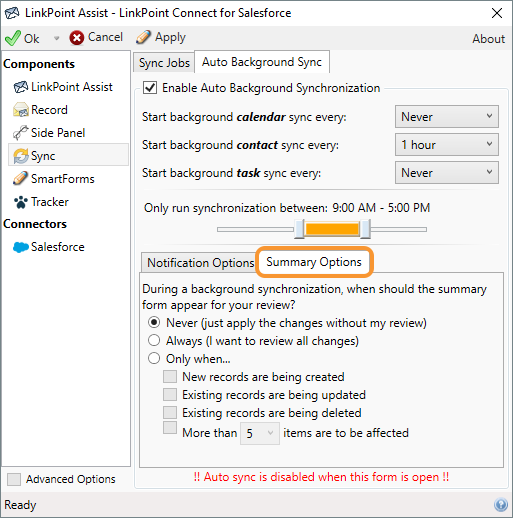
Select the Summary Options tab and indicate when the Synchronization Summary window should be displayed.
Tip: Auto Sync is designed to run with limited to no user interaction. Users can choose to set notifications to confirm when specific sync actions occur.
Example: For example, a user may have a calendar item in Microsoft Outlook that contains special formatting (such as unique fonts or colors). When the item syncs to Salesforce, the original item retains its formatting in Outlook, but the copy of the item in Salesforce loses the formatting due to Salesforce limitations. If the user makes a change to the item in Salesforce, LinkPoint Assist may try to sync the most updated version back to Outlook, depending on user settings. Selecting this option will prevent LinkPoint assist from overwriting the original body content in Outlook, thus preserving the formatting. Other details, such as meeting date or time, will still update if necessary.
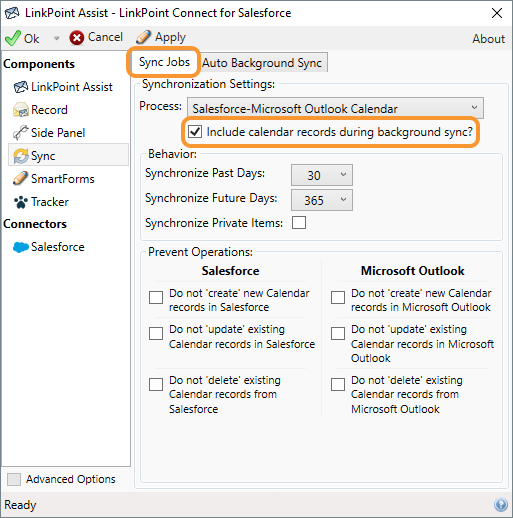
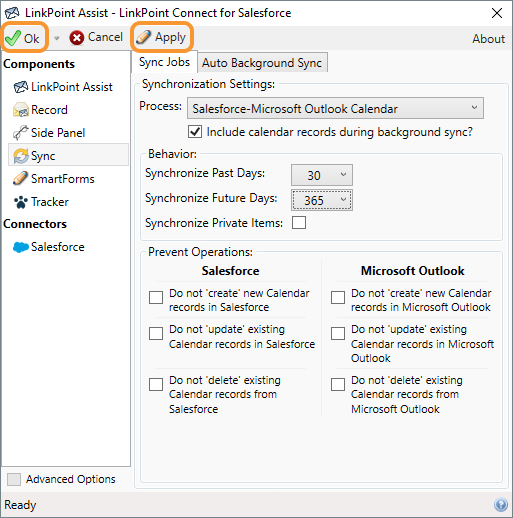
Select the Sync Jobs tab in the LinkPoint Assist window and confirm that the Include calendar records during background sync? checkbox is selected for the items that should run in the Auto Sync.
Tip: You will need to select the Process and then select the Include checkbox for each item (i.e. Calendar, Contact, Task) that should be run in the Auto Sync.
Click the Apply button when finished to finalize the settings. Click Ok to close LinkPoint Assist.
Download: Access the complete LinkPoint Connect: Outlook + Salesforce User Guide in .pdf format. Get the User Guide