Running Background Synchronization with Auto Sync Settings (Outlook + Salesforce)
Users can force LinkPoint Connect to run a synchronization in the background based on existing Auto Sync rules at any time. In some cases, users set the Auto Sync frequency to longer intervals between each sync. Users may create a batch of appointments or import a list of contacts that they need available in both Outlook and Salesforce sooner than the next sync time. In this section, you will learn how to run background sync.
Click the images throughout the Knowledge Base to see full size versions of screen captures.
Running Background Synchronization with Auto Sync Settings
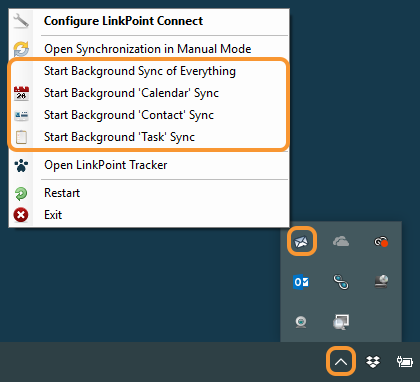
Click the LinkPoint Assist icon in the system tray with the right mouse button and then select the Start Background Synchronization option as needed for Everything, Calendar, Contact, and Task.
Example: In this example, we will demonstrate how to run to a background synchronization using the Start Background Sync of Everything option. The steps are similar to initiate a background sync for Calendar, Contact, and Task.
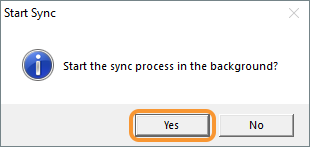
Click Yes to confirm the background synchronization.
Click the LinkPoint Assist icon in the system tray with the right mouse button and then select Start Background Synchronization.
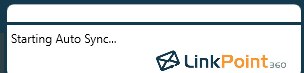
Note that the system will provide a notification if the sync fails. Otherwise, the sync will run in the background with no additional notification or user interaction.
Download: Access the complete LinkPoint Connect: Outlook + Salesforce User Guide in .pdf format. Get the User Guide