LinkPoint Connect helps users remain in Outlook while creating new Salesforce records with minimal manual data entry. In this section, you will learn how to create new Salesforce Contacts while remaining in Outlook.
Tip: Depending on how your organization has configured LinkPoint Connect to mirror your existing business processes, users may not have all of the options described in the following section. Contact your internal IT admin for more information.
Example: In this example, we will demonstrate how to create a new Salesforce Contact. The steps are similar for creating new Leads and Accounts.
Click the images throughout the Knowledge Base to see full size versions of screen captures.
Creating a New Salesforce Contact from Outlook
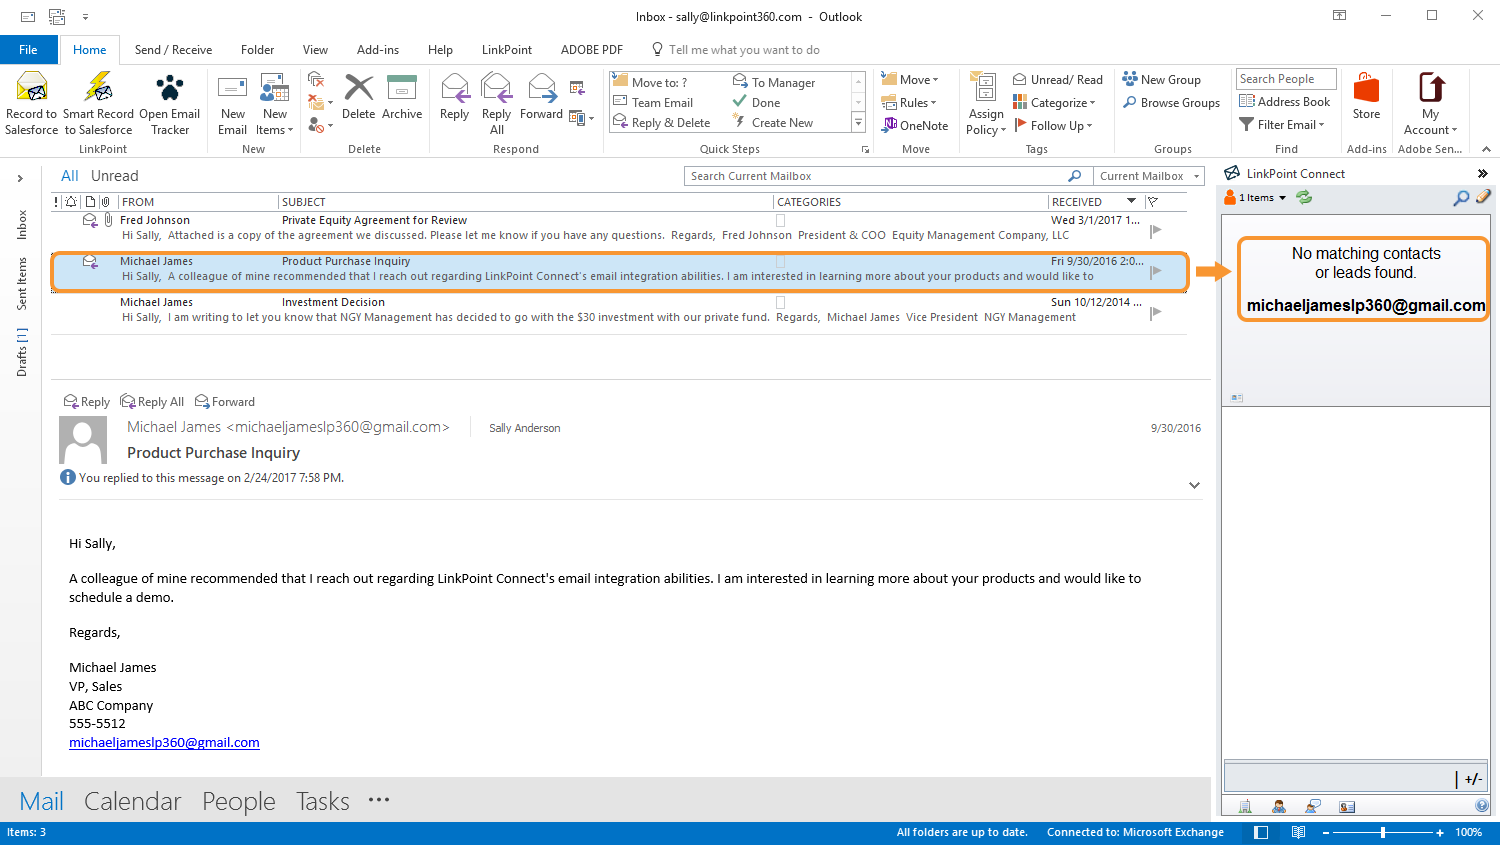
Select an email from a new Contact. Note that the Side Panel searched Salesforce for the Contact and did not find a record matching the sender’s email address.
Tip: LinkPoint Connect searches Contacts based on primary email address. If you receive an email from an existing Contact and the Side Panel does not return a matching Contact, it is possible that the Contact may be in Salesforce under a different or secondary email address. You can verify before creating a new Contact by using the Search Bar in the Side Panel to look for the contact by First and/or Last Name.
Additional Resources: Users can enable the option to search based on secondary email address to expand the search results provided in the Side Panel. Refer to the Searching and Recording Based on Secondary Email Address section of this User Guide for more information.
Additional Resources: LinkPoint360 can customize the Search Bar to include results from custom fields. Please contact the LinkPoint360 Support Team for more information.
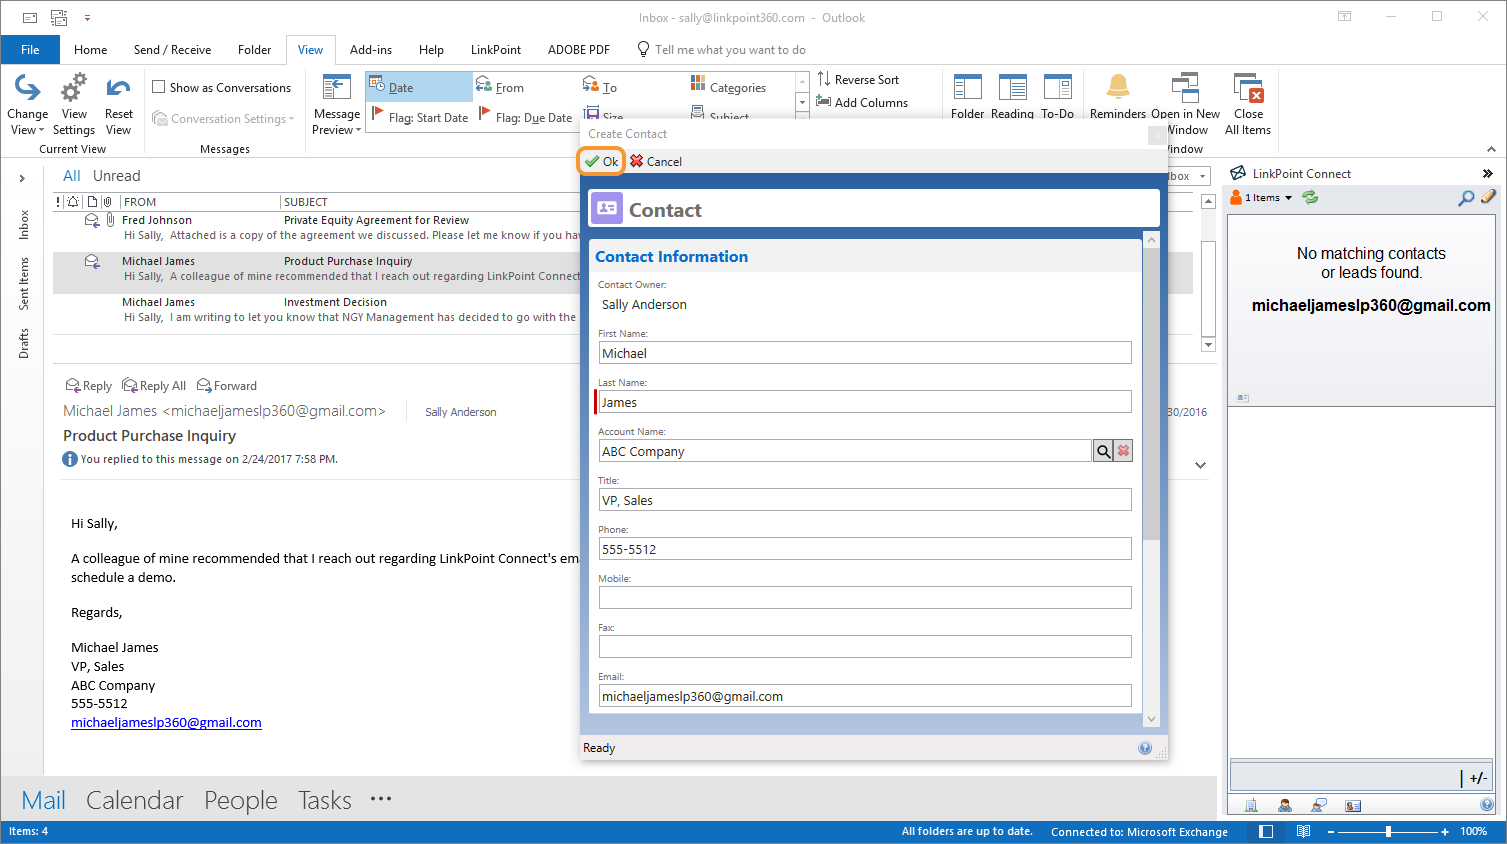
Highlight the signature within the email. Drag and drop the highlighted signature to the Drop Zone at the bottom of the Side Panel. Release the selection over the record type you want to create.
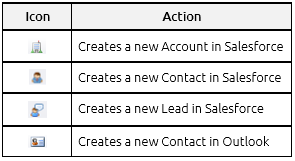
Tip: Users can create new Salesforce Accounts, Contacts, and Leads or Outlook Contacts by releasing the email signature over the corresponding icon in the Drop Zone.
Enter any required information in the Smart Form for the selected record type. Note that some fields, such as First Name, are prepopulated based on the contents of the email signature.
Tip: Existing customers may need to update their configuration to launch Smart Forms with drag and drop. To change whether drag and drop launches new records in Smart Forms or in Salesforce via the web browser:
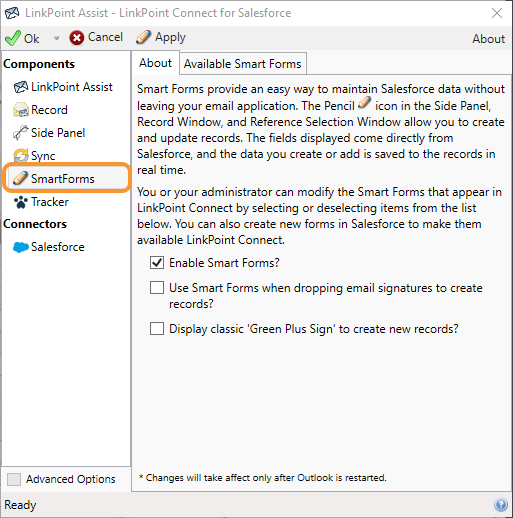
Select Smart Forms from the Components list on the left side of the LinkPoint Assist window.
Select the checkbox to Use Smart Forms when dropping email signatures to create records?. Click Apply and Ok to finalize the changes.
Tip: LinkPoint Connect will not override any business rules within your instance of Salesforce. If additional fields are required to create the Contact, the user will need to enter the information in order to proceed.
Download: Access the complete LinkPoint Connect: Outlook + Salesforce User Guide in .pdf format. Get the User Guide