
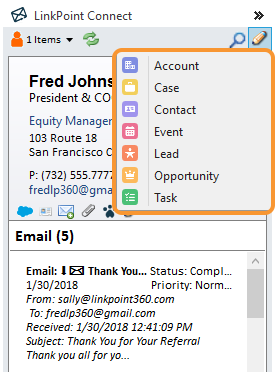
- Accounts
- Cases
- Contacts
- Events
- Leads
- Opportunities
- Tasks
Smart Forms can be launched from a variety of shortcuts throughout LinkPoint Connect and are displayed in their own window, making it quick and easy to review available fields, enter data, and save information to Salesforce. Users can select a Record Type from a drop-down list within any applicable Smart Form. Record Types are automatically detected, and LinkPoint Connect will present the default Record Type from Salesforce. Smart Forms support custom record types and fields with additional implementation provided by the LinkPoint360 Professional Services Team. In this section, you will learn how to create and update a record using Smart Forms.

Click the images throughout the Knowledge Base to see full size versions of screen captures.

Creating and Updating Salesforce Records with Smart Forms


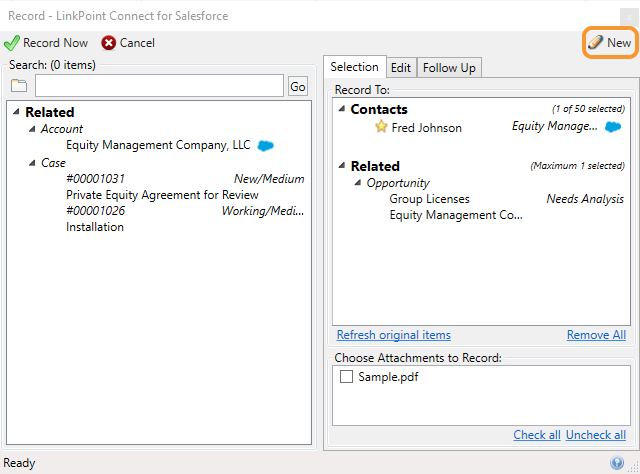
Tip: You can create new records using Smart Forms in the Record Window by clicking the Smart Forms icon in the top right corner.
Tip: You can create new records using Smart Forms in the Reference Selection Window when working with calendar items. Click the Link to Salesforce option and then click the Smart Forms icon in the top right corner.
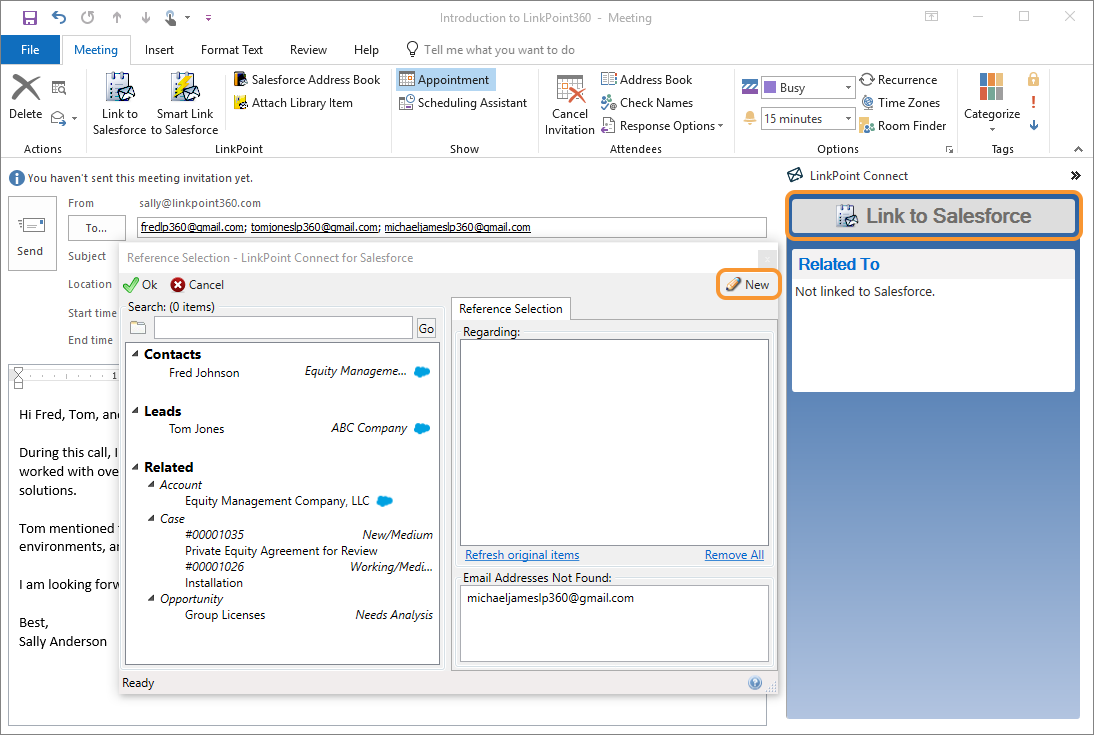

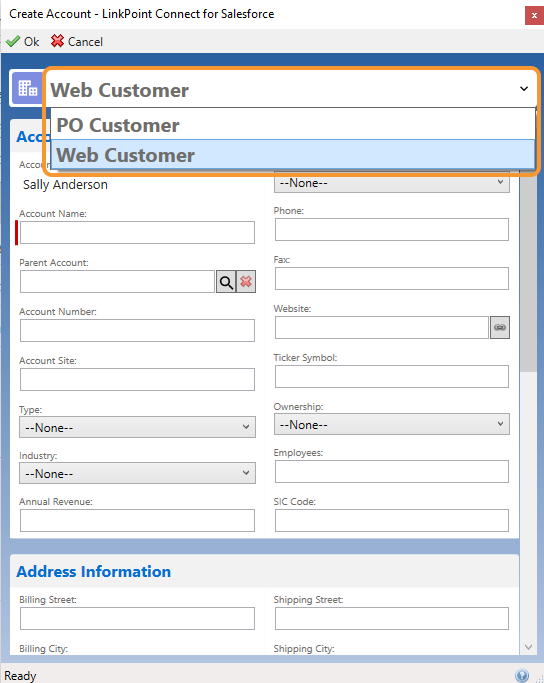
Select the object type to create.

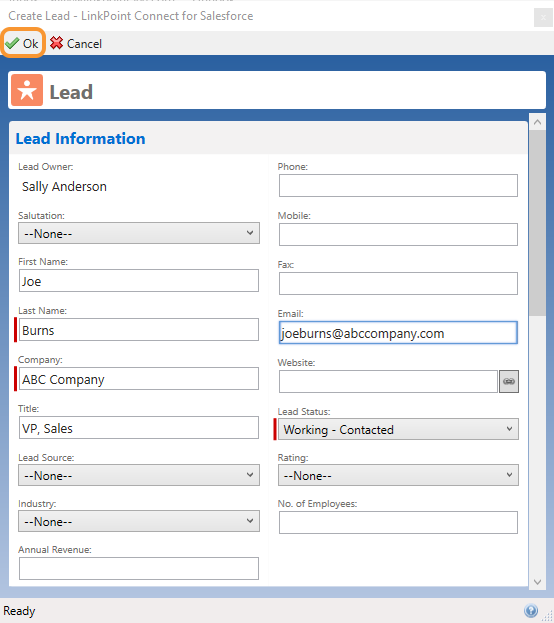
Enter data in the available fields in the Smart Form.
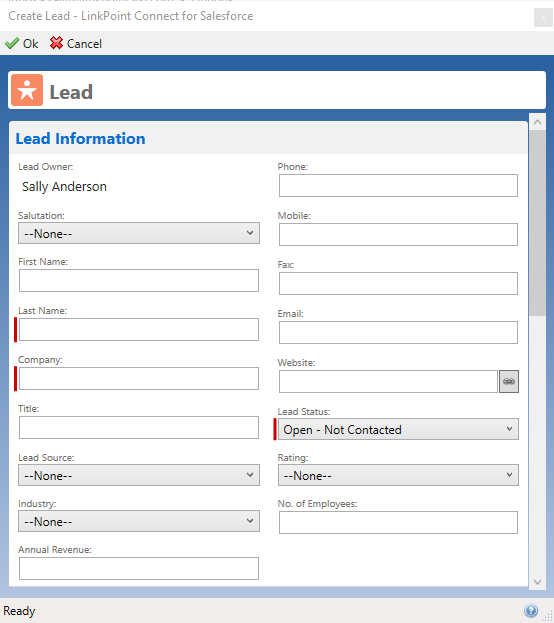
Tip: Any Salesforce required fields will also be required in the Smart Form. These are marked in red.

Click Ok to complete the Smart Form and create the record in Salesforce.

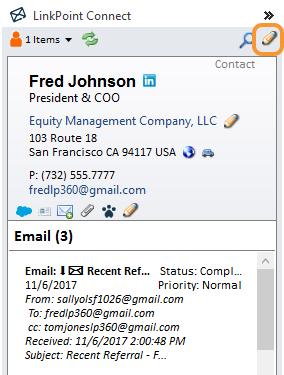
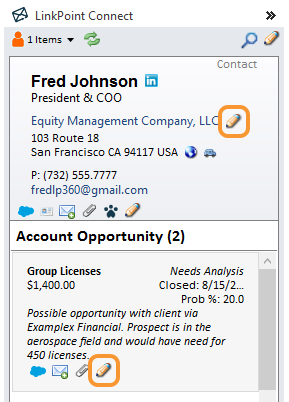
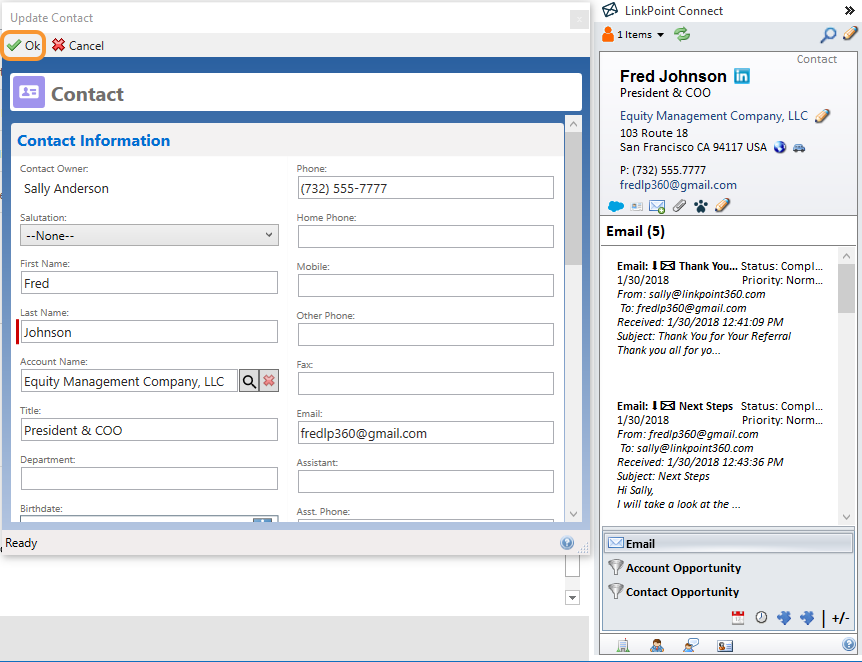
Click the Smart Forms icon within the Contact section of the Side Panel to update an existing record.
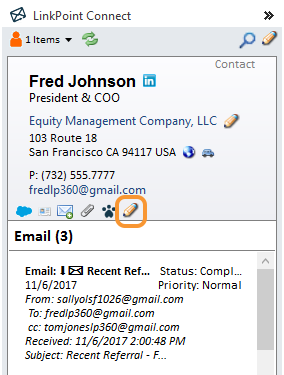
Tip: The Smart Forms icon appears throughout LinkPoint Connect for Accounts, Cases, Contacts, Events, Leads, Opportunities, and Tasks. Click the icon to update the information for each specific record as needed.

Edit the record as needed. Click Ok to save the changes to the record in Salesforce.
![]() Download: Access the complete LinkPoint Connect: Microsoft Outlook + Salesforce User Guide in .pdf format. Get the User Guide
Download: Access the complete LinkPoint Connect: Microsoft Outlook + Salesforce User Guide in .pdf format. Get the User Guide
