LinkPoint Connect users are able to record emails to Salesforce without the hassle of copying and pasting data between systems. Users can leverage a variety of options to select where to record emails and access supporting functions designed to make them more productive in Outlook. In this section, you will learn how to record emails to Salesforce from Outlook.
Click the images throughout the Knowledge Base to see full size versions of screen captures.
Recording an Email to Salesforce from Outlook
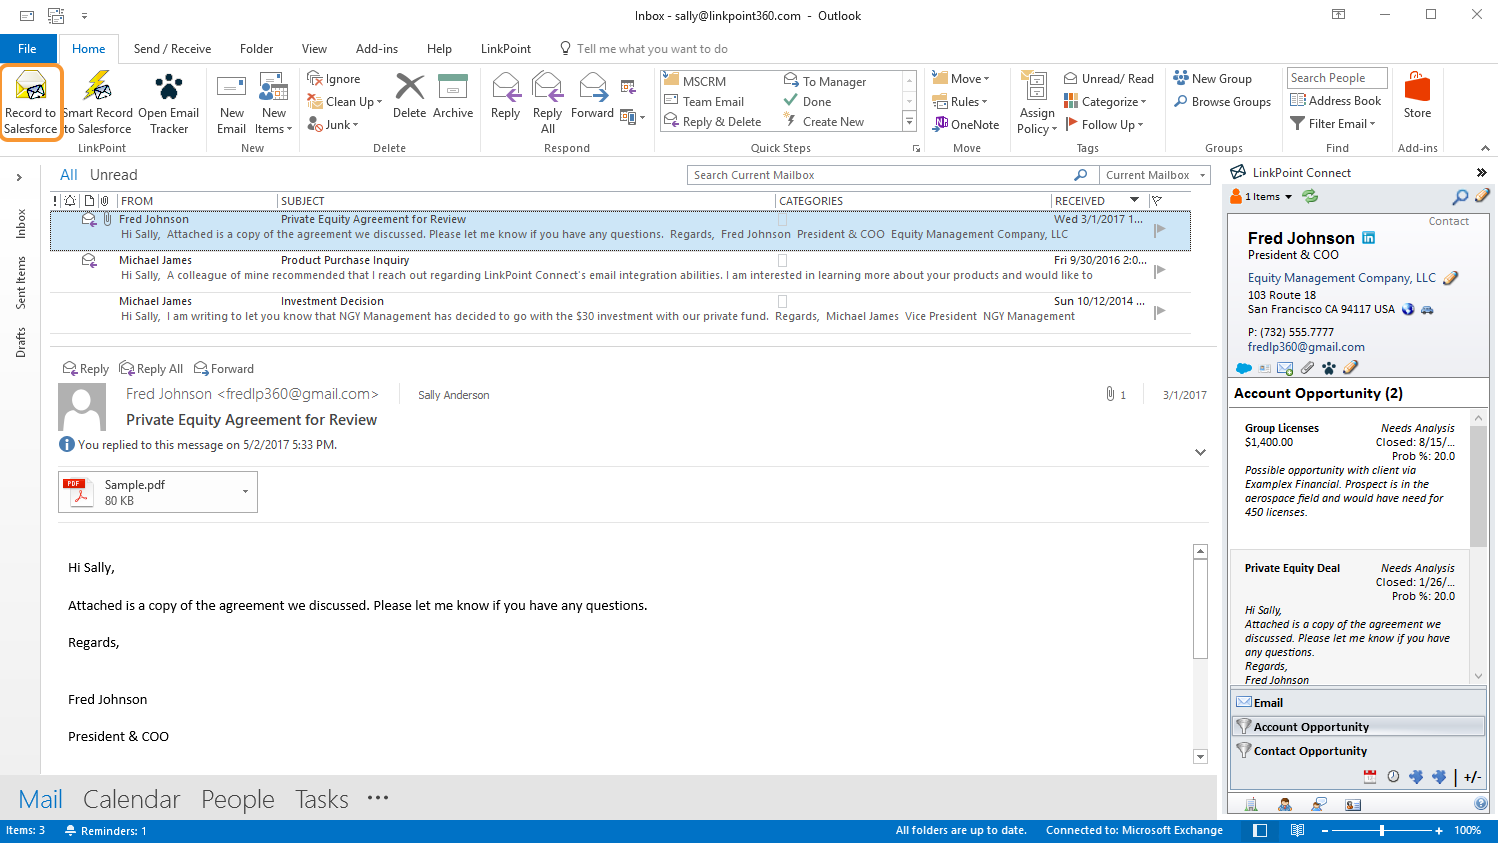
Select an email and click the Record to Salesforce button in the top left corner of the Outlook Ribbon.
Tip: There are four other ways to access the Record window for LinkPoint Connect.
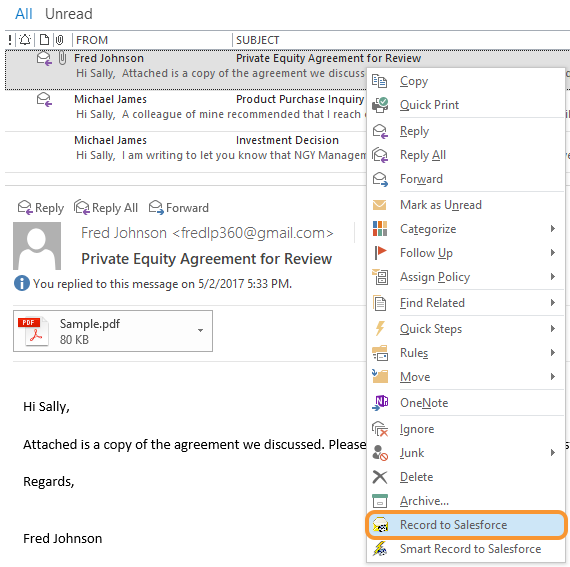
Right click an email in the inbox and select Record to Salesforce from the menu.
Within an inbound email, click the Record to Salesforce button.
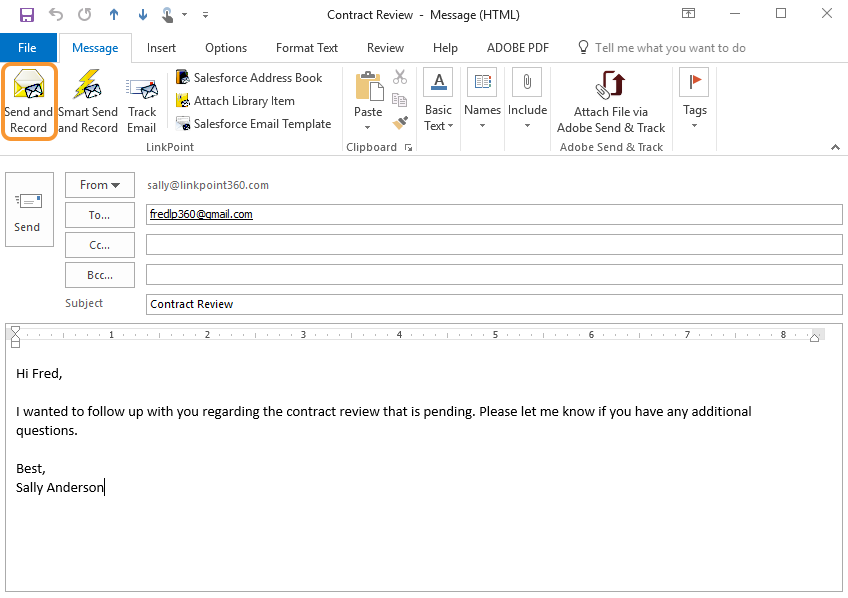
Within an outbound email, click the Send and Record button.
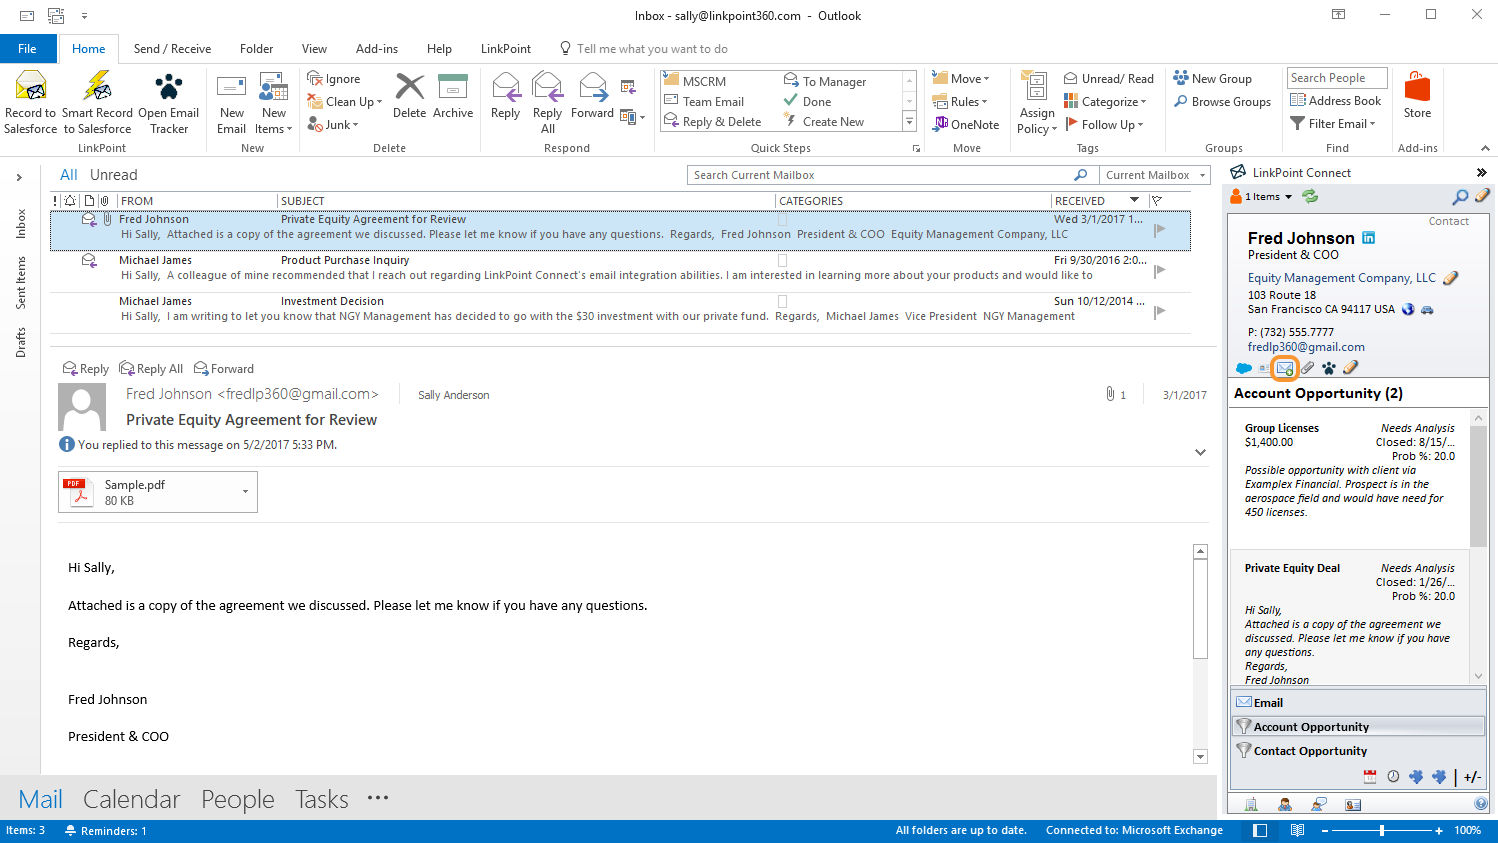
Select an inbound email and click the Quick Record the email to this record icon on the Side Panel to record the email to the sender’s record in Salesforce. Note that this method will not record attachments.
Tip: If you select more than one email in your inbox and then follow the steps to record, the same criteria will be used to record all of the selected emails.
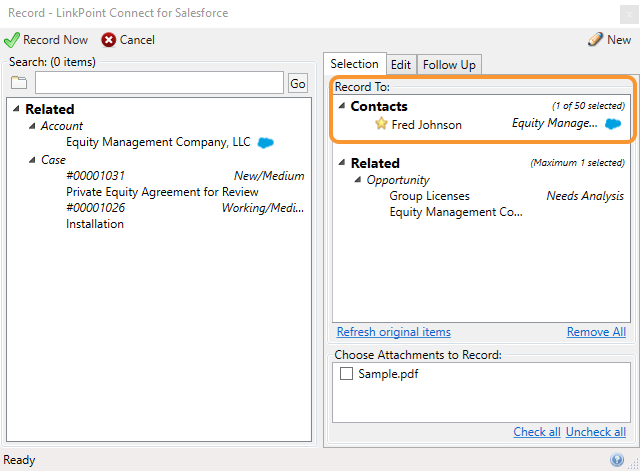
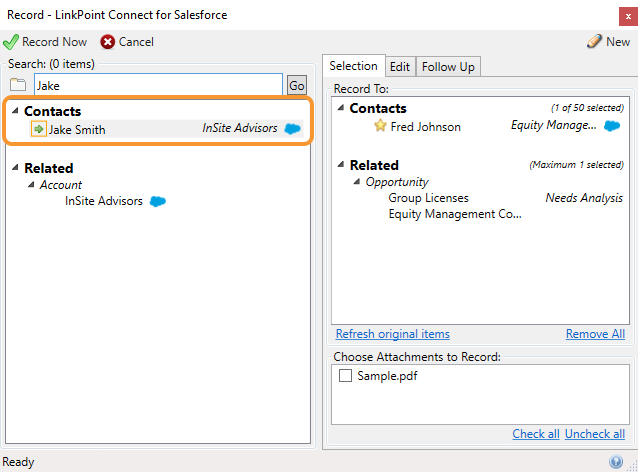
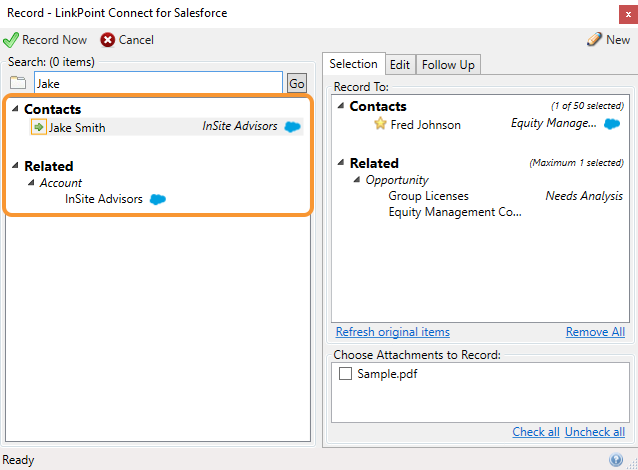
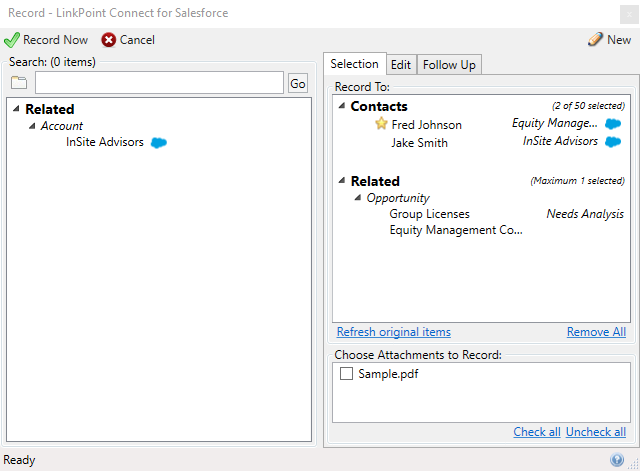
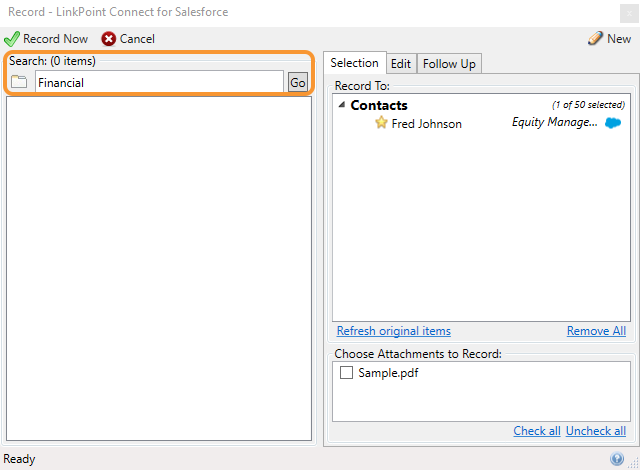
Choose the items to record the email to within the Selection tab in the Record window. Review the suggested Contacts displayed in the Record To: section.
Tip: LinkPoint Connect automatically suggests Contacts and Leads that exist in Salesforce if they are included in the To, From, Cc, or Bcc fields of the email. If there are no matching Contacts or Leads in Salesforce, the Record To section will not display any suggestions.
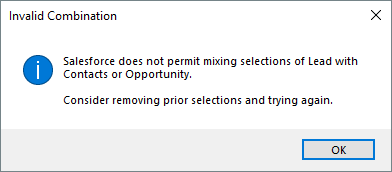
Warning: Salesforce does not allow users to take action on Contacts and Leads at the same time. Try selecting only Contacts or only Leads and record the email.
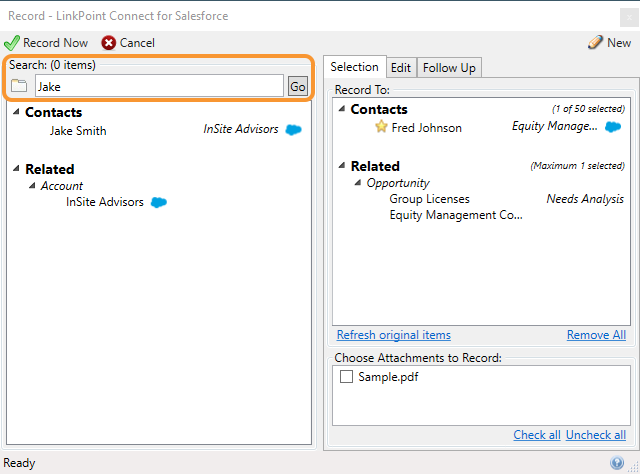
Enter text in the Search field and click Go to search for additional records.
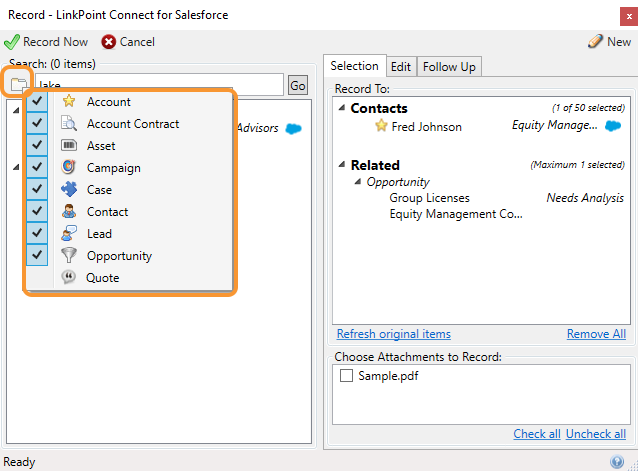
Tip: Click the folder icon to the left of the Search bar in the Record window. You can select the object types to include in the Search results as options for recording.
Review the Search results. Mouse over and click the green arrow to add the Contact to the Record To list.
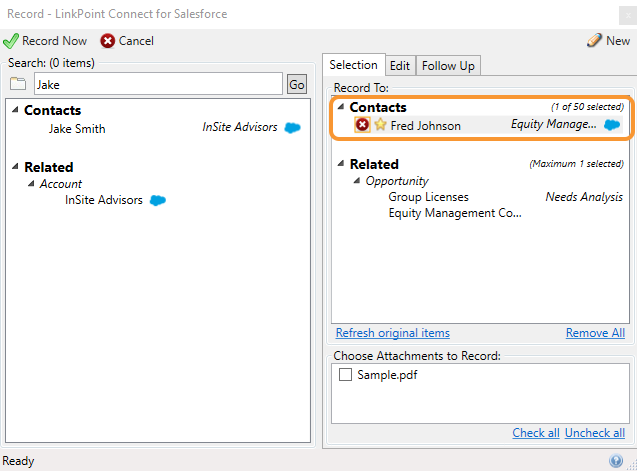
Mouse over an item in the Record To list and click the red x icon to remove it from the list. Note that the removed item will appear on the left side of the Record window.
Tip: You can also double click on an item to add or remove it from the Record To section.
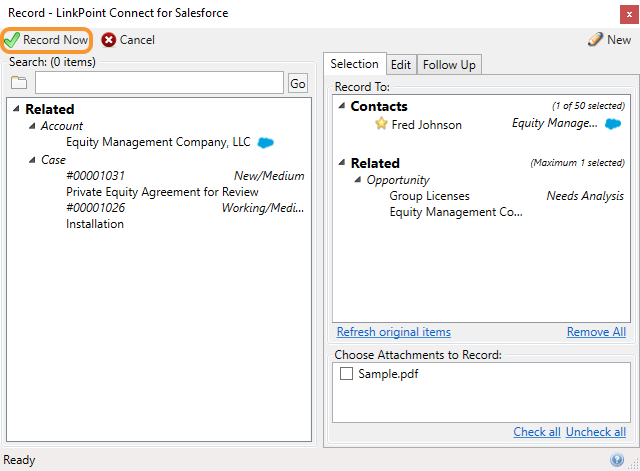
Select additional items to record the email to from the Related list on the left side of the Record window.
Tip: Salesforce does not allow users to take action on more than one related record type at the same time. Try selecting only one record type to record the email.
Enter text in the search field and click Go to search for additional records. Review the search results list, mouse over an item, and click the green arrow to add the contact to the Record To list.
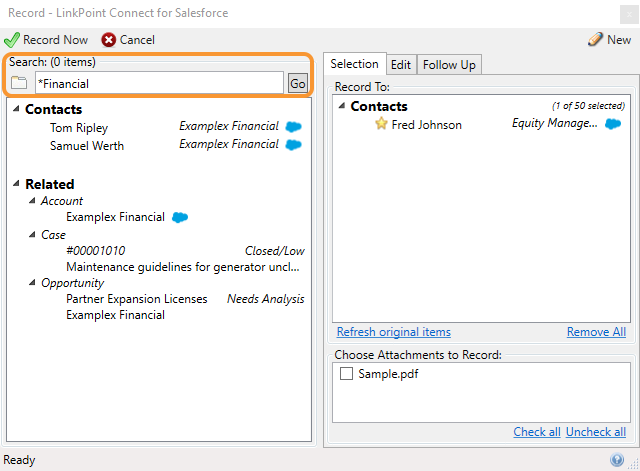
Tip: By default, LinkPoint Connect is configured to search based on Starts with logic in the Record window. Users can add either * or % at the start of the search term to perform a Contains search.
Example: In this example, we want to record an email to an Account record. We search for the record using the word Financial because we remember the name of the Account has the word Financial in it. However, the Account does not appear in the results because Financial is not the first word of the Account name.
To find the right Account, we search for *Financial. Now the search returns results for Examplex Financial, which is the Account we wanted. Now we can proceed with adding the related items to the Record To section.
Click the Record Now button to record and send the email, or continue to work with the record options by recording options in the next section of this User Guide.
Download: Access the complete LinkPoint Connect: Outlook + Salesforce User Guide in .pdf format. Get the User Guide